Friday, April 29, 2022

My Dishwasher Isn’t Cleaning Well Enough?

dishwasher repair service okc

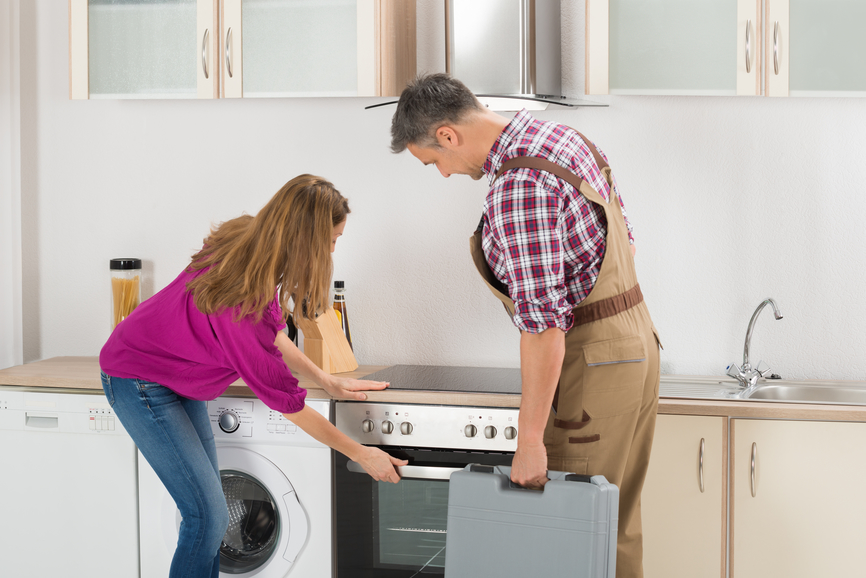
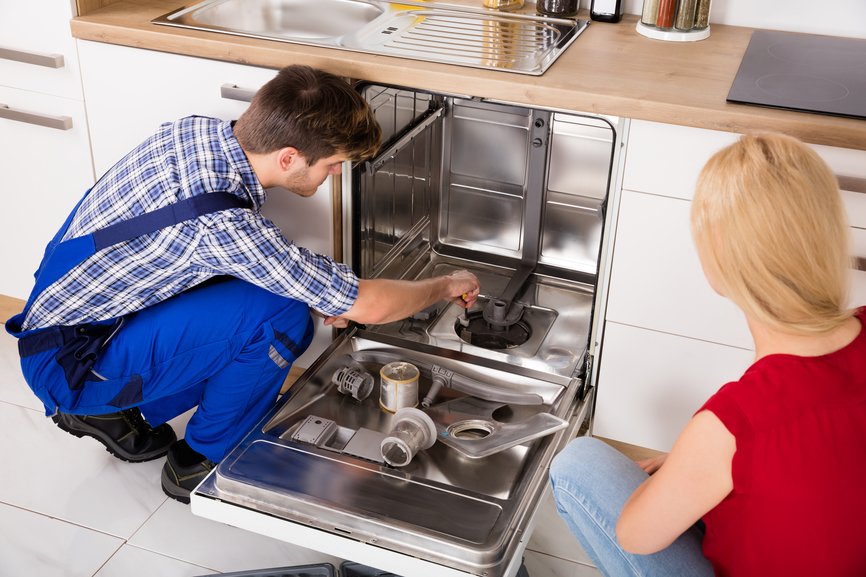
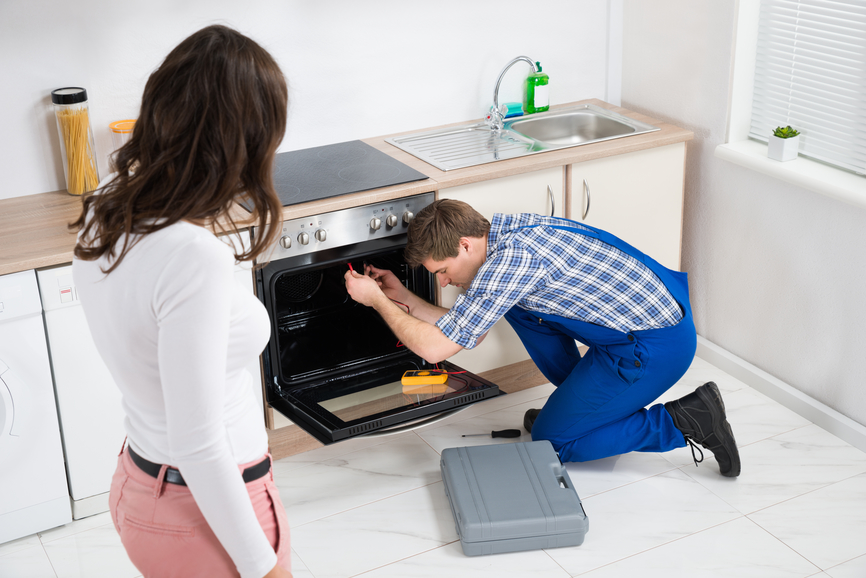
Smiling Woman Behind Technician Repairing Dishwasher In Kitchen


My Dishwasher Isn’t Cleaning Well Enough?

If the dishes in your dishwasher aren’t coming out clean, there are many possible causes. Sometimes the problem with a dishwasher not washing dishes is not related to the type or temperature of the water, but to how much water gets into the dishwasher. If the problem with the dishwasher not washing dishes is that the water is not hot enough, this is an easy fix to clean the dishwasher properly again.

The temperature of the water in the dishwasher must reach at least 120 degrees Fahrenheit in order to wash the dishes properly. If the water in the water heater does not heat up enough, it may affect the performance of your dishwasher. Dishwashers have heaters to increase the temperature of the water for sterilization and better cleaning; even cold water won’t activate the detergent, so if the water isn’t hot enough, the dishwasher won’t do it either.

Your dishwasher will have limited functionality without the right amount of water. A dishwasher requires the right amount of water at the right temperature and pressure for optimal cleaning. Removing the hardness or filtering your home water will make your dishwasher cleaner than ever before. If you live in an area with hard water, you may need dishwasher detergent to clean your dishes properly.

Water and detergent cannot clean surfaces they cannot reach, so be careful when loading dishes. If you have hard water and use a detergent that doesn’t react well, you’ll probably notice that your glasses and cups don’t look clean when they come out of the dishwasher. You may notice that some food remains on the plates or that your pots are not dishwasher safe. The default setting means that the dishwasher may not wash with water or with enough water pressure to wash the dishes.

If you don’t clean the dishwasher tub when this happens, some of the debris will flake off and mix with the fresh water you use to wash dishes, rendering the dishwasher useless. Even though your dishwasher’s main job is to wash dishes (and it cleans itself to some extent every time you run a wash cycle), your dishwasher can still accumulate debris over time.

Your dishwasher will use one portion of water for washing dishes and another for rinsing. This will help your dishwashers drain water better, which means cleaner water for rinsing dishes. In the same way that a new dishwasher can benefit from cleaner dishwashing water, your old dishwasher can benefit too.

The first and best tip for improving the quality of your dishwasher is to preheat the water. Filling the kitchen sink with hot water before the wash cycle begins can make it easier for the dishwasher to reach it. You can also turn on the kitchen sink for a minute before starting the dishwasher so that hot water enters the machine from the very beginning of the wash cycle. Run ensures that only very hot water goes into the dishwasher, which helps your soap work better and removes debris from dishes more easily.

Fill the sink with hot soapy water to wet the dishes before putting them in the dishwasher. Rinse dishes quickly before loading them into the dishwasher so that only small food residues enter the machine.

Filling the dishwasher incorrectly can cause the spray to not reach all of the dishes, causing food residue to get stuck. If the spray arms become clogged with limescale and food residue, water cannot be properly sprayed through the nozzles, preventing dishwashing.

If the dishes are blocking other dishes from splashing water, the clogged dishes will not be cleaned. If dirt and grime clog the small holes in the wash arm, the water won’t be able to get out, which means your dishes won’t be clean. Make sure dishes or pots in the lower basket are not blocking the rotation of the spray arm, and load bowls and other deep containers with the open side down to prevent dirty laundry water from collecting in them.

Dishwashers use tap water to wash dishes, so if tap water isn’t clean, minerals will build up in it and your dishes will look dirty and unwashed. Dishwashers need adequate hot water to wash dishes properly, usually around 140 degrees Fahrenheit.

If you notice that the dishwasher is leaving marks on your dishes, it may be due to a lack of hot water. You should also check if your dishwasher should be connected to a hot or cold water outlet. You may need to increase the temperature of your domestic water heater to improve the performance of your dishwasher.

If you tried the previous tips and the dishwasher still doesn’t clean well, there may be a problem with the water inlet valve. The water inlet valve is one of the most common dishwasher failures, and if it doesn’t provide the correct water level in the tub, it can be the reason why the dishwasher isn’t doing the dishes properly. When the water inlet valve is clogged or damaged, it cannot provide enough water to wash dishes in the dishwasher.

If the water inlet valve is faulty, water from the household water pipe will not be able to enter the dishwasher. When the manual filter gets clogged, the dishwasher continues to circulate dirty water, leaving behind tiny sticky foods and potentially smelly dishes. Small pieces of food, grease, and soap scum can build up inside the dishwasher, preventing it from working properly. Despite the regular use of water and detergent, dirt and debris can build up in the dishwasher, causing blockages and dirty dishes.

If you can’t find the cause of the dishwasher problems then call for dishwasher repair in Oklahoma City and be sure and contact Appliance Repair OKC Services by calling 405-378-4566 or visit our local website at https://www.okcappliance.com or also our Google business website at https://cli.re/Dyq1ME. Call now!


The post My Dishwasher Isn’t Cleaning Well Enough? appeared first on Appliance Repair OKC Services | Best Appliance, Washing Machine Repair Company in Oklahoma.

Thursday, April 28, 2022

Why Is My Oven Not Getting Up To Temperature?

oven repair OKC

Woman Showing Oven To Male Plumber In Kitchen


Why Is My Oven Not Getting Up To Temperature?

If your KitchenAid oven isn’t heating up at all, or just isn’t reaching the right temperature, it’s an annoying mess that will keep bothering you until it’s fixed. If you have turned on your gas oven and it is not heating up, there are several possible causes that need to be addressed. Whatever the symptoms, an electric oven has so many components, which means that you can find the cause of an oven malfunction. If you notice that your electric oven does not heat up to the right temperature, and food comes out undercooked, this is largely caused by a faulty electric oven thermostat.

The temperature sensor and heating elements may be the most common suspects, but they are not the only things that can cause your electric oven to stop heating up. To be honest, a faulty thermostat or heating element in your oven are the most likely culprits for your oven not maintaining temperature. If your oven is overheating on the outside and your food is burning, the most likely explanation is a faulty thermostat. If the oven doesn’t heat up fast enough, never reaches the right temperature, or if the food burns on top and undercooks on the bottom, the cooking element may be the culprit.

If the temperature drops below the level that needs to be maintained, the thermostat will signal the LG oven and the resistor will turn back on. A thermostat measures the temperature inside the oven cavity by turning resistance on and off to maintain the desired temperature.

You can adjust the temperature to 50 degrees Fahrenheit depending on the type of thermostat. You will be able to see the screws that need to be adjusted to change or lock the temperature. I’m not sure if anyone else has caught your attention, but in your gas manual you say that turning the thermostat knob counterclockwise will raise and lower the temperature.

When you notice a serious discrepancy, replace the thermostat and temperature sensor, as both are badly damaged. A damaged thermostat may not raise the temperature properly; then the knob shows the set minimum temperature, but inside the oven the temperature is actually lower. If the temperature set with the thermostat differs from the temperature of the hand held oven thermometer, it is probably time to replace the oven thermostat. The oven thermostat usually works to maintain the set temperature, but may need to be recalibrated to improve accuracy.

Sometimes the temperature control thermostat is not properly calibrated and needs to be adjusted to better reflect the actual oven temperature. A temperature-controlled thermostat detects temperature fluctuations in the oven and turns on the heat when it gets too cold. A thermostat is an extension of the main control panel that uses grills, cooking elements, and other temperature sensors to regulate the oven’s internal temperature. Remember that the thermostat is wired and located behind the front panel or on the back of the Viking oven.

Although your oven is factory calibrated, it can be adjusted if you feel it is inaccurate. When you have problems where your industrial oven doesn’t reach the desired temperature or gets too hot, it’s usually a sign of a bad, faulty, or out-of-calibration thermostat. A common cause of an oven overheating is a damaged or loose thermostat knob, which can cause the temperature to be set incorrectly. When your commercial oven fails to keep the temperature, it can be unsatisfactory and shut down almost completely.

Most ovens heat up slightly differently, but if you find your oven is hotter, colder, or inconsistent, the temperature sensor may be the problem. If the temperature sensor is no longer in the correct position or is damaged, the sensor may be causing the oven to heat food too quickly. If the oven door won’t close, the heat will keep escaping and your oven’s programmed heat production won’t be enough to fully cook food at a specific temperature.

If your oven isn’t warming up enough, the oven door may not close completely, or it may be tight against the cabinet. A dirty inside of the oven can prevent the radiant element from heating the oven efficiently, causing the oven to cook unevenly. In some cases, the heating element may be damaged after exposure to high temperatures in the self-cleaning cycle of the oven.

If the cooking elements in an electric oven are defective, the grill element on top of the oven is the only source of heat, resulting in uneven cooking. A charred cooking element contains wiring that generates heat when electricity is passed through it. A faulty Samsung oven igniter opens a valve that lets gas flow and ignites the gas with an electric spark to heat the oven.

While gas ovens use natural gas as a heat source, the ignition unit uses electrical energy to operate. When you select the cooking or grilling function in the gas oven, the control system sends current to the igniter or spark electrode. Then the control unit turns off the voltage supply to the igniter or spark, and then the gas supply to the burner. The igniter will be on to keep the safety valve open until the gas oven reaches the set temperature.

To determine if the ignition is faulty, turn on the oven and watch it light up to light the gas. Of course, slow heating of the toaster oven could also indicate some problem with the appliance.

If you are having oven issues and need oven repair in Oklahoma City contact Appliance Repair OKC Services by calling 405-378-4566 or visit our website at https://www.okcappliance.com. Alternatively you can also visit our Google business website at https://cutt.ly/YEnc8qk.


The post Why Is My Oven Not Getting Up To Temperature? appeared first on Appliance Repair OKC Services | Best Appliance, Washing Machine Repair Company in Oklahoma.

Wednesday, April 27, 2022

My Refrigerator Dispenses Water But No Ice?

Ice Maker Repair OKC

Ice Maker Needs Repair


My Refrigerator Dispenses Water But No Ice?

Although it is rare for a refrigerator ice dispenser control board to fail, if all of the above components have been checked, the failure of the control board may be due to the GE refrigerator not properly dispensing water or ice. If the dispenser control board is defective, it may not supply power to the entire dispenser assembly, which therefore cannot produce ice.

A damaged door seal or any obstruction will prevent the door from depressing the switch, interfering with the operation of the dispenser itself. If you find that the water and ice dispenser in your KitchenAid fridge doesn’t work at all, check the door switch for a problem. If the door switch is broken, you will notice that the refrigerator does not dispense water or ice even if the refrigerator door is closed.

If you notice that the ice maker in your refrigerator is not producing ice, you may need to replace your refrigerator water filter more often. This ensures that your refrigerator receives fresh, clean water, preventing problems such as broken ice makers. If your current refrigerator has an ice maker, make sure the plumbing is in good condition if you intend to use it again. Inspect the fill tube and pour cup area on the back of the ice machine to make sure nothing is blocking the water supply system – sometimes ice buildup (caused by faulty door seals) can block the fill tube; can be defrosted with a hair dryer.

Flushing the water supply system is required each time the filter is changed or the first time the refrigerator is installed in the water supply line. Over time, the water filter becomes clogged, making it inefficient and restricting the flow of water through the dispenser. If the filter is clogged and cannot be replaced immediately, leave the filter outside to allow the water system to bypass.

If you’ve already changed your water filter and you know the pressure is fine, the next likely cause is a faulty door switch. If the dispenser switch is faulty, it will not supply the required voltage to open the water supply valve and no water will flow to the dispenser. When a dispenser button is pressed, the corresponding switch energizes the water or ice dispenser. Dispenser switches supply power to each touchpad button to respond to your commands.

If one of these switches is faulty, the button control will not work and no water or ice will be dispensed. The controller may be accidentally turned off when, for example, items are placed in the refrigerator and the switch is accidentally pressed. If the dispenser switch is faulty, the water supply valve will not receive a signal to release water or ice, and neither will be dispensed.

Even after dosing is completed, water remains in the pipes, which can freeze over time. After turning off the water, replace any cracked, worn or brittle hoses according to the instructions supplied with the parts. You can remove this part from behind the refrigerator by unscrewing a few screws and disconnecting the water supply line. Look for the water stopcock in the basement or under the sink closest to the refrigerator.

You may need to remove the grate at the bottom of the refrigerator model to find the connection. Disconnect the plumbing at the connection and with the freezer door closed, check the water dispenser to make sure no water is leaking from the connection. Look over there at the connection in the plumbing where you can turn it off before it enters the freezer door. I hope I explained it in a reasonable way. If the water supply line is frozen, it often freezes in the freezer door. Provide an extra water supply line behind the refrigerator so you can easily pull it out for cleaning without stretching the line or causing kinks.

Once the ice has been removed, check the brew group to make sure nothing is stuck inside. Remove the ice bucket from the freezer by opening the ice drawer door inside the left door of the refrigerator if a jam occurs.

As with a refrigerator that stops making ice, a clogged filter or low water pressure can cause a Whirlpool refrigerator to stop making ice. It can be frustrating when your Whirlpool refrigerator isn’t producing ice or water, but this troubleshooting guide can help you pinpoint the problem. Electrical problems, water supply failures, distributor component failures, and ice blockages can cause your GE refrigerator to stop making ice.

We will describe the reasons why you might have a Whirlpool refrigerator that is not delivering ice or water from a stuck ice maker to a clogged water filter. If the water supply to the ice maker and water dispenser in the refrigerator is not set correctly, it may result in hollow ice cubes, little or no ice production, slow water delivery, intermittent dripping of water from the dispenser, water leaks in the freezer, freezing of the inlet pipe, and possible damage to the filling valve or ice maker. If your Whirlpool refrigerator continues to produce ice or water, the first things to check are stuck buttons, sticky levers, unlocked doors, and water pipes with ice.

Always make sure the Whirlpool refrigerator is unplugged and the water is turned off when an internal problem occurs. Many homeowners make the mistake of calling an appliance repairman right after they think there is a problem with GE refrigerator ice dispensers. The appliance shut-off valve is essential as it allows the water pipe to be closed whenever the refrigerator needs to be repaired or replaced.

To schedule ice maker repairs in Oklahoma City contact Appliance Repair OKC Services by calling 405-378-4566 or visit our website at https://www.okcappliance.com to also our Google business page at https://cutt.ly/YEnc8qk. Call now!


The post My Refrigerator Dispenses Water But No Ice? appeared first on Appliance Repair OKC Services | Best Appliance, Washing Machine Repair Company in Oklahoma.

Tuesday, April 26, 2022

My Freezer Stops Freezing Then Starts Again?

freezer repair Oklahoma City OK

Young Male Repairman Fixing Freezer In Kitchen


My Freezer Stops Freezing Then Starts Again?

When the freezer fan is running, it means that the defrost timer and the cooling control of the freezer are set to COOL. Most of the time, when the freezer fan is running, the compressor fan should also be running.

If the freezer fan continues to run but the refrigerator does not cool, the compressor or compressor start relay may be damaged. If the freezer does not freeze food, the compressor start relay may be the problem.

The compressor produces and then circulates refrigerant through the freezer so if the compressor fails the freezer won’t freeze. That is why, even if the compressor motor is running, the freezer cannot maintain a negative temperature to preserve food.

If you can hear the compressor motor running and the freezer is still not cooling, the problem may be with the evaporator or condenser coil. If the evaporator coils are frozen, the required air will not be able to pass through them, which can cause the freezer to freeze incorrectly. If the evaporator coil is covered with frost and the fan cannot supply air to the evaporator coil, cooling will be limited and ice may form even after activating defrost mode. Problems with a self-defrost system can also be due to the evaporator coil freezing and not being able to cool.

For example, if the door does not close properly, moist air can enter the freezer, causing the batteries to freeze. If you find that the temperature in your Samsung freezer continues to rise, the compressor and condenser batteries may be the problem. If the condenser fan is not working properly, the refrigerator temperature may rise and the compressor may overheat.

If you adjust your refrigerator’s thermostat for cooler air, your refrigerator’s compressor kicks in, causing low pressure to flow through the cooling fans. When the air damper does not open, cold air cannot flow from the freezer compartment to the refrigerator compartment, heating it up. If the air damper fails to close or open, the air damper may affect the refrigerator temperature while the freezer maintains the correct temperature.

The evaporator fan circulates cold air throughout the refrigerator, and when it stops working, the temperature in the entire refrigerator will begin to rise. The evaporator fan circulates air through the condenser coils to the freezer and refrigeration sections of the LG refrigerator. The job of this freezer is to move air around the condenser coils and disperse it throughout the unit. This means that the freezer does not produce enough cold air to freeze the contents of the freezer, but produces enough cold air to cool the contents of the refrigerator section.

Usually, the cold air produced by the refrigerator comes from the freezer compartment and then goes into the fresh food section of the refrigerator. The freezer compartment has an evaporator fan that blows cool air from the freezer compartment to the refrigerator’s crisper compartment. Typically, most refrigerators use a fan to send cool air from the freezer to the evaporator, which forces air into the refrigerator area to keep it cool.

The purpose of the temperature control thermostat is to monitor the temperature of the freezer compartment and then tell the control board what voltage to apply to the evaporator fan motor and compressor to freeze the freezer compartment. This thermostat controls the compressor and evaporator fan motors; so if it doesn’t work properly, the cooling system may run longer than it needs to, causing the refrigerator to overcool. A temperature-controlled thermostat monitors the temperature in the refrigerator and sends the correct amount of voltage to the evaporator fan motor, compressor, and condenser fan motor (if your refrigerator has one) to ensure they are working properly.

If the freezer compartment is cold and the freezer compartment is hot, the freezer compartment and freezer cooling components may not work properly. If not, this may be the reason why the refrigerator is not cooling but the freezer is working. If the environment is too cold, the freezer may not have enough time to maintain the temperature.

If the freezer is still cold and the fridge is warming up, this problem is 80% of the time caused by restricted airflow, due to a blown defrost thermal fuse, a blown defrost heater, or a faulty evaporator fan. The shutdown is usually caused by a malfunction of one of the freezer components that needs to be repaired or replaced. A faulty thermistor will make the freezer too cold or not cold at all, depending on the specific fault. Another cause of high temperatures in the freezer is a broken or defective evaporator regulator.

Depending on the appliance, a defrost problem may be caused by a defective defrost heater, bimetal sensor, defrost sensor, or control board. A faulty timer or defrost control thermostat can easily cause the freezer to be too hot. Lowering the temperature in the refrigerator compartment is not the best test because many refrigerators are cooled through the freezer vents. If the condenser fan assembly or fan motor is defective, the Frigidaire freezer may not freeze.

In other words, the faulty compressor is not pumping refrigerant into the sealed system to cool the refrigerator. The job of the evaporator fans is to draw cold air from another set of coils to circulate it throughout the unit, first through the freezer and then through the refrigerator (or fresh food compartment).

For freezer repairs in Oklahoma City contact Appliance Repair OKC Services by calling them at 405-378-4566 or you can visit our website at https://www.okcappliance.com or also our Google business page at https://cutt.ly/YEnc8qk. Call today!


The post My Freezer Stops Freezing Then Starts Again? appeared first on Appliance Repair OKC Services | Best Appliance, Washing Machine Repair Company in Oklahoma.

Monday, April 25, 2022

Five Signs Your Refrigerator Is Leaking Freon

refrigerator repair okc

Tecnician repairing refrigerator


Five Signs Your Refrigerator Is Leaking Freon

Signs that your refrigerator is leaking Freon include hot food in the refrigerator, a constantly running engine, or strange smells near the refrigerator. Another sign of a freon leak is a significant amount of oil accumulating on the floor under and around the refrigerator. Leaks are most likely to occur near an outdoor condensing unit, so signs of a refrigerant leak don’t always mean your home has a Freon leak. Smelling Freon is one way to tell if a refrigerant leak is causing your refrigerator to perform poorly.

Freon is mostly odorless, but if you smell a chemical smell in or around your refrigerator, you should investigate if Freon may be leaking from your refrigerator. Freon is a colorless and odorless, non-flammable gas, but whenever you smell a greasy, strange, moldy, oily, or burning smell around your refrigerator, examine the Freon component immediately. Freon is a relatively colorless, odorless gas, so it’s hard to tell if it’s leaking from a refrigerator. Freon is contained in a pressurized system inside your refrigerator, so it should never “drain” or need to be refilled.

Freon is a refrigerant not found in most modern refrigerators because it destroys the ozone layer. Freon is one of the most important elements in your refrigerator, allowing your appliance to perform its cooling function. If you find that your refrigerator is not keeping food fresh, the problem may be a lack of Freon.

Meanwhile, any Freon-powered refrigerator is a very old refrigerator and should ideally be replaced. Since freon refrigerators have not been sold since 2004, it is likely that such a refrigerator may be at the end of its life, in which case it will require a complete replacement, rather than repair. In the highly unlikely scenario where you can replace the freon for your refrigerator, it would be incredibly dangerous for you to attempt to recharge your refrigerator cooling system yourself.

Unfortunately, if Freon leaks in your refrigerator, the appliance will not be able to function properly. As mentioned earlier, a freon leak causes the refrigerator motor to run longer and longer. As mentioned above, a leak can cause the engine to run continuously, which in turn will increase energy consumption.

If a freon leak occurs, the engine will be forced to run longer to counteract the uneven amount of coolant. When Freon leaks, the engine will be forced to run longer to try and compensate for the wrong amount of coolant.

The loss of freon, as mentioned earlier, makes the engine work for a long time. If your refrigerator is leaking freon, the engine will run constantly – an engine that stops and starts or stops completely indicates an electrical problem. If you feel like your refrigerator is running continuously and the refrigerator is not cooling even after it has been plugged in for several hours, check properly to make sure there is no Freon leak.

The biggest sign of freon leakage from the refrigerator is an unpleasant odor such as a chemical smell, watching the engine run continuously without interruption, the smell of burnt wires or oil spilled on the ground, etc. Although, various freon leak detection kits are available on the market that can help you understand the smell that drives you unconscious. There are ways to spot a freon leak, big or small, but first you need to know what are the signs that this type of gas has entered your appliance. Your first impulse might be to assume that something has gone bad inside your refrigerator, but if you can’t trace the source of the strange smell, don’t ignore it and check for a freon leak.

Although Freon has almost no odor, if you smell an unusual musty odor in the refrigerator that you can’t trace, it may be a Freon leak. While you may not be familiar with the smell of Freon, this strange musty smell may actually be the result of a leak. The odor of Freon coolant has been described as a very strong ozone or gasoline odor in addition to the odor of cosmetic nail polish remover.

Some refrigerants, such as Freon, give off almost all of the musty smell, especially if your refrigerator is in a closed area like a garage. If freon leaks in there, it will leave a musty smell in the refrigerator when the refrigerator is stored in an enclosed space. Depending on the age of the appliances, the size of the hole and the amount of refrigerant in the unit, it can take from 30 minutes to six hours for the freon to leave the air conditioner or refrigerator.

If freon leaks, the appliance will not be able to keep food at a low enough temperature, which could result in food spoilage or additional energy bill costs if more energy is used to maintain the original level of freshness. The loss of freon means that the temperature of refrigerators drops day by day, the compressor and condenser do their best to use freon wherever it is present to bring the temperature to the right place. Freon normally passes through enclosed copper coils in the AC unit, but these coils can break and cause AC refrigerant to leak.

When your system doesn’t have the refrigerant it needs to cool your house, copper wire or evaporator coils can’t absorb as much heat. A common misconception is that refrigerant is slowly depleted during the cooling process of an air conditioning system.

A refrigerant leak, also known as refrigerant or freon, is not a normal part of an air conditioning system and most likely indicates a refrigerant leak. A small amount of freon on the skin or a local leak is usually not dangerous in a well-ventilated area. The gradual loss of freon gas not only reduces the efficiency of the refrigerator, but the gas itself can cause additional problems as it dissipates into the environment.

To schedule refrigerator repairs in Oklahoma City contact Appliance Repair OKC Services by calling 405-378-4566 or visit our website at https://www.okcappliance.com to also our Google business page at https://cutt.ly/YEnc8qk. Call now!


The post Five Signs Your Refrigerator Is Leaking Freon appeared first on Appliance Repair OKC Services | Best Appliance, Washing Machine Repair Company in Oklahoma.

Friday, April 22, 2022

My Washing Machine Isn’t Filling With Water?

washer repair okc

Technician checking washing machine with digital multimeter in kitchen


My Washing Machine Isn’t Filling With Water?

If the problem with your washer not filling with water is related to the drain hose, refer to the User Manual for the correct configuration of the drain hose and stand hose. If the end of the drain hose is below the water level in the machine, water will be sucked in as the washing machine fills up. The inlet valve connects the hoses to the washing machine, ensuring that the machine fills and drains water properly. The water inlet valve is how water passes through the wash and rinse cycles, so if your washer isn’t filling properly, be sure to check that as well.

If the water in your washing machine pours very slowly, you need to check if the water inlet valve is clogged. If you notice your washing machine won’t fill with water at all, the next step is to check the water inlet valve to make sure it hasn’t burned out. If you’ve followed all of these steps and your washer still won’t fill with water, the issue might be with the lid switch and water temperature. If your washing machine normally fills with cold water but does not fill properly on a hot water cycle, follow the same steps as for a washing machine that does not fill with cold water, but check the hot water pipe and faucet instead.

If you get continuous splashes of water from the connection, a faulty supply valve is causing problems filling the washer. If there is a hole in the hose, the pressure is reduced and the water level sensor of washing machines does not turn off the water supply to the water supply valve. When the washing machine starts pumping water from the main water supply, it goes from the filler pipes to the water supply valve. If there is sufficient water supply. If the water flows through the fill tube at a decent rate, check the filter in the washing machine’s water valve.

If the water supply is on, double check the water inlet hose to make sure there are no kinks that could restrict or interfere with the water supply to the machine. There must be no kinks or blockages in the water or inlet pipes between the equipment and the mains water supply. Pull the appliance forward to access the faucet; turn off the water supply and remove the water inlet hose; take a bucket, turn on the faucet, and see what the flow is; if the flow is erratic, below normal, or no flow at all, it’s most likely a pipe There is a problem with the water pressure in the . If the water flows and fills very slowly, and the pipes and filters in the back are fine, then the problem is with the plumbing in your home.

If the water does not flow freely, the filter may be clogged and must be cleaned before proceeding. If you are lucky, the problem may simply be that the filter needs to be cleaned, be careful with the water valve filter as many are very fragile. If the water valve filter is clean, the problem may be related to the connection of the valves, this can be checked, but if you do not have much experience with home appliances or electronics, it is best to call a professional washing machine repair technician. If you’ve drained your washing machine and inspected the hose, pump, and lid switch and still can’t pinpoint the problem, you may need to call a professional plumber or washing machine service technician.

Pinching can be diagnosed as the machine washes and spins even when there is no water. If your machine can run without water, you can be sure that the pressure chamber is the problem. If water flows into the washing machine but does not fill the drum If you see or hear water flowing into the washing machine but the water level in the drum does not rise, it may be draining directly from the drain. If the drum starts spinning without water inside If the drum starts to spin back and forth instead of filling with water, as during washing, the pressure system may be faulty.

You can turn on a spin cycle to see if the water runs out, but if that doesn’t help, you’ll be back where you started with a pile of clothes and a washing machine. Your washing machine may work perfectly, but if it doesn’t take on water, your clothes won’t get washed. If the bucket is overflowing, raise the hose above the laundry tub until you can empty the bucket and start refilling it. Locate the pressure switch for the water level in the washing tub.

You should also check the water volume control to make sure it is set correctly and that the buttons on the control panel are fully depressed. Measure to make sure the voltage of the electromagnets is not being blocked somewhere inside the washer – usually the water level switch, lid switch, cycle switch or timer is the culprit. You should close the main shut-off valve and then drain the hot water tank (unless you know where the hot water shut-off valve in the water heater is located).

To schedule washing machine repairs in Oklahoma City contact Appliance Repair OKC Services by calling 405-378-4566 or you can visit our website at https://www.okcappliance.com. Also our Google business website can be found at https://cutt.ly/YEnc8qk. Call now!


The post My Washing Machine Isn’t Filling With Water? appeared first on Appliance Repair OKC Services | Best Appliance, Washing Machine Repair Company in Oklahoma.

Thursday, April 21, 2022

My Dishwasher Will Not Drain?

dishwasher repair

Young Woman Looking At Repairman Repairing Dishwasher In Kitchen


My Dishwasher Will Not Drain?

If the dishwasher still won’t drain, a bad solenoid may be causing the problem. In this case, even if the drain pump is running, the drain pump will not effectively drain the dishwasher. Checking the other end of the hose will most likely require access to the drain pump inside the dishwasher. To check for blockages in the drain or pump, remove the filter to expose the drain and pump at the bottom of the dishwasher.

After turning off the water and turning on the dishwasher, check that the drain hose is not kinked or clogged. Water at the bottom of the dishwasher is the result of a clogged filter, waste disposal system, drain hose, drain pump, or air gap. Sometimes a Frigidaire dishwasher that won’t drain is due to an air gap or clogged drain, not the dishwasher. In some cases, when the dishwasher does not drain water, the cause may be an air gap or drain pipes.

Complete waste disposal or an air gap in the connecting hose may prevent the dishwasher from draining properly. If the drain hose is kinked or clogged, it can prevent water from flowing out, leaving a puddle in the dishwasher. Remember that if the drain pipe or sink drain hose is clogged, draining the sink will cause water to return to the dishwasher if you don’t have an air gap. Over time, the dishwasher filter itself can become clogged with debris and block the water drain.

If one of them becomes clogged with debris, it could block the drain, causing water to return to the dishwasher during the wash cycle. If one of them is clogged, the water could get clogged when draining the dishwasher, causing leaks or even leaks. When this happens, the water doesn’t drain properly, causing the dishwasher to back up.

If the dishwasher won’t drain, a clogged drain is a common cause. When food or sediment builds up inside the filter’s blockage, the dishwasher won’t drain properly. If your dishwasher gets your dishes wet with a puddle of dirty water, the filter may be clogged. If you’ve ever turned on the dishwasher and found dirty water under the bottom basket, you’ve had a drainage problem.

Before checking dishwasher components that may be causing the problem, make sure the hose into which the GE dishwasher drains is not clogged. If the dishwasher accidentally turns off during a cycle, there will be water on the bottom when you open it. If the dishwasher drain hose is kinked or clogged with debris, this can restrict the flow of water and you will notice water remaining in the dishwasher at the end of the cycle. Over time, the drain valve can become clogged with debris and not open, causing water to remain in the dishwasher.

If the drain valve is clean but still not working, it needs to be replaced. The valve can also become clogged with debris, preventing it from opening and closing properly. The drain hose connected to the pump can also be clogged, which can be removed by simply disconnecting the drain hose from the dishwasher pump and blowing it out after turning the dishwasher off.

These blockages usually appear in the hose that connects to the drain pump or dishwasher and can be removed to fix drainage problems. To check for a blockage, you need to remove the bottom front panel and find where the finned tube connects to the dishwasher drain pump. If there is excess water in the pump, you may need to sponge it dry before checking for a blockage.

If the dishwasher still appears to be clogged, check the kitchen sink drain. If both the trash can and kitchen sink drain are draining properly, and there is water in the bottom of the dishwasher, the filter is clogged, the drain pump impeller is clogged, or the drain hose is clogged/kinked. If all is well and your dishes are being washed, a small amount of standing water in the dishwasher is normal and probably nothing to worry about. While standing water can indicate that your dishwasher needs professional repair, it’s usually a small problem that you can fix on your own.

It is normal for some water to remain in the dishwasher after a cycle to prevent the dishwasher seals from drying out. The drain hose is a lightweight plastic hose that connects the dishwasher to a sink drain or waste bin so that water can drain. When a dishwasher hose is connected to a sink without a waste chute, an air gap—a small, grooved cylinder (often made of stainless steel)—is installed on top of the sink, right next to the faucet.

If the bin is clogged with debris, the water in the dishwasher will not drain properly and may return to the dishwasher during the wash. If you run the dishwasher with the chute clogged with food debris, the water won’t be able to get to the same drain.

Over time, things like grease will affect the system, causing the drain hose to clog and therefore prevent the dishwasher from draining. If the dishwasher won’t drain, or if too much water remains at the end of the cycle, it may be because food particles are clogging the bowl area, or it may be caused by a clogged dishwasher drain hose or a faulty part such as a motor or drain pump. In some cases, you may be dealing with a clogged main exhaust chimney or even a sewer line, but this will affect all drains in your home.

If you can’t find the cause of the dishwasher problems then call for dishwasher repair in Oklahoma City and be sure and contact Appliance Repair OKC Services by calling 405-378-4566 or visit our local website at https://www.okcappliance.com or also our Google business website at https://cli.re/Dyq1ME. Call now!


The post My Dishwasher Will Not Drain? appeared first on Appliance Repair OKC Services | Best Appliance, Washing Machine Repair Company in Oklahoma.

Wednesday, April 20, 2022

My Ice Maker In The Door Of My Refrigerator Isn’t Working?

Ice Maker Repair In Oklahoma City

Refrigerator is making fresh clean ice cubes.


My Ice Maker In The Door Of My Refrigerator Isn’t Working?

We’ll look at some of the common reasons the Thermador ice maker isn’t working, including incorrect freezing temperatures or dirty water filters. Some GE refrigerators are equipped with sensors or timers that stop the ice maker when the water filter needs to be replaced. A clogged water filter can restrict the water supply to the ice maker and water dispenser and prevent the ice maker from working properly.

If the filter is not installed correctly, the ice maker will not work, or there may be air in the plumbing that prevents the ice maker from working properly. If the plumbing is clogged, water cannot come out and ice does not form. Over time, the water supply valve can become clogged with mineral deposits and stop opening, causing the ice maker and dispenser to stop working. If the water supply valve has sufficient pressure and power is supplied, but the ice maker does not fill with ice making water, replace the water supply valve.

To check the water pressure, disconnect the water supply hose from the back of the refrigerator, place it over a bucket or container, then turn on the water and check the flow. You can check where the water supply line connects to the back of the refrigerator and where it connects to the ice maker inside the refrigerator. Before continuing, make sure the refrigerator water is on and the water supply is connected to the refrigerator. Unplug the refrigerator. Turn off the water tap. Loosen the two screws that hold the ice maker to the freezer wall.

Open the ice compartment door of the freezer and take out the ice bucket. Place a towel under the ice maker to collect ice or water. Press and hold the test button under the ON/OFF switch for 3 seconds. turned off, the reset process is complete and the ice maker should start making ice. Also be sure to remove as much ice from the ice cube tray as possible, as spare ice can cause the water in the small water fill tube to freeze. Accumulated ice can cause the water inlet tube to freeze, so the problem may be a faulty valve if the inlet tube repeatedly freezes after defrosting.

Inspect the fill tube and pour cup area on the back of the ice machine to make sure nothing is blocking the water supply system – sometimes ice buildup (caused by faulty door seals) can block the fill tube; can be defrosted with a hair dryer. Make sure the water supply line is not kinked behind or under the refrigerator (it’s better to use 1/4″ copper tubing rather than a plastic fill line to prevent kinks). Find the water supply stopcock behind the refrigerator or under the sink, close it, unscrew the copper pipe from the back of the refrigerator, put the copper pipe into a bucket, open the faucet and see if water is leaking.

Flushing the system is necessary every time the filter is changed or the first time the refrigerator is installed in the water supply line. We recommend replacing the water filter in your refrigerator and allowing the refrigerator a few hours to make new ice. Be sure to change the water filter every 6 months or more often if ice production is impaired.

A clogged filter can only supply a small amount of water, resulting in minimal ice production. If you can’t get ice or water out of the fridge, the filter should be the first suspect.

If your refrigerator model is equipped with a water filter, a dirty filter may be causing slow ice production. If the refrigerator filter is not working properly, it can restrict the flow of water to the spout. The water flow to the Samsung ice maker may also be restricted if the filter has been installed incorrectly or replaced with a non-OEM filter. A clogged or improperly installed water filter will reduce the water supply to the Whirlpool Ice Maker and may result in little or no ice production.

When this happens, your Whirlpool refrigerator water dispenser is not working, it affects the ice but not the water. As expected, if door switch A doesn’t work, neither your Whirlpool ice maker nor water dispenser will work. If the dispenser switch fails, the water supply valve will not receive a signal to release water or ice and will not dispense.

If the faulty water supply valve is defective, the water flow may be restricted and you will notice that the refrigerator is not producing enough ice. If your Bosch refrigerator’s ice maker isn’t working, there’s usually a relatively simple fix, like defrosting the ice tube or replacing the water valve. That’s why, if you find that your Whirlpool French Door Refrigerator is not making ice, you need to fix the problem quickly before the warmer days arrive.

We will describe the reasons why you might have a Whirlpool refrigerator that is not delivering ice or water from a stuck ice maker to a clogged water filter. Find out the most common reasons why your Samsung refrigerator won’t produce water or ice and how to fix the problem. We will discuss the likely reasons for the need, from temperature to problems with the water supply, in order to still compete with the heat.

Lack of air circulation inside the freezer by the evaporator fan motor or frost on the evaporator coils restricting air flow can also cause the ice maker to malfunction due to an increase in the temperature of the ice maker. If the refrigerator and freezer are too hot, it may be necessary to remove debris from the condenser coils at the bottom of the refrigerator, or remove frost and ice from the evaporator fan on the back of the freezer.

The presence of air in the water line will also drip from the dispenser. Air in the system may cause the dispenser to drip or form small/empty ice cubes. By pointing the hair dryer at the water line, you can melt the accumulated ice so that the water can flow freely.

To schedule ice maker repairs in Oklahoma City contact Appliance Repair OKC Services by calling 405-378-4566 or visit our website at https://www.okcappliance.com to also our Google business page at https://cutt.ly/YEnc8qk. Call now!


The post My Ice Maker In The Door Of My Refrigerator Isn’t Working? appeared first on Appliance Repair OKC Services | Best Appliance, Washing Machine Repair Company in Oklahoma.

Tuesday, April 19, 2022

My Freezer Is Making A Clicking Noise?

Service technichian repairningn refrigerator. Applaince repair OKC

freezer repair Oklahoma City


My Freezer Is Making A Clicking Noise?

In most cases with a freezer that is noisy and not cooling, it is often a faulty capacitor or relay. If your freezer is constantly clicking, a replacement part will be required. The best way to find out is to make sure you turn the freezer off and on again manually and if you hear the same click, it’s the relay sound. Whether you cut off the power via the circuit control panel or there is a power outage, your freezer will make a clicking noise.

If your freezer is still cooling efficiently, but you hear a clicking sound from the freezer (this could also be a scratch, rattle, or no sound), check the condenser fan. If dirty condenser coils are to blame, the clicking sound you hear is actually the sound of the compressor turning on repeatedly. One of the reasons your freezer will click may be compressor overload caused by fouled condenser coil.

A common cause of an overloaded compressor is a dirty condenser coil located behind or below the freezer. If the condenser coil is dirty, the compressor may run longer and with reduced air flow, the compressor will overheat. Guess what happens if the condenser fan isn’t running with the compressor running. After the compressor cools down, you will hear another click and the compressor starts up again.

An incorrect start relay starts the refrigeration process, causing the compressor to start compressing the refrigerant gas. If the start relay/ptc relay is faulty, the compressor will not start and a clicking sound will be heard at 2-5 minute intervals. The clicking noise is an overload that shuts down the compressor when it overheats when trying to start with a faulty start/PTC relay. The compressor may also make a rattling sound when it slows down to a stop.

You’ll know your compressor has failed when it starts making abnormal noises, the compressor overheats or doesn’t provide enough cooling, or when your freezer’s compressor cycles on and off too frequently. A faulty compressor may be accompanied by little or no cooling in the freezer. The compressor coils at the back of the freezer dissipate heat, but when they get clogged with dust, they have to work harder to dissipate the heat and make it louder. freezer clicks can come from the freezer condenser coils, compressor, start relay, or condenser fan.

If you’ve managed to stop the freezer from clicking by cleaning the condenser coils, replacing a faulty start relay, or redoing the condenser fan, remember the solution that worked. If you hear a clicking sound from outside the back of the freezer, unplug it and locate the condenser fan. If you have already verified that the condenser is properly configured and powered, check the condenser coils at the bottom of the freezer.

Unplug the freezer so that no power is supplied to any of the components. To reproduce the click, try unplugging the freezer and waiting 5 minutes, then power on and see if it beeps.

A click can mean the defrost timer is turning on and off, the ice maker is being refilled, or an attempt is being made to restart the compressor after a power failure. If your GE Profile freezer is making loud clicking noises on the back, it could be due to a faulty start relay, a water cut, a main board failure, or simply part of the freezer’s normal operation.

Before moving the freezer and replacing parts, it’s best to make sure you know what normal noise is. If you have thoroughly checked these factors and still cannot diagnose where the clicks are coming from or what error your Frigidaire freezer may be experiencing, you need to ensure that your Frigidaire freezer is inspected by an authorized Frigidaire technician. who will be able to detect the click sounds and see what can be done about it. If there is dirt or other particles clogging the condenser on the condenser, it will cause stress on the compressor, which is definitely not something you would like to have, and that is why you will also have to deal with that clicking sound on your Frigidaire freezer. many times your Frigidaire freezer.

A ticking freezer in Oklahoma City, Oklahoma is very annoying and means something is seriously wrong with your freezer. Feel free to call Appliance Repair OKC Services as soon as you hear the freezer tick. You can’t live with one tick for too long, but you can’t even fix the tick yourself.

If your Samsung freezer is making crackling noises, don’t panic. If you have a Samsung freezer that makes noise like an owl, it often means that ice has built up around the component’s fan. When the evaporator coils on some freezer models are cooling down after defrosting, a “popping” noise can be heard. The refrigerant circulating in the freezer may cause noise such as gurgling, rattling or popping.

When the freezer door closes or opens, it may make a popping or popping sound. If the engine runs with a slight hum, but the temperature is above normal, the problem is most likely with the compressor. I have heard why when there is a problem with defrost, the compressor is constantly running and this leads to its overheating.

For freezer repairs in Oklahoma City contact Appliance Repair OKC Services by calling them at 405-378-4566 or you can visit our website at https://www.okcappliance.com or also our Google business page at https://cutt.ly/YEnc8qk. Call today!


The post My Freezer Is Making A Clicking Noise? appeared first on Appliance Repair OKC Services | Best Appliance, Washing Machine Repair Company in Oklahoma.

Monday, April 18, 2022

My Refrigerator Water Dispenser Doesn’t Work?

refrigerator repair service okc

an appliance repair technician in work clothing repairing a refrigerator


My Refrigerator Water Dispenser Doesn’t Work?

If you find that the water dispenser itself is not working, the problem may be with the door switch. If the dealer itself is still not working, your dealer may have a more serious problem and you should call a GE refrigerator repair technician. If your refrigerator’s water dispenser is intermittent or slow to dispense water or ice, it could be a filter issue. If you find that the water and ice dispenser in your KitchenAid refrigerator is not working at all, check for a problem with the door switch.

If the dispenser switch is not working, the Kitchenaid refrigerator will not dispense water or ice. After replacing the door switch, turn the refrigerator back on and check if the water dispenser works properly. When the dispenser lever is pressed to dispense water or ice, the Frigidaire refrigerator door switch activates the water inlet valve, allowing water to flow into the dispenser. If the Frigidaire refrigerator door switch is faulty, it will not signal the water inlet valve and no water will flow to the dispenser.

Too little pressure will prevent the refrigerator inlet valve from working, limiting the water supply to the dispenser and ice maker. Problems with both components can affect the refrigerator’s water supply, causing the dispenser and ice maker to not work properly. In some cases, a Whirlpool refrigerator not dispensing water or ice may be due to a water supply issue rather than a dispenser issue. While it is rare for a refrigerator water dispenser control board to fail, if all of the above components have been checked, the control board failure may be due to the GE refrigerator not dispensing water or ice properly.

Among your concerns may be problems related to a faulty pressure switch, water dispenser actuator, refrigerator door switch or control board, faulty pressure switch, water dispenser actuator, refrigerator door switch or control board. The problem could be related to a frozen water pipe at the port, a faulty water supply valve, low water pressure, a problem with the dispenser control board, a faulty dispenser switch, a faulty door switch, or a clogged water filter.

Some common reasons why the water dispenser does not work include a broken power line connection to the refrigerator, a closed water supply stopcock, a kink in the water supply line, low water pressure, a new installation, an incorrectly installed water filter, an open door. correctly and the recent removal of the doors. This may be due to the fact that the refrigerator is not connected to the water mains or the water pressure is low, or the shut-off valve on the supply line is closed.

If the GE refrigerator water dispenser is not working, check that the water supply line to the refrigerator is turned on, the water supply hose is not frozen, replace the water supply valve, reduce the temperature inside the refrigerator, or replace the vinyl tube, among other solutions. As noted earlier, water may not come out of a GE refrigerator because the water supply line to the refrigerator is off or the water supply line is filled with air. If other functions such as ice dispensing, timers and filter lights are not working, the problem may not be with the brew group at all. If the dispenser works properly with the correct water pressure after removing the water filter, the filter may not be properly installed or clogged.

A faulty filter can also cause problems with the dispenser that restricts ice and water. Water filter problems are a common cause of distributor problems, resulting in reduced water flow or limited pressure performance. This can happen when the filter becomes dirty or becomes clogged with debris, preventing the water from flowing properly. A clogged water filter will prevent water from flowing into the dispenser, so you will notice a reduction in the amount of ice.

Freezing causes a blockage that prevents or reduces the flow of water to the dispenser. Water may stop flowing from the refrigerator spout if the supply lines are frozen, clogged, or kinked. If this happens, you will likely see little or no water flow from the dispenser, or you may also find water leaking from the refrigerator. If you find the root cause of the problem that caused your GE refrigerator water dispenser to stop working, you can move on to more accurate solutions to get your dispenser back up and running.

If you’ve looked through this list and can’t find a specific issue that matches your specific problem, or you’ve tried various solutions, your GE refrigerator water filter may need to be reset. If you are running a post-2002 GE electronic refrigerator and when you try to dispense water, the refrigerator temporarily shuts down and the lights go out, the main board is defective and needs to be replaced. One of the most common refrigerator repair problems is that the water and ice dispenser in the refrigerator is not working properly, either not dispensing water or ice, or dispensing too much or too little.

Sometimes the Frigidaire water dispenser may not drain as needed if the refrigerator is not getting the power it needs. If the water valve opens, you may hear a faint hum, you may have to turn off the refrigerator to hear it. After ten minutes, turn on the GE Profile refrigerator, gently press the water button and see if the water button begins to function normally.

When the button is pressed, the dispenser switch sends voltage to the dispenser to activate the dispenser. To determine if the distributor problem is caused by a faulty distributor switch, you will need to test the distributor switch with a multimeter.

We will describe the reasons why you might have a Whirlpool refrigerator that is not delivering ice or water from a stuck ice maker to a clogged water filter.

To schedule refrigerator repairs in Oklahoma City contact Appliance Repair OKC Services by calling 405-378-4566 or visit our website at https://www.okcappliance.com to also our Google business page at https://cutt.ly/YEnc8qk. Call now!


The post My Refrigerator Water Dispenser Doesn’t Work? appeared first on Appliance Repair OKC Services | Best Appliance, Washing Machine Repair Company in Oklahoma.

Friday, April 15, 2022

My Oven Won’t self Clean?

oven repair OKC

appliance repair technician repairing oven


My Oven Won’T Self Clean?

As mentioned earlier, the oven heats up to very high temperatures during the self-cleaning cycle, so a blown thermal fuse may be the cause of the oven not working. One of the main causes of failure is that the oven’s self-cleaning heats up to very high temperatures, which can damage components inside the oven and prevent it from working properly.

Your oven is designed in such a way that during the self-cleaning cycle the door is blocked so that it cannot open and could be a hazard. At the end of the self-cleaning cycle, the door will remain locked until the oven has completely cooled down and can be safely opened. If you interrupted the cleaning cycle by opening the door and inserting the latch and now the door cannot be closed, there may be a door activation switch on the front of the oven.

Although your oven may be able to withstand some self-cleaning operations, the more often you use this function, the more likely it is that the oven will not turn on the day after the self-cleaning cycle. If your oven won’t start after completing the self-cleaning cycle, you really need to check for any parts that may be damaged due to the heat. Due to these dangerous temperatures, the oven will not allow the self-cleaning function to start if the components are defective or the door does not close. If your self-cleaning oven is still not working, the last component you might want to check is the control board.

If the wiring is ok, or if you replaced it and the oven still doesn’t work, the next component to check is the thermal fuse. To check the thermal fuse, you need to access the back of the oven again.

Turn off the oven and make sure it has cooled down; then just take out the items to check. After the replacement, you can plug the oven back in and see if it works. Make sure you turn off the oven switch for a minute or two before turning the power back on.

Sometimes if you turn the oven off and on again, you can reset the oven and it will turn on. If the door is not fully closed, hot air may escape from the oven. An oven door that is not fully closed can dissipate heat from the oven, causing food to cook more slowly.

Since the oven door cannot be opened to dissipate heat quickly, it will take longer to cool down as the heat escapes through the oven vents. At this point, all heating elements will be activated and the temperature inside the oven can reach over 1292°F or 700°C, which is much higher than what is needed for cooking. During the half-hour to hour cycle, the door is left open and the internal temperature rises to around 250 degrees Fahrenheit, enough to generate steam that softens and dissolves leftover food.

After the cleaning period is over, allow the oven to cool completely; if you have a high temperature oven cleaning, this may take a few hours. If you perform this function immediately after cooking, the already high oven temperature will reduce energy consumption to the highest level required. If your oven allows you to adjust the duration of the self-cleaning cycle, consider setting it to the shortest possible duration to reduce the risk of overheating (which can cause blown fuses and other mechanical problems) and reduce energy consumption. If the oven door lock still doesn’t open after a self-cleaning cycle and sufficient cooling time (about 1 hour), there are several things you can try.

For example, if a cooking or grill element is on the verge of failure, running the self-cleaning cycle of the oven will likely cause the element to fail at that time rather than three weeks later. Checking an oven that has failed immediately after or during a cleaning cycle is no different than checking an oven for any other occasion, but there are some common malfunctions that sometimes occur during a cleaning cycle.

While oven manufacturers have been working hard to develop features that make household chores easier, the self-cleaning components of many new models can actually cause serious problems for your appliance. Cleaning shelves and washing dirty dishes may seem second nature, but it’s easy to forget to clean the oven. However, cleaning can be expensive, as there can be problems with the inner workings of the oven after cleaning, and the fumes from the cleaning process can be annoying. Because a dirty oven takes longer to preheat and can lead to dangerous grease fires, it’s important to get into the habit of cleaning it regularly.

When things go wrong, these cleaning options will make your oven look brand new. If your oven is very dirty, you may need to increase the cleaning time. On some ovens, you can specify the duration of cleaning; others cannot.

If you are cleaning a high temperature oven and it does not automatically lock during cleaning, lock it. While it’s generally best to avoid this feature and clean your oven with old-fashioned elbow grease and an approved cleaner, if the self-cleaning feature renders your oven unusable, you can check to see if you can get it. work again. If you try to use the oven after a cleaning cycle, if the control panel displays the message “Lock”, “LOC”, “Door locked” or the light is flashing, you must first check the door lock switch.

If you are having oven issues and need oven repair in Oklahoma City contact Appliance Repair OKC Services by calling 405-378-4566 or visit our website at https://www.okcappliance.com. Alternatively you can also visit our Google business website at https://cutt.ly/YEnc8qk.


The post My Oven Won’t self Clean? appeared first on Appliance Repair OKC Services | Best Appliance, Washing Machine Repair Company in Oklahoma.

Thursday, April 14, 2022

My Dishwasher Doesn’t Start?

dishwasher repair Oklahoma City

Woman Looking At Male Technician Checking Dishwasher With Digital Multimeter In Kitchen


My Dishwasher Doesn’t Start?

To help you find and fix the cause of your dishwasher starting up, we’ve done a little troubleshooting. Power problems, a wrong cycle setting, or a door that won’t close can prevent the dishwasher from starting. Another common reason why the dishwasher may not turn on is that the door is not fully closed. Sometimes the latch may not work properly and prevent the door from locking in place, preventing the dishwasher from starting.

The dishwasher will not start unless the dishwasher door is properly closed and locked. The start switch may not work properly, so even with the correct settings and the latch closed, the dishwasher will not start. If the latch breaks, the door will no longer be able to click and hold it closed, meaning the dishwasher cannot start and operate safely. Once the door is completely closed and locked, you can start your KitchenAid dishwasher.

After loading the dishwasher, select the cycle on the control panel, press “Start” and close the door. To reset your GE dishwasher, press the Start/Reset button on the selection bar. On most models, the dishwasher switch can be accessed by unscrewing the control panel. You can test the start switch yourself with a multimeter, depending on the make and model of your dishwasher.

Checking and replacing the starter switch will require disassembly of the door. To access the selector, you will need to remove the dishwasher door, especially the inner door panel. Carefully remove the inside panel of the dishwasher door to access the fuse. If the dishwasher door does not close properly, you may need to unscrew the panel around it to inspect the part.

In the event of a malfunction, the control board will not supply the power needed to run the dishwasher and must be professionally replaced. In the event of a malfunction of the main control board, none of the functions of the dishwasher will receive the necessary power to start. If the electrical timer check fails, the timer will not receive the power needed to start the cycle, which may prevent the appliance from turning on.

If the timer is defective, the dishwasher may not receive power to start and should be replaced by a professional service center. If your dishwasher still won’t start on command, its electronic timer may be faulty. If your dishwasher is already plugged in but still not working, the problem might be with the circuit breaker.

If your dishwasher is on but does not start on command, it may not have enough water. Without sufficient power supply, the dishwasher cannot start or perform any functions.

After a power failure, it may be necessary to restart the dishwasher in order to resume operation. If your dishwasher seems to be trying to run but not working properly, the motor may be stuck. If the drive motor fails, not only will water stop flowing into the dishwasher, but the dishwasher may not start at all (depending on the brand).

If the engine start relay fails, the rest of the dishwasher will not receive a “start” signal from the control panel. If the timer control or its connection to the control panel is disconnected, the dishwasher may not start because the first timer never starts. If the dishwasher door does not close properly, or if the latch switch is damaged, the dishwasher controller may not get the necessary power to start and operate the appliance properly. Dishwashers refuse to start for a variety of reasons, but the most likely culprits are door latch assemblies, electrically controlled timers, selector switches, and thermal fuses.

Whether the error is due to a faulty door latch or a blown thermal fuse, our dishwasher troubleshooting guide will show you why your Kitchen Aid dishwasher won’t start. If the previous troubleshooting tips didn’t solve the problem and your dishwasher still won’t start, it’s best to contact a certified technician to fix the problem. Once you’ve eliminated the possibility of easily fixable problems, if your dishwasher still won’t start, you need to dig a little deeper.

After making sure you follow the manufacturer’s recommendations, you can check for problems with the dishwasher itself. First, make sure you are not doing anything that could cause the dishwasher to malfunction. To perform the test, you just need to turn off the switch and turn it back on – if the dishwasher comes back on, then that was your problem.

Be sure to turn off the dishwasher or turn off the power inside the electrical panel before checking the electrical components. You can also check the electrical switch box to make sure the switch that controls the dishwasher is working properly (also check for frayed or damaged areas on the cord). Finally, check if the child safety setting has been accidentally activated, this will also prevent the dishwasher from starting. If your Frigidaire dishwasher won’t start but is on, Electrolux (the brand’s manufacturer) recommends checking to see if the baskets are protruding or dishes are blocking the door.

If you have a Whirlpool dishwasher with the light on but it won’t start, you need to open the door and press the dry, normal, dry, normal heat combination. If you are sure the door is fully closed and the KitchenAid dishwasher is still not producing gas, check to see if the latch is damaged. If the latch fails electronically, it will not signal the Viking dishwasher to start a wash cycle.

If you can’t find the cause of the dishwasher problems then call for dishwasher repair in Oklahoma City and be sure and contact Appliance Repair OKC Services by calling 405-378-4566 or visit our local website at https://www.okcappliance.com or also our Google business website at https://cli.re/Dyq1ME. Call now!


The post My Dishwasher Doesn’t Start? appeared first on Appliance Repair OKC Services | Best Appliance, Washing Machine Repair Company in Oklahoma.