Friday, September 30, 2022

My Oven Isn’t Heating To The Correct Temperature?

oven repair okc

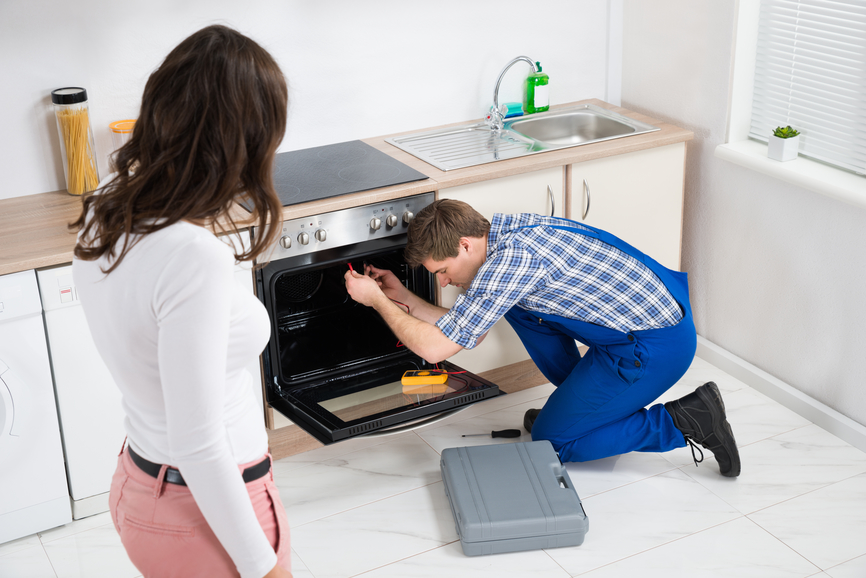
technician repairing oven with customer


My Oven Isn’t Heating To The Correct Temperature?

If you notice your electric oven is not heating to the right temperature, and the food comes out undercooked, it may be caused by the electric ovens defective thermostat. One of the most common problems is that the oven or range is not heating up to the right temperature. Sometimes, your gas stove may be heating up, but you may be seeing the incorrect temperature on your display. When your furnace stops heating properly (or never does), that can be quite the disappointment.

Once you have eliminated your spark plugs and the electrical connections, it is possible that your oven is not heating up due to an issue with your gas connections. For a more serious problem of the gas oven not heating up at all, you may have a damaged burner or oven ignition electrode.

Your gas oven might not heat up at all if your ovens ignition is not working, or it is completely off. If your furnaces burners are turning on, but your oven is not heating, a clogged or malfunctioning igniter could be to blame. This seems like an obvious issue, but anyone can be in a rush and fail to notice that one of your stoves heating elements is not turning on. If the oven is not warming quickly enough, it never seems to reach the correct temperature, or food is burning at the top while cooking below, your heating element is probably to blame.

When the bake element becomes defective, your Samsung oven cannot heat to the correct temperature, or even to any temperature. A burned-out bake element is the most common reason for temperature problems with electric ovens. Fortunately, there are possible solutions for all these problems caused by an oven that is unable to reach the proper temperature.

The next item to focus on when the oven is not getting hot is your thermostat. If the oven is not heating up yet, check your thermostat and selector switches.

Simply put an oven thermometer in your oven, and see if the temperature setting is the same as the temperature on your thermometer. Set the temperature to 300 degrees F, and test the oven thermometer after about 10-15 minutes, when the oven is completely heated. You can also place an oven-safe thermometer inside as the preheating is going on, and check if the temperatures are consistent.

Thermostats measure temperatures within the ovens chamber, turning on and off electric elements to keep your desired temperatures. The furnace thermostat is responsible for regulating the electrical power delivered to the heating elements, helping keep the electric furnace hot. The thermostat is an extension of the primary control panel, which regulates the ovens interior temperature via broiler, baker, and other temperature sensors. The ovens thermostat reacts to fluctuations in the temperature of your oven while it is baking, indicating more heat if needed.

When the temperature drops enough, a thermometer inside the oven senses this and signals to the control board to fire up the heating elements again to raise the temperature. An oven thermometer can help you tell whether or not your oven is regularly dropping below or above its preset temperature.
If you have checked to make sure that the heating elements are working correctly, it is possible that the electronics controlling the ovens temperature are not reading a temperature drop as a problem. In all honesty, the faulty thermostat or heating elements in your oven are the most likely culprits for why your oven is unable to keep a consistent temperature.

In this article, we are going to go over some reasons your oven is not warming up the right way, as well as things you can do to correct the ovens temperature. While ultimately, you might have to call a professional, we can walk you through some of the common reasons your electric or gas oven might not heat up correctly.

If you have been using the same gas oven for months or years with success, but are suddenly having trouble with your cookout, a malfunctioning ovens heating elements, digital controls, or other components could be at fault. If your broiler and burners are working, but the oven is not warming up, you may have a malfunctioning burner, the most common cause of an oven failure. If you install a new element, and your oven is still not working, it is possible that you have a wiring problem. If the oven is not getting that level of electrical power, it might not be heating up, or not even starting.

If the oven door cannot shut, heat is constantly coming out, and the amount of heat output from the furnace that is programmed into the program is not sufficient for the full cooking of the food to the specified temperatures. Due to aging, continuous use, and poor handling, ovens may begin to exhibit specific flaws, one of which is the insufficient heating of the oven.

A malfunctioning thermostat might fail to increase temperature as intended; therefore, knob indicates minimum temperature that you have set, but actually, temperature is lower in oven. If the above components are working correctly, but you still feel that your LG ovens temperature is inaccurate, then your ovens thermostat may need to be calibrated. Before purchasing a replacement thermostat, be sure to make sure that the temperature probe is not touching the interior walls of your oven.

You may even want to disconnect the oven to test whether or not the temperature sensor is producing an adequate level of resistance. Get two oven-grade thermometers, and re-calibrate your ovens temperature using adjustment screws to match your temperature gauges accuracy. The ovens control board works with the ovens sensors to adjust temperature. The ECB is also responsible for managing the safety gas valve of your oven, which must be checked if your oven is not getting hot.

Ovens without sensors use a heat-sensing lightbulb to monitor oven temperature. Similar to electrical appliances, gas-fueled ovens also have thermostats, which keep the temperature of the oven stable by adjusting the size of the flames on the burners accordingly. The thermostat tracks the ovens temperature and determines when to turn the power off.

If you are having oven issues and need oven repair in Oklahoma City contact Appliance Repair OKC Services by calling 405-378-4566 or visit our website at https://www.okcappliance.com. Alternatively you can also visit our Google business website at https://cutt.ly/YEnc8qk.


The post My Oven Isn’t Heating To The Correct Temperature? appeared first on Appliance Repair OKC Services | Best Appliance, Washing Machine Repair Company in Oklahoma.

Thursday, September 29, 2022

My Dishwasher Is Making Loud Noises?

dishwasher repair okc

Sad Woman Calling Technician On Cellphone To Fix Dishwasher With Foam Coming From It


My Dishwasher Is Making Loud Noises?

A lower-pitched whirring noise coming from the dishwasher may be normal, because the water is going down the drain. In some cases, buzzing sounds might not be the fault of your dishwasher. The sounds can also happen when a dishwasher is running after a long time with no usage.

If the dishwasher makes grinding noises, this could be because the Drain Pump is not working. Check around and within the drain pump for debris, and if the noise continues after cleaning the appliance, change your dishwashers drain pump. If the dishwashers drain pump is not working correctly, this could cause the dishwasher to produce a buzzing or grinding sound as it begins to drain at the end of a washing cycle. If a solenoid on your drain valve is stuck open or closed, this could cause the dishwasher to produce a buzzing noise.

Some dishwashers that have an independent sewage pump have a drain valve solenoid that opens and closes during the drain cycle, either stopping the dishwasher from draining or allowing it to flush. A dishwasher has one or two pumps, usually one combined drain pump, that helps wash dishes as well as clean drains. Depending on the model, your dishwasher might have one single pump that is responsible for both draining and circulating the water, or two or three individual pumps.

Be sure to shut off power to your dishwasher and water supply before you get near your pumps. The dishwasher will not usually run at all if you have a defective circulator pump. A busted or defective washing pump may be decreasing water flow through the dishwasher, and you might notice your dishes are not being cleaned correctly.

Dishwasher pumps may make unusual noises if they get stuck or worn. If your dishwasher makes a loud, droning noise when it is running, then a likely reason is the bearings in your circulator pump are worn. A dishwasher making loud noises when not in use may indicate that there is an issue with the circulation pump.

A dishwasher making filling noises that sound like whirring or vibrations can also be blamed on water hammering. A solenoid inside a dishwasher may also produce a popping noise when it is triggered while it is draining. This kind of sound will be heard when you are changing cycles in your dishwasher; such as, when your dishwasher switches between recirculating and pumped-out modes.

If your dishwashers motor is defective or is about to go out, a grinding noise may appear. If this is certainly not a dishwasher that is causing the rattle, you will want to check your dishwashers motor.
This may be the reason for squeal or rattling sounds when your dishwasher is used for the first time. Squeal rumbling sounds may be an indication of problems with dishwasher flushing or the drainage pump. If there is anything jammed in the drain pan, or if the drain pump is not working properly, your dishwasher is going to produce strange sounds when it is on its Drain Cycle.

If you are hearing the thud of a squealing noise during the drain cycle, this is likely caused by the squealing of the spout pipe on the cabinets as water is being removed from the dishwasher. If your dishwasher was installed recently, a banging sound may occur because the drain hose is banging against this cabinet or wall while operating. If your newly installed dishwasher is making banging noises, then it is likely you installed it too close to your cabinets, and your drain line is vibrating against cabinet walls.

If grinding noises suddenly begin, then you will want to open your dishwasher and inspect the plastic blades on the drain pump. Another reason for strange grinding noises from your dishwasher is if there is not enough water sprayed in the machine. A broken piece of food or glassware, or an object that is trapped in the food, can create grinding noises as the pump runs out the water. Food scraps, bits of glass, or other objects could also become trapped in one of these parts, or create an obstruction, which would result in an unusual dishwasher noise.

Your dishwasher usually makes noise if a broken part is present, something is loose, the bearings are damaged, or if an impeller shaft has been knocked out. If you hear any clanking or clattering sounds while running your dishwasher, it could be the spray arm of your dishwasher hitting dishes that were not properly stacked. A new dishwasher can produce this sound on the first run through the cycle before pump seals are properly greased. Adding 2 quarts of water to the bottom of your new dishwasher should give it sufficient lubrication to prevent this noise.

Carefully clean out any gunk on the pumps, which will help to make the dishwasher quieter as you drain. To change the flushing pump or the drainage pump, you will need to disconnect your appliance first from the power and water supplies, as well as the drainage pipe at the bottom of your sink. Substandard clean-up indicates you must replace the wash pump, and ponding water indicates the drain pump is defective.

The wash or drain pumps use fins on an impeller to move the water around your system, but if any of the fins breaks, or if the impeller is not moving correctly, this could result in loud grinding noises or grinding sounds in your dishwasher. A blockage in the pump may make this sound, if your drain impeller is blocked. A partially blocked drain pipe can cause a wild, hollow, bubbling noise, as well as eerie sounds that come from a sudden discharge hours after dishwashers are running. Growly grinding If gurgling sounds have a harsh, tinny edge–like grinding noises or creaking–when the dishwasher is running, that indicates water shortage.

Dishwashers typically produce hissing or gruff sounds when the water is forced through the inlet valves and nozzles. The hissing sound of water flowing through an inlet fill valve, or gentle motor-pump hum, are common dishwasher sounds. When a dishwasher starts its normal cycle, it starts with a brief flushing cycle, and then the inlet water valve begins the tub-filling process.

If you can’t find the cause of the dishwasher problems then call for dishwasher repair in Oklahoma City and be sure and contact Appliance Repair OKC Services by calling 405-378-4566 or visit our local website at https://www.okcappliance.com or also our Google business website at https://cli.re/Dyq1ME. Call now!


The post My Dishwasher Is Making Loud Noises? appeared first on Appliance Repair OKC Services | Best Appliance, Washing Machine Repair Company in Oklahoma.

Wednesday, September 28, 2022

My Ice Maker Is Barely Making Any Ice?

Ice Maker Repair In Oklahoma City

Refrigerator is making fresh clean ice cubes.


My Ice Maker Is Barely Making Any Ice?

Ice jams are a common cause of a Whirlpool French Door Refrigerator failing to produce ice. A Whirlpool fridge not making ice can come down to the wrong temperature settings. The main causes for slow-producing ice in the ice maker are improper temperature settings, too much or too little food in it, and clogged water lines or filters.

When the freezer has little to no food inside, it has to work harder to keep a consistent, cold temperature needed for making ice. If your freezers temperature is too hot, it takes longer for the ice to form, or maybe even fail to form. To form the right kind of ice, your freezer should have about a freezing-cold temperature. Even lower is okay, but higher than that can lead to problems. If it is too hot, ice might not freeze enough, and it might look smaller or distorted.

Meanwhile, temperatures below 0degF may cause an accumulation of ice and frost, which prevents the ejection of ice. Often, the ice might not have fully frozen by the time it comes out of the ice maker. In some cases, an ice machine may produce too small a cube (in the absence of waterline blockage) or too large. If a whole load of ice gets stuck, there is no way to make any more ice, and a water line may also cause problems, as it cannot be filled to capacity.

If the water intake valve is not working or is getting too much pressure, then the ice machine cannot function correctly. To test your water inlet valve, first turn off your water supply and disconnect the refrigerator this should take just a brief moment, so you won’t need to worry about items inside your fridge being affected if you leave the doors closed.

The water inlet lines can be checked at where the water inlet lines attach to the rear of your fridge, and where they attach to the ice maker within your fridge.

The system should also be flushed out after you connect your fridge to your water supply line for the first time. When replacing a water filter, the system needs to be flushed out before it can function properly. Without filters, or with filters installed incorrectly in the filter housing, water does not flow into your fridge and water dispenser.

With the new filter, the water will flow more freely, and it can cause a slosh when reaching the ice maker. Because water has to pass through your filter, water cannot pass through it when it is filled with debris. Eventually, everything that is been filtered from the water coming from the tap, prior to being turned into ice, eventually gets trapped in your filter. When fresh water will fill the cooler, it actually overfills, with a certain amount of water leaking over the tray.

If you have the thermostat set to very low, your whole ice machine may suffer, which causes the water to freeze before it gets to the molds that create ice. If your ice makers fill pipe is covered with ice, you may have a problem with your home having great water pressure that keeps the water flowing to your ice maker, or you may have mud or defects at the water intake valve. If a defective water inlet valve shows proper water pressure, but the ice maker is still not getting enough water, the valve could be defective.

If the water inlet valve has adequate pressure and is receiving power, but the ice maker is not filling up with water to produce ice, then the water inlet valve needs to be replaced. A clogged water filter, bent hoses on a water supply, or defective water inlet valves may limit water flowing into an ice maker. A clog, leak, or damage in a water line may result in my ice maker shutting down automatically or otherwise stopping working.

The most common problems with LG fridges ice makers are caused by temperature fluctuations (in the ice makers compartment), a bad water inlet valve, broken ice makers, faulty control boards, or defective ice makers fans in the freezer compartment. Some Ice Maker problems may lead to bigger (and costlier) problems with your fridge or freezer over time, so it is important to find a fix ASAP so you can get things working correctly. While the savvy home owner can often perform these repairs and replacements on their own, those who are uncomfortable or unfamiliar with this process should consider calling in a professional appliance repair service when their ice maker is not working.

If you have tried these ice maker repair tips and the ice maker is still not working, reconnect the fridge and use Sears Home Services flexible online repair schedule to schedule a fridge repair. Whether you have a side-by-side, an armoire-style, or standard top-freezer model, these ice maker problem-solving tips can help you avoid this repair. Whether your fridges ice maker is broken, or your freezer has a sunk-in ice, problems with your kitchen appliances might be better left to the professionals–especially for people with no experience in plumbing, electrical, or other types of repairs. When you are calling in a request for more than just some ice, oftentimes, time is tight to fix problems.

If your ice maker is not producing ice, there are several things you can check to try and solve the problem. If you have an ice-ejector that is not producing any ice, this may be one of a number of things. In some cases, a fridge might even be designed to stop dispensing ice or water once a filter is past its replacement date, which can make it appear as though your refrigerators ice machine is broken.

If the Samsung ice machine is not producing enough ice, replace your fridges water filter immediately to make sure that the Samsung ice machine has adequate water. This drastically reduces the production of ice as it increases the temperatures within. A blockage in a pipe or closed valve can easily explain the sudden shortage of ice, as long as new ice cannot be made.

To schedule ice maker repairs in Oklahoma City contact Appliance Repair OKC Services by calling 405-378-4566 or visit our website at https://www.okcappliance.com to also our Google business page at https://cutt.ly/YEnc8qk. Call now!


The post My Ice Maker Is Barely Making Any Ice? appeared first on Appliance Repair OKC Services | Best Appliance, Washing Machine Repair Company in Oklahoma.

Tuesday, September 27, 2022

My Freezer Stops Freezing Then Starts Again?

freezer repair okc

repair tech repairing freezer with customer


My Freezer Stops Freezing Then Starts Again?

If you are not hearing your compressor clicking, and your freezer is not cooling, it may be that the compressor, or components that initiate it, are bad. If you do hear the compressor motor running, but the freezer is not cooling at all, there may be an issue with the evaporator or condenser coils. If your evaporator coils are frozen, then required air cannot get past them, which could cause the freezer not to ice up properly. If the rear part of your freezer, where your evaporator coils are located, is very heavily frozen, then you may run into trouble with the defrost.

Another cause for the consistent thawing/freezing is if the coils on your fridges evaporator are frozen/clogged. Frost built solely at the rear of your freezer part, which is where your evaporator coil is located, indicates an issue in your defrost cycle. Giving your freezer a couple days to reset and defrost completely will allow the freezers evaporator coils and other mechanisms to thaw, which should make it function better.

If your freezers condenser fan has frozen, defrost the freezer before turning it back on. Open the freezer door and find the condenser fan unit (it is located in the back of the freezer). If the evaporator fan is not working, then cold air is not being circulated into the refrigerator compartment.

The temperature-control thermostat tracks your refrigerators temperature, then sends just the right amount of electrical power to the evaporator fan motor, the compressor, and, if your fridge has one, to the condenser fan motor, so that everything is working correctly.

The temperature control thermostat sends voltage to different parts of your freezer, and if that does not work correctly, your freezer does not get cold. Another reason why your Fridaire freezer may not work correctly is that your temperature control thermostat has stopped working. A faulty thermostat would send no electricity to the refrigerant system, and therefore, your freezer would not be cooling. If broken, a thermostat will not be able to read temperatures accurately, telling your appliance exactly how cold the freezer is.

If the thermostat is adjusted incorrectly, the refrigerator will shut down and restart as temperatures rise. So, once you have got the fridge-freezer combo working again, you can test the thermostat to find out exactly how hot the interior is getting, as well as what is in it.
Once it is cleaned or defrosted, reassemble your cooler, power it up, and see if the problem has been solved (you will need to wait a couple hours to know). If you have cleaned, defrosted, and sealed-tested the refrigerator, and everything seems fine, try pulling the unit from the wall and wiping down the coils using the crevice tool or brush attachment.

If your freezer door still does not seal properly after cleaning, you may need to replace your freezers seals or realign the freezer doors. If the freezer door seal is not working, you will have to buy a replacement freezer door seal and install it on your appliance, as explained in the video below. Faulty/Damaged Door Seal: If the seal on your freezer door is seriously damaged, you run the risk of the cold air coming out of your appliance, while hotter air coming in from the outside of your appliance. Generally, you can tell that your freezer compressor is not working when you hear no sounds coming from within the freezer.

The compressor produces, then circulates, refrigerant through your freezer, so if your compressor has gone bad, the freezer is not freezing. A typical freezer works by compressing, condensing, and vaporizing a coolant gas in order to draw heat away from items being frozen. It works on the concept that a gas, when compressed to a liquid, releases heat. If you put dry ice in a freezer, it will keep frozen foods from melting for a while.

If you are using an older refrigerator model, this may cause excess ice to accumulate around your freezer and coiled in your cooler. If your freezer is placed in a region that is too warm or cold, your freezer will have to work harder to maintain a proper temperature, and that could lead to defects developing.

If the environment is too cold, your freezer might not receive enough running time to keep the temperature. If this happens, the freezer can remain cold, but the fridge cannot. If you keep the freezer door open for too long, food will start to thaw, so the freezer has to work harder to thaw it all back. If you are keeping your temperatures up, then you could run into freezer problems.
Other causes include parts of your freezer that are not working anymore, like evaporators or condensers. Other causes for the thawing may include a coil in the evaporator freezing, the loss of refrigerant, or a thermostat that is not set to the proper temperature, the list goes on.

In a fridge that has just an evaporator, the evaporator is located in the freezer compartment. The evaporator fan motor draws air across the (cooling) evaporator coils and circulates it through the cooler and freezer compartments. The evaporator draws heat away from the freezer, cools down its contents, and converts coolant to hot vapor. The job of this freezer is to move the air through condenser coils and distribute it across the entire device.

The purpose of a temperature-controlled thermostat is to monitor your freezers temperature, then tell your control board how much voltage to send to the fan and the condenser compressor, so that your freezer can chill. To test the evaporator fan motor, your freezer maintenance specialist will open your units doors and manipulate the door switches.

To schedule refrigerator repairs in Oklahoma City contact Appliance Repair OKC Services by calling 405-378-4566 or visit our website at https://www.okcappliance.com to also our Google business page at https://cutt.ly/YEnc8qk. Call now!


The post My Freezer Stops Freezing Then Starts Again? appeared first on Appliance Repair OKC Services | Best Appliance, Washing Machine Repair Company in Oklahoma.

Monday, September 26, 2022

Water Is Leaking From My Refrigerator?

refrigerator repair okc

Tecnician repairing refrigerator


Water Is Leaking From My Refrigerator?

Those pools of water on the kitchen floor are a sure sign your fridges ice maker water supply is leaking. When it is working, you have lots of ice in your freezer, and you have got a nice splash of fresh water from your water spigot. If you have an ice maker or a water dispenser in your fridge, it is possible the water lines feeding it are clogged or frozen.

If your fridge has water in it, it is possible you may have a leak in your ice makers dispenser. Waterline connections to your ice maker can become loose, or seals may deteriorate and break, leading to a leak, which ends with water accumulating underneath and around the fridge. If your GE fridge is leaking water onto the floor in front of the unit, it is possible the water lines are either loose or damaged.

If there is a leak coming out the rear of the fridge, and you notice it right after using the water feature if applicable, or the ice maker has just been filled, you have a leak from the water entry valve. If your fridge and freezer are not having any cooling issues, it is more than likely that ice jamming the drainage lines is causing water to spill out into the refrigerator. Water Leaking From Your Freezer to Your Refrigerator Your refrigerator is likely being caused by ice accumulation causing defrost condensation to spill out of your refrigerator instead of into your drainage tub.

Blockage occurs when food particles or other debris block your drain pipe, causing the buildup of ice and ultimately water to spill from the freezer into your refrigerator. It is not common, but sometimes, the drainage tray in the bottom of your fridge may develop cracks, which allows water to spill. While it is not very common for this pan to develop holes or cracks, this could be a reason why the water is leaking.

If this pan has holes or cracks, the water may spill from the bottom of the GE fridge, causing the evaporation. If your freezers pan is cracked or split, water will spill onto your floor before it can vaporize. Water that is draining out from your freezer drips down to your freezers bottom-side defrost pan.

Instead of the defrost water going down the drain, it gets frozen into your fridges defrost pan. It then will flood out of the vents on the next defrost cycle, and then you will see water inside your cooler. If defrost drain is clogged, the water will overflow the freezer and into refrigerator.
As mentioned, the fridges drainage/drip tray is where the water goes from defrost cycles to vaporize. Things like trash, bugs, and mold can foul up your pan, causing the water there to re-enter your refrigerator when it does not evaporate quickly enough. If your drainage pan becomes cracked or damaged, this could result in water trickling down the bottom of the appliance.

The frost pipe may get clogged with ice or debris, which will result in the water backing up and spilling into the freezer again. The tubing running across the back of your refrigerator may be coming from the rear of your fresh produce compartment, which in your fridge has a small tray, approximately 2 inches square, which captures the water dripping out of your freezer compartment. You can see the water dripping off of the refrigerators ceiling near the rear-venting area.

If you see water dripping, or collecting, along the outside of your tubing, then you have got a leak. You can search for the opening where water is leaking, whether it is in the bottom of your freezer or fridge compartment, or you can find a drainage hose within the fridge, or in the back of the refrigerator. If you see a puddle forming directly in front of your fridge, or notice that water is pouring out of the fresh produce compartment when you open it, then you are having an issue with your drain line.

If your fridge is on the right level, and your drain lines are not blocked, but you are still seeing the puddle every day, your water line may have the issue. One of the most common problems is water that is not being able to get to your drain, because the fridge is not properly leveled. If a refrigerator is either fully leveled, or is tilted just slightly forward, the water (from the condensation) might not be able to flow to the drain.

Water (from condensation) should run from the interior of the refrigerator into a drainage hole, and then to the drip pan below, where it will evaporate. A fridge will naturally spill water, but that should be collected in the pot under the fridge, where it can safely evaporate, not soaking the floor.

When the coolant cannot circulate as easily, it may pool up in a tube and cause your refrigerator to have to work harder than it needs to pump it out; this causes additional condensation to form around the coils, and that could eventually drip onto your kitchen floor, making it appear like my refrigerator is leaking. When particles of food or trash clog a drainage tube, the fridges condenser coils begin leaking water, because they are working overtime to get rid of the air that is being trapped by this buildup. Cue condensation gathering on the coils, and before long, the water was trickling down to my kitchen floor, much like a faulty refrigerator-leveling scenario.

If your refrigerator has a water filter, that may be the source of your leak. You might have a really easy issue, the pipe running across the back of your fridge that brings the water up the rear wall is probably in the wrong place, or maybe the supply lines at the rear are not secure. We shut the water off for the ice maker thinking it was the main issue, but my refrigerator is still leaking about 1/2 cup of water per day.

To schedule refrigerator repairs in Oklahoma City contact Appliance Repair OKC Services by calling 405-378-4566 or visit our website at https://www.okcappliance.com to also our Google business page at https://cutt.ly/YEnc8qk. Call now!


The post Water Is Leaking From My Refrigerator? appeared first on Appliance Repair OKC Services | Best Appliance, Washing Machine Repair Company in Oklahoma.

Friday, September 23, 2022

My Oven Door Won’t Close?

oven repair OKC

appliance repair technician repairing oven


My Oven Door Won’t Close?

If you have found your oven lights are not turning off, or that you can actually see into the oven tube itself from the sides of the doors, the more likely culprit is your stoves door latch. The door gasket in your oven may be located either inside of the door, or the interior of the oven tub itself. You can access the gasket in most ovens without having to take off your door. If the gasket in the door is smeared or otherwise raised, it will not form a seal, and it can leave the door of the oven a little loose, if the jam is severe enough.

If you have an oven door that is not closing completely, you may want to check to see if your hinges are lined up correctly. If you can flex your ovens hinges back in place, and/or tighten bolts to get the hinges lined up again, then your oven door will re-close. Before going too far into checking for springs, try greasing your hinges or re-tightening them in your jog wheel.

If needed, pull the doors out from under your stoves hinges so that you can clean off any mud or rust more efficiently. Once you replace the hinges correctly, you should be able to fully close your oven door and effectively operate the stove. You will have to take off the door of your oven on its own, which you can do by pulling it down completely, releasing the clips, and then raising it up to about three-quarters of its closing height, pulling it up.

If you do all this, but you are still having trouble getting the door closed, it is also possible that you might have to replace the hinges altogether. It is best to replace both hinges at once, so you can make sure that your door is working correctly. Especially if you have not used the stove for some time, hinges can get rusty and lead to problems with the doors opening and closing. Since the hinges are meant to last for the life of your oven, if the hinges rust early, you might also want to investigate what caused this.

A poor door lock can also result in your door latches closing, even if you leave your oven on. A bad door lock motor can prevent the oven from closing and unlocking on its own. There are two things that can repair your oven if your lock is the issue. If you are having trouble getting your oven lock off, you might first want to get your stove cleaned.

If you cannot get the oven lock to release, one of the first things you should do is look at the lock on the oven. If your cooktop or ovens doors are not lined up perfectly, this will definitely make closing them properly a challenge. To test whether your door springs are damaged or not properly aligned, you might have to pull off your lower drawer and peek under your cooker. If the hinges are misaligned, look for a bolt connecting the hinges to the doors on your oven.

Your oven might have the hinges on two lower ends of the doors, with the assembly at the sides. The next place to look is at the door jamb, the point at which the door edges meet the edges of the stove. The more you use the oven, the more mud, dirt, and crud will accumulate around the doorframe. Just like how grime and dirt build up around your door gaskets and seals, so too will it get on the hinges on your stove.

If you cannot shut your oven door completely, it may be because an object is getting in the way, the hinges are out of alignment or broken, springs are worn, or your rubber gasket has been damaged. A more serious issue might be if the hinges are damaged or misaligned, you may be able to repair it yourself by maneuvering around the chassis, but chances are that you need to call in a professional electrician who specializes in electrical appliance repairs to do this for you. I would advise against DIY repairs for these cases as glass could be broken, you might break a door, or the result may jeopardize your ovens seals and safety. While it might fix the problem for a time, it is likely to occur again if you do not have a professional come and replace your oven door or perform a more comprehensive repair.

Oven shelves and tray may also get bent, which can stop the doors closing properly, and anything that is harmed by this will need replacing. An uneven stovetop, or an angled door, may also stop your appliance closing completely. The hinges might not function perfectly because of uneven weight distribution on an unleveled oven door. If you have an oven with hinge latches, and they are engaging (or even partially engaging), then you might be having problems closing your oven right now.

If you cannot move the lock, or if it is not properly engaged/deactivated, the issue could be the oven crumbs within the locking mechanism. If your ovens hinges are especially soiled, or worse, the hinges are starting to rust, then you are going to run into problems. Dirt and muck, like cooking scraps, oily residues, and fat, can accumulate around the metal housing of the oven, where it meets the doors, and hinder or obstruct the closure mechanisms.

If you are having oven issues and need oven repair in Oklahoma City contact Appliance Repair OKC Services by calling 405-378-4566 or visit our website at https://www.okcappliance.com. Alternatively you can also visit our Google business website at https://cutt.ly/YEnc8qk.


The post My Oven Door Won’t Close? appeared first on Appliance Repair OKC Services | Best Appliance, Washing Machine Repair Company in Oklahoma.

Thursday, September 22, 2022

My Dishwasher Has No Water Coming In?

dishwasher repair OKC

appliance repair technician repairing dishwasher


My Dishwasher Has No Water Coming In?

If there is absolutely no water coming into the dishwasher, then the first obvious thing to look at is your water supply. Many dishwashers have sensors that test whether any water is present in the drainage pipe, and prevents the pipe jets from operating if it is. The valves open and shut to let water into the dishwasher from the water main of the house. When that happens, the valve cannot open and close like normal, and water cannot enter the dishwasher.

If it continues to happen, the water will leak out of the valve, even though your dishwasher is on “off”. If this switch is unconnected or broken, then the water intake valve might not open, preventing the dishwasher from getting any water. Some dishwashers have a control valve on the fill pipe of the water inlet, which may occasionally break, preventing water from entering the dishwasher. Reasons why your GE dishwasher is not filling up include the inlet valve being plugged, and water delivery issues.

The issue could have been caused by the broken door switch, which prevented my dishwasher from filling with water. If you have checked that the door is closed, but your dishwasher is not filling up with water, then a malfunctioning door switch could be causing the problem. Various problems can arise; one of the most common is the dishwasher not filling with water. If you have turned off for some reason, and you have left the switch on by accident, then your dishwasher cannot fill up with water, although the appliance will power up.

To solve a dishwasher that is not filling up, you must ensure the floating switch is turned on only when the water level is at the highest point. As the water level increases, the float also increases, triggering the float switch as water fills the dishwasher up to your desired level.

If the float switch is faulty, it will not send the electrical signal needed to begin filling the dishwasher with water. If the drainage solenoid is triggered too fast or is malfunctioning, it may activate the float switch, which results in the dishwasher not filling with sufficient water. If The Drain Solenoid is defective, then this prevents dishwashers from having the Drain Valve working, which could be causing dishwashers not getting any water.

If a water intake pipe is not connected correctly, or if the pipe has any kinks, the water might not reach the dishwasher. If the hose that delivers water is kinked, damaged, or otherwise blocked, this can stop the water from getting into a dishwasher. The cause of the water not flowing into your dishwasher may be a floating object stuck in its shut-off position, which is blocking the flow of water.

There are several reasons why water is not going into the kitchen dishwasher. The cause for the dishwasher not getting enough water can be related to faulty door indicators. A dishwasher water supply issue could be more severe than you thought. Another possible cause of the Whirlpool dishwasher not getting enough water is a problem with the water entry valve.

A bad valve could stop the water entering the machine, and this could also occur if a dishwashers water inlet valve is clogged with debris. If a valve is faulty or clogged, there are a number of problems that can occur in a dishwasher, including overflowing and low water pressure. The water intake valves job is to refill your dishwasher with an appropriate quantity of water, usually controlled by the timer, which is activated when you run the washing program, and float switch.

Used to fill the dishwasher with hot water, the water inlet valve is located behind the lower access panel. The floating valve raises as the dishwasher fills and cuts the water when it reaches a specific height — much like a floating valve on your toilet tank. The dishwashers water intake valve The lower access panel, which has the pipe connecting it to the water supply, and a pipe coming from it into the dishwashers tank.

Check the hot water valve, usually underneath the sink, and make sure that the hot water valve is fully opened. Look under your sink and examine the hot water valve, making sure it is open completely, continues Ray Brosnan. If power is not coming into a busted water intake valve, check with your multimeter if a circuit has been tripped electrically either to a floating switch, a timer/electronic controller, or to the gate switch.

It may look as though your dishwasher is running, but there is no spraying water, just because no water has been able to get to the appliance. A dishwasher not filling up with water is a pretty common problem, and it can be caused by various problems, from the obvious to the enigmatic. Now that we have a better idea about the top causes for the lack of water coming into your dishwasher, let us look at the most common ways of fixing the issue.

If you are unsure about how to declog your dishwasher, and after following these suggestions, the dishwasher is still sitting with standing water, rather than draining, then perhaps it is time to call in the professionals to evaluate the problem. If your dishwasher is not refilling water, you do not necessarily need repair or replacement — you will be happy to hear that with some hard work and elbow grease, you should be able to make your dishwasher function again and get your dishes cleaned. Most Bosch dishwashers include a small filter at the hose end, which keeps sediment from your water supply from getting into your dishwasher.

If you can’t find the cause of the dishwasher problems then call for dishwasher repair in Oklahoma City and be sure and contact Appliance Repair OKC Services by calling 405-378-4566 or visit our local website at https://www.okcappliance.com or also our Google business website at https://cli.re/Dyq1ME. Call now!


The post My Dishwasher Has No Water Coming In? appeared first on Appliance Repair OKC Services | Best Appliance, Washing Machine Repair Company in Oklahoma.

Wednesday, September 21, 2022

My Ice Maker Has Completely Stopped Making Ice?

ice maker repair okc


My Ice Maker Has Completely Stopped Making Ice?

Some GE fridges have a sensor or a timer which stops the ice maker from working if you need to change your water filter. A clogged water filter may limit water flowing to the ice and water dispensers, preventing the ice maker from working correctly. If a water delivery valve has become corroded, worn, or just stuck, this will stop the ice maker from working.

The water supply lines can be checked at where the water supply lines attach to the rear of the cooler, as well as the location of where they attach to the ice makers within the cooler. Make sure that the water supply line is not bent behind or under the refrigerator (a 1/4-inch copper tube is far better at preventing bends than a plastic supply line).

If you notice the water stream is faint, inspect the water supply lines to look for kinks, clogging, or damage that may be impacting flow. Or, if there is anything unpleasant coming from a clog, then the ice that is coming out of it might not be very pleasant to taste. This could be due to older ice being stuck to mold, or simply chunks of ice, which is why the ice comes out broken or not whole.

If the whole batch of ice is stuck, then new ice cannot form, and water lines may also cause problems as they cannot fill up the test. If no ice is coming out, you will have to stop pressing on the dispenser and inspect it for blockage. Look for the ice inside the ice mold, and check to see that the motor turning the ice-ejection arms is working. To remove the ice from the ejector arm, gently scrape away the ejector arm using a plastic knife.

Lift, then lower, the arm or the actuation cable; wait ten seconds to fill the tray with water. To vary the amount of water that fills the ice-cube tray each cycle, remove the lid of the ice-maker first. The water fill valve is turned on for several seconds to refill the ice mold once more, and the cycle repeats.

If the water fill valve has enough pressure and is receiving power, but the ice mold is not filling up with water to produce ice, change the water inlet valve. If there is more than just ice on top of the ice makers fill pipe, you may have a large amount of home water pressure needed to ensure that the water flows to the ice maker, or you may have mud or defects on the water inlet valve. If the water inlet valve is faulty, or does not receive sufficient pressure, then the ice maker cannot function correctly.

If your ice maker is not producing ice, or the ice is not large enough or is misshapen, your water inlet pipe might be a problem. If my ice maker is broken completely – meaning that the tray is missing any ice – problems with the water flow could be the cause. A blockage, leak, or damage to a water supply line can make your ice maker shut down automatically or otherwise stop working. A clogged water filter, bent hoses, or defective water intake valves may limit water flow into the ice maker.

Because the water must pass through the filter, water cannot flow through when it is filled with debris. Telltale signs of a dirty water filter include changes in ice or water flavor, as well as slower water from your refrigerators water dispenser. In some cases, a fridge might even be designed to stop dispensing ice or water once the filter is past the “use by” date, which can make it appear as though the refrigerators ice machine is broken.

Be sure to check out your fridges water filter replacement instructions specifically for this, just to make sure. To make sure that you get clean ice and an uninterrupted stream of water, you should replace your freezers water filter according to manufacturer recommendations. The changes will ensure you never have ice contaminated or of low quality, and you will never have to drink water from the refrigerator that is unsafe or tastes foul.

This is a safety feature that makes sure the ice and water are safe for consumption. The Door Switch turns off the ice and water dispensers when you open the refrigerator door. Locate the water shutoff valve behind the refrigerator or below the sink, shut it off, unscrew the copper tubing behind the refrigerator, place the copper tubing into a bucket, open the valve, and see if the water comes out. Make sure that your water service is connected correctly to your cold water service, and that the water shut-off valve is completely opened.

A faulty faucet valve–the small piece of equipment that attaches your ice makers water supply line to your water line–can create problems in which your ice makers supply line attaches to your water line. If the ice maker is not making ice, but you see the ice-ejection arm move, and you hear a whirring sound that lasts for 10 seconds or so, then the water valve is asking for water, which is not coming. If your thermostat is set to very low, your whole ice maker can take an impact, freezing the water before it gets to the molds to create the ice.

Warmer water will melt away any ice bits that are frozen, adding no chemicals to the ice makers trays — making it safer to start making ice right back at the maker assembly. A bit of warm water (with a towel on hand for cleaning) melts any ice clogs.

Remove your ice chest and break any ice that is stuck together using your hands. If your ice bin is full, it is expected that the bin will push the filling bars upwards, preventing new ice being created. Eventually, anything that is being filtered from the tap water before becoming ice eventually gets trapped in the filter.

When replacing a water filter, you will have to flush out the system before it works properly. A blockage in a pipe or closed valve can easily cause an unexpected ice shortage, as long as new ice cannot be made.

To schedule ice maker repairs in Oklahoma City contact Appliance Repair OKC Services by calling 405-378-4566 or visit our website at https://www.okcappliance.com to also our Google business page at https://cutt.ly/YEnc8qk. Call now!


The post My Ice Maker Has Completely Stopped Making Ice? appeared first on Appliance Repair OKC Services | Best Appliance, Washing Machine Repair Company in Oklahoma.

Tuesday, September 20, 2022

My Freezer Has Stopped Working And Won’t Turn On?

freezer repairs okc

freezer repair Oklahoma City


My Freezer Has Stopped Working And Won’t Turn On?

If your freezer stops working, or is not freezing, it could have an issue with your thermostat, which controls the temperature. If your freezer has stopped working and is not freezing, there may be an issue with the starter capacitor. If your freezer is not freezing your food, that may mean that you have an issue with the compressors startup relay. If you do not hear your compressor clicking, and the freezer is not cooling, there could be something wrong with your compressor or the compressor startup components.

The compressor produces, and then circulates, refrigerant through the freezer, so if it is bad, then the freezer is not freezing. What this means is that, if your starter relay is bad, the compressor at best may run intermittently — or, more likely, at all, meaning the freezer will not freeze.

The compressors start relay is also known as a controller, and it works by feeding electricity to the compressors starter circuitry so that your freezer starts up. The thermostat for the temperature control also has electrical contacts which feed electricity into the compressor circuitry when your freezer needs to begin cooling.
The temperature control thermostat sends power to different parts of the freezer, and if it is not working properly, the freezer is not cooling. A faulty thermostat will not send electricity to your refrigeration system, and if that is the case, the freezer will not cool. If broken, a thermostat will not be able to read temperatures accurately, telling your appliance exactly how cold the freezer is. The sealed system might leak, and not have enough freon to keep the appliance at its desired temperature.

If your freezer door is still not sealing properly after cleaning, you may need to replace your freezer seals or realign your freezer doors. In most cases, fixing the problem causing your frost accumulation, and letting your freezer run a couple defrost cycles, will remove excess ice, and your appliance will return to normal. Sometimes, manual defrost will return your freezer to normal.

This way, your fridge and freezer are reset completely, potentially solving several common problems. If you are seeing an error code, and are sure that your fridge and freezer are working correctly, you can probably get rid of the code by resetting the fridge or freezer. If your fridge and freezer are able to get the temperatures you want without issue, you are done with the reset and you fixed any issues there were to begin with. For instance, if you notice your fridge and freezer are not getting to the correct temperature, then you might have to reset them and reprogram the temperatures.

If you are looking for ways to reset your freezer and refrigerator, one of the first things you will want to do is disconnect your appliances. You might need access to the circuit breaker as well, depending on what happens once you unplug your freezer and fridge. Make sure to connect a number of power strips, all of them into the working socket, in order to power the fridge and freezer back up.

Pull your fridge out of the wall slowly, and then power it down. After you have disconnected your fridge, use the control panel located within your fridge to shut down both the fridge and the freezer.
Make sure that the appliances controls are set to 0degF (18degC) for the freezer and 37degF (3degC) for the fridge. Your fridge and freezer controls will differ depending on the brand and model of your fridge, but experts suggest keeping the temperature in the fridge at about 40degF.

The purpose of the temperature-controlled thermostat is to monitor your freezers temperature, then tell the control board how much electricity to send to the fan and the evaporator compressor to ensure that your fridge freezes. The evaporator fan motor pulls air across the vape coils and circulates it through your freezer, if it does not do its job, then your freezer is not cooling.

When your freezer fan is running, this means that your refrigerators defrost timer and cooling controls are both set to COLD. A cold control stuck in its Open setting, or the defrost timer stuck in Defrost, will also prevent freezer from running. The inside contacts on the defrost timer may be bad, which causes the defrost timer to stop when it is defrost, meaning that the compressor is not being signaled to defrost air inside the freezer. Most of the time, the compressor fan should be operating as well, while the freezer fan is operating.

The coil is the most difficult working part on a fridge, it is part of the process of taking hot gases and turning them into cool liquids, which makes a refrigerator cool. If your coils are clogged, disconnect your cooler (empty your cooler first) and then clean your coils. If you have cleaned, defrosted, and sealed-checked your refrigerator, and everything seems to be working, try pulling the appliance from the wall and vaccinating the coils using the crevice tool or brush attachment.

If you installed a new starter relay unit, power back the freezer and test to see if it is freezing now. Resetting it also can sometimes fix other problems internally, such as malfunctioning timer cycles, so this is one of the first things you should try if you think that something seems off about your fridge. Another reason why your Frigidaire fridge may not work as expected is if your thermostat for the temperature controls has stopped working.

To schedule refrigerator repairs in Oklahoma City contact Appliance Repair OKC Services by calling 405-378-4566 or visit our website at https://www.okcappliance.com to also our Google business page at https://cutt.ly/YEnc8qk. Call now!


The post My Freezer Has Stopped Working And Won’t Turn On? appeared first on Appliance Repair OKC Services | Best Appliance, Washing Machine Repair Company in Oklahoma.

Monday, September 19, 2022

My Refrigerator Went Off And Now Won’t Start Again?

Refrigerator Repair Oklahoma City

Appliance Repair Technician Checking Refrigerator With Flashlight At Home


My Refrigerator Went Off And Now Won’t Start Again?

Once it is done, you can re-plug the fridge back into a wall outlet. You can disconnect the refrigerator, then check for the overloaded relays and overloaded power supply with the help of a multimeter. The overload relay is the protective device used on your fridges compressor circuit.

Once you are done replacing it, power the fridge back on, and see if the issue has been solved. If you actually replaced your fan or one part of the fan motor, then you need to turn the fridge back on and test if the problem is now solved.

If your fridge starts again after unplugging, it is very likely the compressor is defective and needs a professional to replace it. Test your compressor by disconnecting your refrigerator for approximately 2 hours, and plugging it back in.

Once it is done, you can re-plug the fridge back into a wall outlet. You can disconnect the refrigerator, then check for the overloaded relays and overloaded power supply with the help of a multimeter. The overload relay is the protective device used on your fridges compressor circuit.

The chiller is the temperature-control switch which supplies electricity to the compressor and fan circuits on the refrigerator. When the refrigerator fan is running, that means that both the defrost timer and cold control on the refrigerator are set to COOL. The purpose of a fan is to move heat away from condenser coils, and when a fan is malfunctioning, your fridge is not cooling down fast enough, and will continue running for longer than necessary.

If either one of your fans is failing, or if your compressor is off, the fridge is going to provide very little or no cooling. If your appliances set temperature is too low, you do not have a chance of getting the humidity out of the air while your appliance is cooling. When levels of adequate cooling agents get insufficient, your refrigerator might not function as it should.

If you adjust your refrigerators thermostat for more cold air, the fridges compressor will activate, forcing less air to flow through the cooling fan. If you do not correctly adjust the thermostat, your refrigerator shuts down, then turns back on as temperatures rise. If the refrigerator is turning off, and you can make it work by turning on and off the refrigerator using the thermostat knob, the thermostat might be the problem.

If your fridge does not start, and no fans are running, then you may have a faulty control. If your fridge does not get any cooling, it is the electrical controls that are nearly always causing the problem – it is not a demand for more refrigerant. Instead, a refrigerator might have dirty condenser coils, a door that does not close tight, or defective temperature controls. If the refrigerators compartment is freezing the contents, even with the cooling control set at the lowest setting, it is very likely the fault is in your fridges temperature sensing unit, or in its refrigeration controls.

Even if your refrigerator is otherwise working properly, the cool air from within your cooler can escape if a door seal–also called the door gasket–is not working properly. Door gaskets for fridges and freezers are another possible cause for the refrigerator to not stop working. After you have disconnected your refrigerator, use the control panel located within the fridge to shut down both the fridge and freezer. Unplug your refrigerator before you clean out the coils, fans, and compressor.

Remove the rear access panel from your fridge, then find the fan — it will be near the compressor. Plug in the fridge, and ensure that the condenser fan is running while the compressor is running. Normally, when your thermostat calls for extra cooling, your fridges condenser fan and compressor, located near the floor in the back of most refrigerators, will turn on.

When you turn the refrigerator on, the thermostat sends a signal to the starter capacitor, which activates the compressor and starts the fridges cooling cycle. A faulty thermostat cannot transmit start signals to the start capacitor, and the refrigerator does not start.

When the thermostat for malfunctioning frost shutdown becomes faulty, it does not work properly, your fridge keeps running. The defrost timer might fail to trigger a Whirlpool fridge to restart after completing the defrost cycle.
One of the most common causes for the fridge running continuously is the faulty defrost timer. Several factors can cause a fridge to temporarily run continuously. If your circuit breaker is tripped, or your fuse is blown, it is preventing power from reaching your fridge.

If you can hear the compressor running, but the refrigerator is not cooling, then it is most likely that a freeze-clogged evaporator coil is to blame, or that a plugged-in or broken evaporator fan is the issue. If the compressor seems to be running, or is making some sort of buzzing or acoustic sound, but your refrigerator is not cooling at all, it is time to call in the service professionals. A simple way to check your compressor to see if it is overheating and needs replacing is to disconnect your refrigerator for two hours and let the compressor have a chance to cool.

If you spin your refrigerator upside down and power it up, your refrigerator might still work a little, but you are at high risk of actually damaging the compressor in your refrigerator and breaking your appliance. By leaving it sitting there for several hours, you can safely power it back on again, with no fear of damaging it. You might want to have this repaired before your whole fridge stops working entirely. After the refrigerators compressor has been running for eight or 10 hours in a certain time frame, a defrost timer kicks off the defrost cycle, shutting the compressor down, in effect giving it a moment to defrost.

To schedule refrigerator repairs in Oklahoma City contact Appliance Repair OKC Services by calling 405-378-4566 or visit our website at https://www.okcappliance.com to also our Google business page at https://cutt.ly/YEnc8qk. Call now!


The post My Refrigerator Went Off And Now Won’t Start Again? appeared first on Appliance Repair OKC Services | Best Appliance, Washing Machine Repair Company in Oklahoma.

Friday, September 16, 2022

Bottom Oven Not Working But Top Is?

Oven Repair OKC

Smiling Repairman Repairing Oven On Kitchen Worktop In Front Of Woman


Bottom Oven Not Working But Top Is?

Once you have checked your basics, if the stove is still malfunctioning, but your oven is, then it is time to look at your stove itself. If the oven is still not heating up properly, you can use an ohmmeter to check if your sensors are working. If your oven is still not heating, check your thermostat and the switch on it. Give your oven time to warm up, then check to see if the oven is set at the right temperature, or needs adjustment.

If your gas oven is not heating properly (or at all), first check your igniter. The gas ignitor is the most common reason why your stovetop is not working, even when it is. If the gas igniter is working, the problem may be a plugged gas element or burner. If they are, clean them, and then place them back in the gas stove, and see if this fixes this issue.

If both your gas oven and your gas burner stopped working, then it is more than likely that your gas lines are faulty, which would require a professional to fix.

Remove all the racks from your oven, as well as the bottom pan from the gas stove, so that you can get to your gas burners and the gas flare. The heating elements are typically located within the oven, and you can access the igniter from below. An electric oven has two elements, one at the top for cooking, and one at the bottom for broiling. Most electric ovens use both a bake element and broiler element during a baking cycle, with the bake element doing 90% of the heating.

If the bake element is malfunctioning, your oven might not achieve your desired temperature, or it might take more time to achieve this temperature, and your food usually ends up burned at the very top. When the oven has reached its desired temperature, the ovens control panel turns off the power supply to the element. An electronic control board operates the safety valve of an oven on a gas range, and the broiler/searing element on an electric range. The thermostat for controlling the oven is located on the main control panel and controls both the bake and broil elements.

The oven control thermostat is the temperature control switch, and will therefore have contacts which provide the electrical power for those elements. The purpose of a temperature controlled thermostat is to monitor the temperature within your gas stove, then turn the heating up and down as soon as the stove gets too cold. The temperature sensor for the oven can be found within the oven, usually located near the broiler element. Typically, your ovens sensor is located towards the top-most portion of the rear portion of the oven.

With most modern ovens, there is a digital sensor; before removing it and replacing it, check first that all of the wiring is connected correctly, so that it is not what is causing the issue. Before replacing the sensor that you think is bad, be sure to first inspect your stovetop elements and wiring. Just do not do any repairs requiring replacement of elements while the oven is still under warranty, because doing so is bound to void your warranty. When your oven is malfunctioning, replacing your furnaces heating elements may be the solution you are looking for.

If it is not glowing orange, or only a portion is, this likely means that the element is burned and needs replacing. If your cookers burners are turning on, but your stovetop is not heating up, your issue may be with the spark plug being dirty or malfunctioning. The fuse box can be seen inside the oven, or you might need to take off the bottom panel of the stove to get at it. An oven that is not warming up is typically a fault with either the igniter (for gas stoves) or heating elements (for electric stoves).

If a sensor or thermostat is defective, your oven might simply not light up. A blown thermal fuse will cut off the ovens power, and will result in an unusable oven. If a circuit breaker is tripped or a fuse is blown, reset the circuit breaker or replace the fuse, then try turning the oven back on.
Turn the oven power off (set breaker to OFF) before performing a replacement. If the oven is too dirty to function correctly, it might be necessary to replace the appliance. As long as your oven is beyond its warranty, you should not let this repair scare you: You do not have to be an electrician to change a heating element. If you do install a new element, but your oven is still malfunctioning, it is possible that you have a wiring problem.

You can probably still use your oven, but the heating elements are close to the end of their useful lives. If your baking or broiling elements are not receiving power, then you may want to test continuity on appropriate contacts on your ovens thermostat using a multimeter.

Check the baking element for signs of heat, if it is still cold, it might be faulty. Turn oven to 400 degrees F. and while the oven is warming, watch for elements. Turn the temperature down to 300 degrees F. and in 10 or 15 minutes, check an oven thermometer, once the oven is completely heated.

If you are having oven issues and need oven repair in Oklahoma City contact Appliance Repair OKC Services by calling 405-378-4566 or visit our website at https://www.okcappliance.com. Alternatively you can also visit our Google business website at https://cutt.ly/YEnc8qk.


The post Bottom Oven Not Working But Top Is? appeared first on Appliance Repair OKC Services | Best Appliance, Washing Machine Repair Company in Oklahoma.

Thursday, September 15, 2022

My Dishwasher Stopped Filling With Water?

dishwasher repair service okc

Smiling Woman Behind Technician Repairing Dishwasher In Kitchen


My Dishwasher Stopped Filling With Water?

If there is absolutely no water coming into the dishwasher, then the first obvious thing to look at is your water supply. If the dishwasher is not still filled up with water, then you need to have a trained professional come out and check the dishwasher. If it is turned off for some reason, and you leave it on by mistake, your dishwasher cannot fill with water, even though the appliance is powered on. If you have checked that the door is closed, but the dishwasher is not filling up with water, a malfunctioning door switch may be to blame.

To solve a problem where a dishwasher is not filling up, you will want to ensure the floating switch is turned on only when the water level is at the highest point. As the water level increases, the float also increases, triggering the float switch as water fills the dishwasher up to your desired level. When the water is filled in the dishwasher, a float is raised, which makes sure the correct amount of water is filled in your dishwasher. The water filling into the dishwasher raises the float, and when it reaches a certain level, that acts as a trigger to float the switch.

The water intake valves job is to fill your dishwasher with an appropriate quantity of water, and is typically controlled by the timer, which is activated when you run the washing program, and by the float switch. If the float is working, but the water inlet valve is not, then it is very possible the float switch is the culprit, and that is why your dishwasher is buzzing, but is not filled.

It could be that your water supply, the water inlet valve, and the float switch are all working properly, and that your dishwasher has another kind of problem. Some dishwashers have a control valve on the fill pipe for the water inlet, which may sometimes go off and prevent the dishwasher from getting any water. When the water inlet valve becomes defective, or if a screen within it becomes clogged, it may be unable to open, and the dishwasher may not refill with water.

If a hose that is connected to the water inlet is not connected correctly, or there are any kinks in the pipe, the water might not reach your dishwasher. If the water intake hose for a dishwasher has flood-resistant hose, that can cause problems as well. If your water inlet line is bent, damaged, or otherwise blocked, this can stop the water flowing to your dishwasher. The cause of the water not flowing into your dishwasher may be a floating object stuck in its shut-off position, which is blocking the flow of water.

There are several reasons why water is not going into the kitchen dishwasher. The problem of the dishwasher not getting any water is probably more severe than you thought. The reason your dishwasher is not getting enough water could have something to do with faulty door indicators. Another possible reason why your Whirlpool dishwasher is not getting enough water is a problem with the entry valve.
If the drainage solenoid is actuated too fast or is malfunctioning, it may cause float switch activation, which will cause a dishwasher to not fill with enough water.

If The Drain Solenoid is defective, then this prevents dishwashers from having the Drain Valve working, which could be causing dishwashers not getting any water. If the drain solenoid stops working correctly, then your dishwasher will not work either, and it may be impossible for the dishwasher to get any water.

If this continues to occur, water will leak out of the valve even though the dishwasher is on the “off” setting. The purpose of a relief valve is to maintain pressure and prevent messy water from backing up in each dishwasher from the sink after draining.

Once you have got your floating part back in place and your lid back on, start the dishwasher and see if the dishwasher is full right now. Next, you will want to adjust your Overfill Protection Float to fit properly inside the dishwasher.

Usually, the float is located on the front right-hand side of the dishwasher tank. The float raises as the dishwasher fills with water, and cuts the water off once it reaches a certain height — much like a toilet tank float. When water fills a dishwasher during the washing cycle, a little plastic part floats upward.

Many dishwashers have sensors that test whether water is present in the drainage pipe, and prevent a pipe jet from operating if it is. Water Inlet Valve The lower control panel in a dishwasher has a hose connecting it to a water supply, and also has a hose coming from it into the dishwashers tank.

As a result, the floating switch is not going to disconnect, preventing the water inlet valve from opening and allowing water to enter your dishwasher. Reasons why your GE dishwasher is not filling up include the inlet valve being clogged and the water supply being an issue. If the valve is faulty or clogged, you are going to have a number of problems with your dishwasher, including overflowing and low water pressure. In this situation, you need to have the valve replaced in order to get proper water flow back into your dishwasher.

When the drainage pipe is lowered too far, the water will start to spit. The first thing that you will want to do is to turn off the dishwashers water faucet below the sink. If your dishwasher is not filling up with water, you do not necessarily need repair or replacement — you will be happy to hear that with some hard work and elbow grease, you should be able to get the dishwasher working again, and your dishes cleaned.

If you can’t find the cause of the dishwasher problems then call for dishwasher repair in Oklahoma City and be sure and contact Appliance Repair OKC Services by calling 405-378-4566 or visit our local website at https://www.okcappliance.com or also our Google business website at https://cli.re/Dyq1ME. Call now!


The post My Dishwasher Stopped Filling With Water? appeared first on Appliance Repair OKC Services | Best Appliance, Washing Machine Repair Company in Oklahoma.