Monday, January 31, 2022

My Refrigerator Is Not Cooling And Is Too Warm?

Refrigerator Repair Oklahoma City

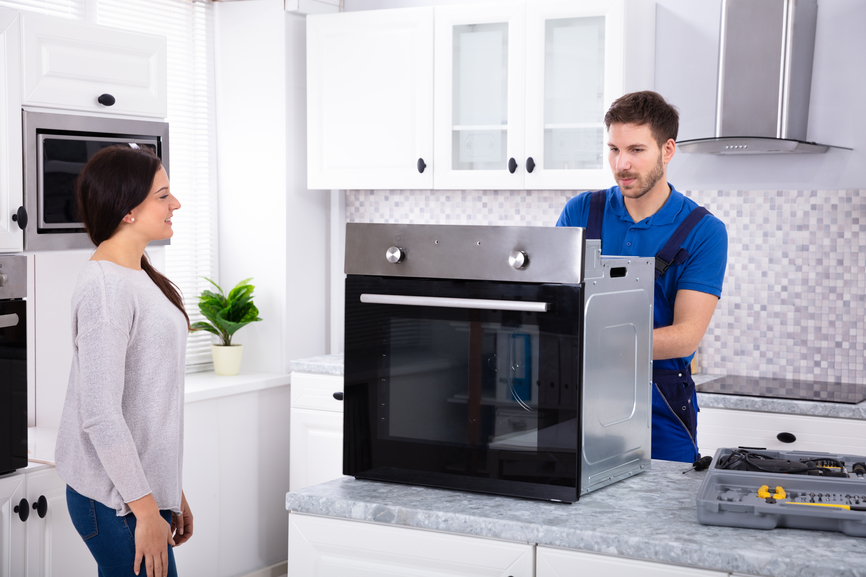
    Appliance Repair Technician Checking Refrigerator With Flashlight At Home


My Refrigerator Is Not Cooling And Is Too Warm?

Both sides of the LG refrigerator are cooled by cold air blown onto the evaporator coils by a fan, which then circulates the air in both directions. A faulty evaporator fan motor will slowly cause cooling to stop on the cooling side due to lack of circulation. If the start relay is faulty, the compressor may run intermittently or not at all and the refrigerator will not cool enough. If the refrigerator is not cooling enough, the temperature control thermostat may be defective.

However, the thermostat dials inside the refrigerator may be hit by milk cartons or other items that may change the set temperature. It seems obvious, but sometimes the thermostat dial is set too low, causing the temperature in the refrigerator to rise. Thus, if your defrost or antifreeze function is not working, your refrigerator may overheat.

If the freezer is cold and the refrigerator is hot, the refrigerator and freezer cooling parts may not be working properly. If you can hear the compressor running but the refrigerator is not cooling, the problem is most likely frost-clogged evaporator coils or a blocked or broken evaporator fan. If the freezer fan is still running but the refrigerator is not cooling, the compressor or compressor start relay may be damaged. If the refrigerator is not cold enough, the compressor may not start.

There is a start capacitor that gives the compressor a boost to start. If the start relay is faulty, the compressor will not start and therefore the refrigerator will not start the refrigeration process. If the temperature gets too high or too low, the control board switches the compressor on or off accordingly.

If the compressor and fans are running normally but not running often enough or long enough to keep the fresh food drawers and freezer at the correct temperature, the refrigeration control unit may be defective or not calibrated. If the refrigerator is not cold enough, the problem may be with the condenser fan motor. If the condenser fan is not working properly, the refrigerator temperature may rise and the compressor may overheat. The condenser fan motor is responsible for circulating cold air, and if neither the refrigerator nor the freezer is cooling properly, this is probably the cause.

This will cause problems with the refrigerator compressor, which circulates refrigerant through the system. If the cooling fan and compressor are running but the refrigerator or freezer is not cooling properly, check for problems with the airflow or defrost system. Typically, the refrigerator condenser fan and compressor, located near the back floor of most refrigerators, kick in when the thermostat needs extra cooling. However, if your refrigerator thinks the door is always open, the condenser won’t be able to run long enough to keep it cold.

Most refrigerators make all the cold air for the freezer, so the refrigerator is kept cold by the vent between the refrigerator and freezer. However, if the vents are covered with ice cubes or food stored on the sides, it can seriously affect the refrigerator’s ability to circulate cold air and keep the sides of the refrigerator cool. If the vents on both sides are blocked, your refrigerator will not cool sufficiently, and your freezer may freeze over time. Frost in the freezer can also block vents, reducing or preventing cold air from entering the refrigerator.

If frost builds up somewhere in your system, the freezer should continue to work properly, but the refrigerator will heat up. If your freezer starts to form ice in the wrong places, such as vents or evaporator coils, it could mean that the freezer is at the right temperature and the refrigerator is too hot. The most common reason why the refrigerator is not cooling and the freezer is working properly is a problem with the defrost system. The defrost system includes several components; if any of these faults are not working, the refrigerator may not cool even though the freezer is still running.

When your refrigerator is not cold enough, not only do you have to worry about food spoiling, but you also waste energy as your refrigerator has to constantly work overtime. So, if you’ve done your best to fix the problem, but your refrigerator is still too hot, it might be time to call a refrigerator repairman. While there are some issues that you can try to fix yourself, if your refrigerator still doesn’t keep food fresh enough, we recommend getting it repaired right away. Here are some refrigerator troubleshooting tips to help you focus on the problem if you notice your refrigerator is not cooling.

If you open the refrigerator and find sour milk or warm wine, it should be obvious that your refrigerator is not cooling well enough. From room temperature steaks to warm milk, clear signs that the fridge isn’t cooling are bad news. Luckily, it is possible to fix a hot refrigerator without requiring repairs. By following a few simple troubleshooting steps, you can usually find what is causing your refrigerator to heat up and fix it.

When your refrigerator stops maintaining a cold temperature, you have a problem. You may notice that your cold drinks aren’t as cold anymore, or even that your food spoils faster… but the fridge is still fresh inside. This is why if your refrigerator is not properly insulated, it may appear that the refrigerator is not completely cooled.

Even if the rest of the refrigerator is working properly, if the magnetic seals on the doors, also called “door seals”, are faulty, cold air can escape from the refrigerator. Over time, coils that are not in a sealed box can become covered in dust, hair, or pet hair, reducing their ability to keep the air in the refrigerator cool. As the coils become fouled, the refrigerator becomes less efficient, making cooling more difficult.

If the coil is dirty enough, the appliance will never be cold enough and will not be able to cool the inside of the refrigerator to the correct temperature. But if something goes wrong, too much frost can form on the coils, which reduces the flow of cold air into the refrigerator. There may be some cooling due to frost on the coil, but no airflow over the coil. This frost must be removed by manual or automatic defrosting (in refrigerators without frost) for proper cooling in the refrigerator.

The fan circulates cold air from the freezer to other compartments inside the refrigerator. The evaporator fan is located in the freezer and circulates cold air throughout the refrigerator when the compressor is running. The evaporator fan motor is located in the freezer behind the evaporator cover and is used to circulate cold air throughout the refrigerator when the compressor is running.

To schedule refrigerator repair services in Oklahoma City contact Appliance Repair OKC Services by calling 405-378-4566. You can also visit our website at https://www.okcappliance.com or also our Google business website at https://cutt.ly/YEnc8qk. Call for service now!


The post My Refrigerator Is Not Cooling And Is Too Warm? appeared first on Appliance Repair OKC Services | Best Appliance, Washing Machine Repair Company in Oklahoma.

Friday, January 28, 2022

My Oven Isn’t Heating Up?

Oven Repair Oklahoma City

Smiling Repairman Repairing Oven On Kitchen Worktop In Front Of Woman


My Oven Isn’t Heating Up?

Like most appliances, gas ovens have thermostats that keep the oven at a constant temperature by adjusting the size of the flame on the burner accordingly. A thermostat measures the temperature inside the oven cavity by turning resistance on and off to maintain the desired temperature. Likewise, an oven thermometer can help you determine if your oven is frequently below or above the set temperature.

A malfunctioning temperature sensor can be another reason why KitchenAid oven temperatures are inaccurate during cooking. This can be caused by a faulty temperature sensor or the temperature sensor touching the oven walls. If you notice overheating, it’s likely that the sensor is touching the oven walls, as the sensor collects much more heat than the air inside the oven is warm.

If your oven is still not heating, check the thermostat and switches. The oven thermostat records these changes, instructing the oven to increase or decrease the temperature to maintain the desired setting.

Your oven may take 15 minutes to reach the desired temperature. Raise the temperature to 300 degrees F and check the thermometer after the oven is fully heated for 10-15 minutes. Give it time to heat up and check if your oven is set to the correct temperature or needs adjustment.

The igniter ignites the gas from the burner and the oven begins to heat up. If the igniter looks normal, you can turn the power back on, set the oven to heat, and watch the igniter at the start of the heat cycle. The igniter may be visible in the oven or it may be necessary to remove the bottom panel of the oven to access it.

Just remember to always unplug your oven before doing anything to its circuitry or wiring. Even if the oven is heated by gas, the timer and other components require electricity to operate, and when the switch is activated, the oven refuses to heat up. When I tried to turn on the device, I got power; however, it does not heat up. If I turn the oven on to preheat to 350 degrees it shows preheat at 350 for a second or two but then goes up to 100 degrees but won’t turn on or heat up at all.

This seems like an obvious problem, but anyone might be in a hurry and not notice that one of your oven’s heating elements won’t turn on. If the food doesn’t come out as expected, check that both the grill and the oven elements actually get hot when you turn on the oven.

If the grill and stove are working but the oven is not heating up, there may be a faulty igniter, which is the most common cause of oven failure. If the oven burners ignite but the oven does not heat up, the problem may be a dirty or defective igniter. You can solve the problem with a thermal fuse when the electric oven overheats (but this is only found in some models).

If it still doesn’t heat up properly, you can use an ohmmeter to make sure the sensor is working. The furnace control turns off the voltage on the specified element as soon as the selected temperature is reached. The oven control panel regulates the first leg, and the second can be adjusted both on command and by being constantly present on the cooking and grilling elements).

This process varies by oven model, but usually only requires disconnecting the range from the power source, removing a few screws, disconnecting the harness quick disconnect, connecting a new igniter, and tightening everything up again.

Depending on how often you use your oven and how old it is, the heating relays may burn out after a while. Another issue that can cause the oven to heat up incorrectly is faulty heat relays.

When the oven doesn’t heat, the most likely problem is a faulty heating element. The elements of an electric oven are the parts that generate heat and usually glow red when turned on. If you’re installing new elements and the oven still doesn’t work, there may be an electrical problem.

If you’ve replaced a defective element and the oven still doesn’t heat, the problem is electrical. As for the more serious problem of your gas oven not heating at all, you may have a damaged oven burner or ignition electrode. You should hear a click and the gas light up as you set the oven temperature.

If the oven is not producing heat, the thermostat or switch may be turned off. The thermostat controls the temperature of the oven and is similar to the thermostat in your home. If you notice that your electric oven does not heat up to the right temperature, and food comes out undercooked, this is largely caused by a faulty electric oven thermostat.

So when your oven stops heating properly (or never heats up properly), it can be a real shame. If you’ve been successfully using the same gas oven for months or years and are suddenly having trouble cooking, the heating element, digital controls, or other oven components may be to blame. Let’s take a look at some of the most common problems that can cause your electric oven not to heat up even though it’s still on. The temperature sensor and heating elements may be the most common suspects, but they are not the only things that can cause your electric oven to stop heating up.

All of these problems are related to an electrical problem specific to your oven. Finally, the most difficult and elusive potential problem is that the oven’s internal wiring is damaged or malfunctioning in some way. Perhaps a fuse has blown, a wiring or control chip has become disconnected, or a panel inside the oven has stopped working properly.

In most cases, when an oven fails, this is an indication of a defective part. If you turn on your gas stove and it doesn’t heat, there could be a number of reasons why you can fix the problem yourself without calling for service. If the suggested troubleshooting and repairs above fail, your oven may have blown an internal fuse and may need a professional recalibration to heat properly, or it may be a faulty relay switch or a damaged control board. You can then do a DIY repair or ask an expert to figure out the oven’s circuit and get it working again.

Before you jump to the conclusion that it’s time to make a costly service call or replace your old oven, make sure you don’t run into any of these three common oven problems that have a simple fix. We’ll look at some common causes of oven temperature issues so you can fix the problem quickly. While you may need to hire a professional in the long run, we can help you resolve some of the common reasons why an electric or gas oven might not heat up properly.

If you have tried all things you know of to solve your oven troubles and need oven repair in Oklahoma City contact Appliance Repair OKC Services by calling 405-378-4566 or you can also visit our website at https://www.okcappliance.com or alternatively our Google business website at https://cutt.ly/YEnc8qk. Call now!


The post My Oven Isn’t Heating Up? appeared first on Appliance Repair OKC Services | Best Appliance, Washing Machine Repair Company in Oklahoma.

Thursday, January 27, 2022

My Washing Machine Isn’t Pumping Out Water During Spin Cycle?

washer repair okc

Technician checking washing machine with digital multimeter in kitchen


My Washing Machine Isn’T Pumping Out Water During Spin Cycle?

There are few more heartbreaking problems with a device than opening a washing machine after a cycle should have ended and finding your clothes still in the tub of water. We know how annoying it can be when you go to the laundry to transfer clothes from the washer to the dryer, but water remains in the washer tub even after the cycle is complete. When the water in your washing machine won’t drain, it’s a drain problem, but it can be caused by several other problems. If your washer fills with water but doesn’t shake, the problem is most likely a faulty lid switch, a broken belt, or a motor problem.

A broken drive belt or slipping off a pulley can cause the washer to shake during the wash cycle, however, despite the sound of the motor running, the drum remains stationary during the spin cycle. If the washer drive belt breaks or falls off the wheel, the washer may still shake and rattle, but the drum will not spin. Then check the tab on the lid by pressing the lid switch; if it is broken, the washing machine may stop during the drain cycle.

The water pump may be broken or clogged with a small piece of clothing, or the controls may be broken; Call an appliance repair technician. If you’ve drained your washing machine, inspected the hose, pump, and lid switch, and still can’t pinpoint the problem, you may need to seek help from a professional plumber or washing machine service technician. If the washing machine does not spin, this may indicate a malfunction that requires the intervention of a repairman, but often a simple do-it-yourself solution can start the washing machine again.

Our washing machine repair technicians will resolve any issues with damaged appliances. If you are having trouble spinning your washing machine or have any other questions, please contact Appliance Repair OKC Services at 405-378-4566. More serious problems, such as water pump, engine or transmission failure, can be identified by our appliance repair services.

It’s not that hard to get inside the washing machine to service the motor, and that might be what you need to do if it’s not spinning and draining water properly. Removing the Lid If the switch is working properly and you are having trouble draining and rotating at the same time, you may have a top loading machine where the pump and motor are mechanically coupled.

Once you have access to the drain pump, you should first disconnect the hose to check for blockages. To test the drain pump, you’ll need to disconnect the drain hose (if you haven’t already), then unplug the washer from the power and water sources. Then you need to tilt the top fill forward so you have access to the drain pump below.

Once this is done, you can check where the drain pump connects to the washing machine tub. You can check the drain pump by removing the drain hose and the back of the washing machine. Take a look inside the washing machine when it is emptying and check if water is actually flowing out of the tub.

Opening the washing machine and finding clothes lying in a puddle of water is a clear sign of drainage problems. The wrong wash cycle can result in a slower spin cycle, resulting in more water remaining on the clothes. If you need to wash a heavy blanket or similar item, stand next to the washer and stop the cycle every few minutes to redistribute the weight of the items and give the washer a chance to compete with efficient spinning.

Your drain hose is fine, you have checked the weight distribution of the laundry, but there is still water in the washing machine drum. If you need to fix a clogged washing machine that won’t drain, start by pulling the washer out of the wall and disconnecting the drain hose from the back of the washer. Let the water drain and then remove any lint or debris that may have fallen into the drain. Before resuming the normal wash cycle, it may be necessary to empty the excess water from the tub.

A clogged siphon can be a common non-mechanical reason why a front-loading washing machine has stopped spinning. The drain hose may be clogged in some way, which could mean that water has entered the washing machine drum or the washing machine is draining water slowly (we’re talking painfully slow!).

If the hose has a lot of kinks and kinks, this can prevent the water from draining properly. You can run a spin cycle to see if the water runs out, but if that doesn’t help, you’ll be back where you started, with a load of soaked laundry and a washing machine full of water. The most likely culprit for a spinning but still damp washing machine is a problem with the drain hose. Often with this problem, what’s preventing the water from draining during the spin cycle means that the water doesn’t drain fast enough and essentially runs back into the washer drum, soaking your clothes again.

As a result, the washing machine will not develop a sufficient spin speed, and at the end of the cycle, water will drip from the clothes. This will obstruct the flow of water to and from the appliance, causing the washer to run a spin cycle but never pick up speed or drain the water. The washer pump pushes water from the bottom of the car into the drain hose. The washing machine’s drain pump pushes water from the tub into the drain pipe, from where it exits through a riser or sink.

Sometimes small pieces of clothing or debris can get into the pump and block its impeller. In some cases, foam can prevent the washing machine from pumping out water and wringing out. The washing machine will not be able to adequately drain water from the washing machine if the drain hose (vertical pipe) is larger than 244 cm (96 inches). water inside.

Whatever the reason, before carrying out any work or diagnostics, it will be necessary to drain the water from the washing machine. Of course, if it’s spinning and the water has run out, you’ll want to find out why it skipped that cycle. However, if you’re running conservative water-based cycles or washing highly absorbent materials, you can often come back and think the washer has finished when it hasn’t even started. If it stops spinning and merging in the middle of a cycle, you’ll have to contend with all those wet clothes.

If the drive motor is not working, the washing machine may have problems in the middle of the cycle when it tries to spin, even if the machine fills and shakes smoothly. If the gearbox fails even partially, the unit may drain water, but not spin. If the lock is faulty, it will not signal the switch and the washing machine will not be able to start, drain or spin.

To schedule washing machine repairs in Oklahoma City contact Appliance Repair OKC Services by calling 405-378-4566 or you can also visit our website at https://www.okcapplinace.com or also our Google business website at https://cutt.ly/YEnc8qk. Call for washing machine service now!


The post My Washing Machine Isn’t Pumping Out Water During Spin Cycle? appeared first on Appliance Repair OKC Services | Best Appliance, Washing Machine Repair Company in Oklahoma.

Wednesday, January 26, 2022

My Dryer Squeaks and Grinds?

dryer repair Oklahoma City

Repairman Repairing Dryer In Front Of Young Woman In Kitchen At Home


My Dryer Squeaks And Grinds?

If small metal objects get inside, the dryer parts may become loose, causing squealing and rattling. Continued use of the machine results in wear on the rollers and subsequent noise in the ground. These rollers can wear out with use, causing the tumble dryer to rotate and create a squeal or, in some cases, bumps. After years of use, these rollers can wear out and the drum can no longer move freely.

If the dryer starts to squeal or make clanging sounds, the rollers supporting the drum are most often to blame. This is because the drum rollers tend to flatten out when not in use, causing the dryer to hit as it rotates.

When this happens, there is a screeching or grinding sound when the drum is turned by hand. Over time, the roller belt and/or fan impeller will need to be removed to isolate the motor as the cause of the noise. Have your technician remove the roller belt or fan impeller to see if the problem is with the motor.

Then disconnect the drive belt from the engine and lift the drum from the front of the machine. Remove the dryer front panel and locate the drive belt, it will wrap around the drum, under the idler pulley and around the drive pulley.

You can check if the drive belt is broken by simply lifting the top of the unit and inspecting the belt. A fragile belt usually rotates the drum to improve the correct operation of the machine. The ribbon can become hard and brittle with age, and parts of the ribbon can separate and cause a thud when the drum rotates. After years of use, the drive belt can wear out or break and cause a squeak when the dryer is running.

To diagnose a worn drive belt or idler, listen carefully for the squeak of the dryer as the drum rotates. If the creak is coming from the back of the dryer, the problem could be a faulty motor or faulty bearings. If the motor makes a noticeable squeal during operation, these bearings may be wearing out. This won’t happen, but soon enough after the noise starts it will stop completely as the bearings lock up.

You can ignore the sound and hope it goes away, you can try to troubleshoot and fix the car yourself or call a professional. No amount of wishful thinking can silence a noisy appliance, so we’ve put together a list of common problems and solutions to help you choose the best course of action for a noisy dryer.

The dryer may make a loud squeak if a part called the idler pulley is defective. The dryer idler pulley is used to provide tension to the drum belt so that the belt does not slip over the drive motor pulley or drum when the dryer is holding a load. However, increased friction can cause the dryer to squeak or squeak as the idler begins to wear due to its high-speed rotation. As the rollers begin to wear out, a grinding sound may be produced each time the drum rotates.

However, if the dryer is used all the time, a rattling sound may indicate that the rollers are worn out and need to be replaced. Another possible culprit for a squeaky dryer is faulty drum journal bearings that make a squeak or screech at the front of the dryer. To determine if this is the problem, a technician will need to remove the drying belt and then rotate the drum by hand. If it becomes hard and the dryer makes a grinding sound during the spin cycle, it will replace the drum bearing.

Doors or lifters located on the inner surface of the drum are used to dry clothes in the dryer. If the wheels or feet at the bottom of the dryer are loose or uneven, they may squeak. Ideally, dryer creaking comes from wheels or bearings on the bottom of the dryer; it’s relatively easy to solve the problem.

The tumble dryer may also make a dull sound when turned on after a long period of inactivity. Sometimes a noisy dryer is simply caused by clothes falling out of clothing pockets and banging against the drum during washing. A tumble dryer that makes a loud screeching or screeching sound can also be a sign that it is about to run out or stop working altogether.

This helpful guide will help you understand why your dryer is making a loud screeching or screeching noise and how you could fix this annoying problem yourself or call us at 405-378-4566. Now that you know why you might notice your Electrolux dryer making noise, you can ask an Electrolux dryer repair specialist to fix the problem for you. Repairing a tumble dryer that makes a disgusting noise can be a daunting task at home, but you can quickly find out the source of the noise before calling a technician.

To fix a noisy dryer that’s hard to determine where the noise is coming from, you can purchase a dryer maintenance kit. If you are dealing with a noisy dryer that has apparently stopped working properly, you may want to check the details below to find the source of the noise first. If you hear a rattling sound when the dryer is running, the fan or fan guard may be faulty.

If you notice this noise closer to the center of the dryer, it’s most likely the fan. This noise occurs when the fan motor draws air from inside the dryer. When the blower draws air from the dryer, it usually makes a hum which is part of the typical operation. If the fan impeller becomes loose, the symptom is usually a loud thud or roar.

Visually inspect the fan impeller and its housing to ensure that they are not damaged, and check for foreign objects around the fan impeller that may be causing noise. Check for small items or metal objects under the flaps, as this may cause rattling or damage to clothing.

Replace worn bearings with new ones and this will help you get rid of the annoying noise of your car. If these bearings are faulty or worn out over years of use, you will hear a creak or squeal as the dryer drum rotates. By disconnecting the dryer from the mains, you can open the device and check if the bearings need to be lubricated or replaced.

An all-in-one home remedy If your tumble dryer is making loud, rattling noises and is not drying clothes well, replacing the motor may be the most economical solution. When a dryer motor fails, the loud grinding noise of worn bearings makes it sound like the dryers will explode at any moment.

To schedule dryer repairs in Oklahoma City contact Appliance Repair OKC Services by calling 405-378-4566 or visit our website at https://www.okcappliance.com or alternatively our Google business website at https://cutt.ly/YEnc8qk. Call for service now!


The post My Dryer Squeaks and Grinds? appeared first on Appliance Repair OKC Services | Best Appliance, Washing Machine Repair Company in Oklahoma.

Tuesday, January 25, 2022

My Freezer Isn’t Running?

Freezer Repairs Oklahoma City

Serviceman Repairing Freezer With Toolbox In Kitchen


My Freezer Isn’t Running?

Although it is not too difficult to replace some freezer components, determining the exact cause of the problem can be difficult and requires the use of electrical test equipment. The compressor, compressor fan or defrost thermostat may need to be replaced and should be done by a licensed technician. If this does not solve the problem, see a professional as you may have a defective part such as a capacitor, thermostat sensor, or fan motor.

If you can hear the compressor running but the freezer isn’t cooling, the problem is most likely a frozen evaporator coil or a clogged or damaged evaporator fan. If you can hear the compressor motor running and the freezer is still not cooling, the problem may be with the evaporator or condenser coil. If the compressor is not working properly, the freezer will not be able to cool.

To test the starter relay, a technician will disconnect power to the freezer and disconnect the starter relay from the compressor. To test the evaporator fan motor, a refrigeration service technician will open the unit’s door and turn the door switch. However, if the evaporator fan motor fails, the freezer will not be able to cool.

Frost formation only on the back of the freezer where the evaporator coil is located indicates a problem with the defrost cycle. There may be a problem with defrosting if the back of the freezer, where the evaporator coil is located, is heavily frosted over. Frost buildup in the freezer compartment can also block the vent, reducing or preventing cold air from entering the freezer compartment. If the freezer is very cold, unplug the freezer and open the freezer door to melt the frost.

Wipe the seal and surrounding area with a towel, then turn off the freezer. This will ensure automatic closing of the door and proper drainage of the water in the freezer and freezer. A cold plate stuck in the open position or a defrost timer stuck in the defrost position will also prevent the freezer from working.

The internal defrost timer contacts can fail, causing the timer to stop in defrost mode, meaning no compressor is needed to cool the air in the freezer. If your no-frost freezer won’t freeze or stops working, the problem might be with the defrost timer. If the environment is too cold, the freezer may not have enough time to maintain the temperature. If it’s broken, the thermostat won’t be able to accurately read the temperature and tell the appliance how cold it is inside the freezer.

If the freezer does not freeze food, the compressor start relay may be the problem. This part is also known as the controller and works to power the compressor start windings needed to run the freezer. If the sensor contacts or bulb are damaged, the compressor may not be requested to start. A faulty thermostat will not supply power to the refrigeration system and the freezer will not cool.

Make sure the appliance controls are set to 0°F (-18°C) for freezer and 37°F (3°C) for freezer. These checks vary depending on the brand and model of freezer, but experts recommend storing the freezer at around 40 degrees Fahrenheit.

Make sure the freezer temperature is around 0 degrees Fahrenheit (-18 degrees Celsius) and the freezer is around 37 degrees Fahrenheit (3 degrees Celsius). The freezer temperature may be too low if the frost is light, snowy and seems to be all over the place. Perhaps the sealed system is leaking, and there is not enough freon to cool the freezer to the desired temperature. Interrupting the cycle will interrupt the cooling of the freezer, but there are many factors that contribute to this problem.

In most cases, by correcting the problem that caused the frost and allowing the freezer to go through a couple of defrost cycles, the excess frost can be removed and the appliance will return to normal operation. If you don’t hear a click, but the freezer is still not cooling, there may be something wrong with the compressor or its starting components. Freezer not working When troubleshooting a unit that won’t start, always look for obvious causes (disconnected power cord, blown fuse, or tripped circuit breaker) before checking internal wiring and components.

If you do not hear the compressor running after the door is left open for a while, this may mean that the condenser fan is blocked or worn, or the relay or compressor is faulty. You’ll know it’s an evaporator fan if the noise gets louder when you open the freezer door. Try opening the freezer door and see if it closes on its own; otherwise it may cause frost.

After unplugging the freezer, turn off the freezer using the control panel inside the freezer. If the light comes on, the freezer is still on and you can move on to the next possible set of solutions to the problem. Turn on the freezer and make sure the fan is running while the compressor is running.

The job of the fans is to cool the compressor and batteries, so if it fails, the freezer will start to heat up. The job of the evaporator fans is to draw cold air out of these coils and circulate it throughout the unit, first through the fridge and then through the freezer (or fresh food compartment). As mentioned earlier, the evaporator fan draws cold air from the evaporator coils and moves it throughout the unit, including the freezer.
ge
If you adjust your freezer’s thermostat for cooler air, your freezer’s compressor kicks in, forcing refrigerant through the cooling fans. It also helps the fans bring fresh air into the freezer compartment. This is the same warmth that you feel near the freezer when it is in the refrigeration cycle.

From the evaporator, it absorbs heat from the freezer and cools its contents. This is an important part of the freezer as it filters out dirt and iron particles in the freezer. It may seem odd, but your freezer works much more efficiently when it has to cool a lot of food. To avoid this, make sure the storage bag you use is freezer-safe.

Sometimes you will find that the freezer is still quite cold (because it’s next to the coils), but the fresh food compartment isn’t cold at all (because no fresh air is coming in). If the water comes from the freezer itself, it may be because the condensate tray is full.

This occurs when food particles or other debris clog the drain hose, which can cause ice to form and eventually leak water from the freezer. If food is dehydrated, water molecules evaporate in the freezer and are replaced by oxygen molecules. A typical freezer works by compressing, condensing, and evaporating refrigerant gas to absorb the heat of the items to be frozen.

If you need to schedule freezer repairs in Oklahoma City contact the freezer repair experts at Appliance Repair OKC Services by calling 405-378-4566 or your an visit our website at https://www.okcappliance.com or also our Google business website at https://cutt.ly/YEnc8qk. Call now!


The post My Freezer Isn’t Running? appeared first on Appliance Repair OKC Services | Best Appliance, Washing Machine Repair Company in Oklahoma.

Monday, January 24, 2022

My Refrigerator Is Leaking Water?

fridge repair Oklahoma City

Man repairing fridge with customer


My Refrigerator Is Leaking Water?

Modern refrigerators have a clogged defrost drain function that melts accumulated ice and drains water into a dirty drain pan at the bottom of the fresh food compartment. The refrigerator naturally allows water to pass through, but it should accumulate in the pan under the refrigerator, from where it can safely evaporate without wetting the floor. Although this pan does not have holes or cracks, this may be one of the causes of water leakage. To find out if the drip tray is causing the leak, remove the front grill at the bottom of the refrigerator.

If you see that the water has actually come out of the sump and has accumulated on the floor due to a crack, deformation, or other type of damage, contact your local hardware store to have it replaced. But if you see that water has leaked out of the pan and accumulated on the floor due to a crack, bend, or other type of damage, contact your local hardware store to replace it.

Drain pans vary by refrigerator model, so this type of problem is often best left to the professionals. This is not a common occurrence, but sometimes there may be a crack in the tray at the bottom of the refrigerator through which water can drain. The drain pan is located under the refrigerator and usually contains water, so don’t worry if you take it out. Pull the refrigerator out of the wall and locate the defrost drain hose in the bottom rear service panel.

Make sure this valve is closed and check for leaks, kinks, or obstructions in the plastic supply line. To verify that the problem is with the inlet valve, turn off the water at the seat valve, usually located in the basement under the refrigerator, and disconnect the supply hose. If you notice a leak on the inlet valve, fix it by tightening the compression nuts.

This tube can become clogged with ice or debris, causing water to collect and leak back into the refrigerator. This problem can be solved by removing the tube and running it under hot water to melt the ice that caused the blockage. Hot water or a mini plumber can fix this, or professional help may be needed if this leak happens regularly. Whether it’s a gradual leak or a sudden breakdown, you can fix your refrigerator yourself.

This will ensure the spontaneous closing of the doors and the correct drainage of water from the freezer and refrigerator. This will eventually cause water to flow from the door onto the floor below the refrigerator.

A leaking refrigerator is something you cannot ignore because any potential water damage will cost you more in floor repairs and more. A leaking refrigerator can be more than a nuisance – it can be a safety hazard if your kitchen floor gets slippery. Injuries and structural damage can be prevented by checking for water puddles around the refrigerator.

There are a few common problems that can cause a refrigerator to leak. Most refrigerator leaks are caused by simple, easily fixable problems that a professional can fix in no time.

Water pooling under a refrigerator is never a good sign, but it’s also quite common and usually relatively easy to fix. Whether it’s occasional drops or large buildups, a refrigerator freezer leak can often be a sign that something is wrong. This may require a simple fix or a professional look – in either case, the cause must be established first.

In this article, we’ll walk you through some of the common refrigerator and freezer problems that can be causing leaks and what you can do to fix them. A clogged defrost drain is one of the most common causes of refrigerator water leaks and a good starting point for troubleshooting.

If this drain becomes clogged due to a pile of items in the freezer or debris blocking the line, the refrigerator condenser coils will have to work overtime and water will start to drip. Then during the next defrost cycle it will overflow the vents and you will see water in the fridge. Instead of melt water running down the drain, it freezes in the freezer defrosting tray. The defrost function found in all modern refrigerators melts the ice and water flows from the evaporator in the freezer to the drain tube at the bottom of the fresh food compartment.

This happens when food particles or other debris clog the drain hose, which can cause ice to form and eventually leak water from the refrigerator and freezer. If you see a leak in the fresh food compartment or a puddle in front of the refrigerator door, there may be a problem with the drain. If you notice a puddle forming in the front of the refrigerator, or if you notice water leaking from the crisper when you open it, there is a problem with the drain. If you can quickly find the water source after using the water hose function, if you just filled the ice maker with water, or find it immediately after turning off the water source, your refrigerator has no water source.

Finally, if your refrigerator has an ice maker or water dispenser, the water supply line may be clogged or frozen. If the problem is with the water line, you can leave the outlet closed, turn on the refrigerator and continue to use it normally without using the ice and water dispensers until the line is fixed.

However, if water is still leaking from your refrigerator after doing these simple checks and fixes, you may need to go to hardware store and purchase a new one. It is best to call a refrigerator repairman in Oklahoma City as soon as you notice water leaks under the refrigerator.

If someone does not notice that the water from the refrigerator is leaking onto the floor, they may receive an electric shock and fall. Excess condensation due to a poorly closed refrigerator door can cause puddles to form under the appliance. Plumbing connections to the icemaker can loosen and seals can age and break, leading to leaks that will eventually lead to water pooling under and around the refrigerator.

Unfortunately, since refrigerators run on ice, water, and condensate, a leak can be caused by several problems. Moisture leaks not only cause irritation, but can significantly shorten the life of the refrigerator by interfering with or causing corrosion. A faulty evaporator fan motor can prevent the freezer from cooling enough, which can lead to leaks. All refrigerators with antifreeze have a defrost cycle that melts frost and ice that can build up on the evaporator coils and water is fed into a sump or sump located outside the refrigerator, usually under the refrigerator next to the compressor.

If you are experiencing water leaking from your refrigerator and need refrigerator repairs in Oklahoma City contact Appliance Repair OKC Services by calling 405-378-4566 or you can visit our website at https://www.okcappliance.com or also our Google business page at https://cutt.ly/YEnc8qk. Don’t allow leaking water to cause damage to your home. Call for service now!


The post My Refrigerator Is Leaking Water? appeared first on Appliance Repair OKC Services | Best Appliance, Washing Machine Repair Company in Oklahoma.

Friday, January 21, 2022

My Dishwasher Won’t Start?

dishwasher repair Oklahoma City


My Dishwasher Won’t Start?

If the timer is defective, the dishwasher may not receive power to start and should be replaced by a professional service center. If your dishwasher still won’t start on command, its electronic timer may be defective.

Some dishwashers have a manual timer to ensure power is applied in the correct order during the cycle. The timer powers the pump motor, inlet valve, heater circuit, and drain pump motor.

Verify that the engine start relay is receiving power by following these steps. The engine start relay may be faulty if power is supplied from the control circuit, but the dishwasher still does not start. You may have a faulty drive motor if your dishwasher won’t start after the engine start relay energizes it. If the previous troubleshooting tips didn’t solve the problem and your dishwasher still won’t start, it’s best to contact a certified technician to fix the problem.

If none of these steps solve your problem, or if you’re more comfortable hiring a professional to troubleshoot and repair your dishwasher, we’ve got you covered. Troubleshooting a Whirlpool dishwasher that won’t start may involve a simple adjustment to change settings, or professional repairs to troubleshoot parts. The dishwasher is the ultimate convenience in the kitchen, but when it doesn’t start properly, it can be a real nuisance.

If the timer control or communication with the control panel is broken, the dishwasher may not start because the first timer will never start. If you find that your dishwasher does not drain properly or does not start properly, the timer or its connection to the control panel may have failed. The dishwasher may be connected to the mains and the timer may not work properly.

If your dishwasher isn’t drying enough or won’t start on command, make sure you’ve selected the correct setting. Make sure your dishwasher doesn’t need an extra switch to turn it on.

You can also check the electrical switch box to make sure the switch that controls the dishwasher is working properly (also check for frayed or damaged areas on the cord). If your dishwasher is connected to the household power supply, turn off the switch in the junction box. As a precaution, the Maytag dishwasher will not start unless the door is fully closed and locked. Often the protruding basket of the dishwasher makes it difficult to close the door.

If your Frigidaire dishwasher won’t start but is on, Electrolux (the brand’s manufacturer) recommends checking to see if the baskets are protruding or dishes are blocking the door. First, make sure your dishwasher is clean by checking the filter grill, spray arms, and door seal for food particles, grease, and other debris. Run a cleaning cycle with dishwasher detergent and no dishes to see if that helps. If you have hard water, you may have deposits that need to be removed.

Make sure the hot water supply is turned on and the faucet to the dishwasher is turned on. Make sure the dishwasher is properly connected to a working outlet using a standard power cord. If your dishwasher comes with a power cord, make sure it is connected correctly. Always turn off the dishwasher or turn off the power inside the electrical panel before checking the electrical components.

Always check the power supply when you find that your Whirlpool dishwasher is not working properly. The dishwasher needs a constant and sufficient level of power to start and operate various functions. You can control the power by accessing the junction box under the dishwasher.

An error code can be displayed when this panel turns off and a service technician can be called to check the active voltage on the relay outputs.

If the thermal fuse fails, the control board will not receive power and the dishwasher will not start. On most models, the dishwasher switches can be accessed by unscrewing the control panel. On other models, you need to remove the dishwasher’s front panel to use it.

To check if the door switch is faulty, unplug it from the dishwasher and check for continuity with a multimeter. If the door does not close properly, you may need to unscrew the panel around it to inspect the part. If this does not work properly, check for wear on the door latch as well as the electronic controls. Always close the door tightly without slamming to make sure the latch clicks into place.

A Whirlpool dishwasher that won’t start even with the door tightly closed may have a latch failure. If the dishwasher door still won’t close properly, the latch may be broken and you won’t be able to keep the door closed. If the latch breaks, the door will no longer be able to click and remain closed, meaning the dishwasher cannot start and operate safely.

Sometimes the latch may not work properly and prevent the door from locking in place, preventing the dishwasher from starting. If the latch locks correctly, the door switch may have an electrical problem. Also, if the switches are damaged or somehow lose connection with the panel, the dishwasher will not turn on. If the selectors or their connection to the control panel is damaged, it may be necessary to remove the dishwasher door and replace it.

If these functions are not activated and the dishwasher does not respond to button presses, the control panel may be wet or damaged. In some cases, resetting the dishwasher can solve a power issue. Before starting, be sure to unplug the dishwasher and make sure it is turned off.

Finally, check if the child safety setting has been accidentally activated, this will also prevent the dishwasher from starting. Unplug the dishwasher and remove the inner door panel to find the switch. To check and replace the start switch, the dishwasher door must be disassembled.

You can test the switch yourself with a multimeter, depending on the make and model of your dishwasher. If you have another model, such as a Samsung dishwasher, that won’t start but has power, check the user manual for recovery codes. The start switch may not work properly, so even with the correct settings and the latch closed, the dishwasher will not start. If you’ve checked the door latch and power supply, the problem may be with the start switch itself.

Some models require an additional wall switch to turn on the dishwasher. Often this switch is located next to a garbage chute or a kitchen light switch. This is what tells the dishwasher that the door is closed and it is safe to run the water. Once activated, the dishwasher door latch securely holds the door closed and signals the internal control panel that the wash cycle can begin.

If you are still having problems with your dishwasher not starting then you need dishwasher repairs in OKC. To schedule dishwasher service contact Appliance Repair OKC Services. You can reach the office by calling 405-378-4566 or visit our website at https://www.okcappliance.com. Our Google business page is also available at https://cutt.ly/YEnc8qk. Call now!


The post My Dishwasher Won’t Start? appeared first on Appliance Repair OKC Services | Best Appliance, Washing Machine Repair Company in Oklahoma.

Thursday, January 20, 2022

My Oven Does Not Self-Clean?

oven repair OKC

appliance repair technician repairing oven


My Oven Does Not Self-Clean?

For example, if a cooking or grill element is on the verge of failure, running the self-cleaning cycle of the oven will likely cause the element to fail at that time rather than three weeks later. While your oven can handle some self-cleaning, the more you use this feature, the more likely it is that one day the oven won’t turn on again after a self-cleaning cycle. While it’s generally best to avoid using self-cleaning and cleaning your oven with old-fashioned elbow grease and approved cleaners, if your self-cleaning feature has caused your oven to malfunction, here’s what you can check to see if it can help. it works new. If your oven won’t start after completing the self-cleaning cycle, you really need to check for any parts that may be damaged due to the heat.

As mentioned earlier, the oven heats up to a very high temperature during the self-cleaning cycle, so the likely reason for the oven not working is a blown thermal fuse. A common sign that a thermal fuse is the problem is that your oven display is working but the heating elements are not. If the wires are fine, or if you have replaced them and the oven is still not working, the next component to check is the thermal fuse.

To check the thermal fuse, you will need to access the back of the oven again. After you have successfully replaced the fuse, you can reconnect the oven to power and see if it works now. After the replacement, you can plug the oven back in and see if it works. If your oven won’t open, you should wait until it cools down before checking any of the oven’s internal components.

The best thing you can do is just wait an hour or so for the oven to cool down and then see if you can open the door. Since the door cannot be opened to dissipate heat quickly, it takes longer to cool down as the heat escapes through the oven vents. The oven door will lock for safety as the heat burns all debris to white ash. When the temperature drops and the oven can be safely opened, simply wipe the ash off the bottom with a damp paper towel.

Just run a self-cleaning cycle and let it run; at the end of the cycle, manually remove loose debris from the smooth, heat-resistant enamel coating of the oven with a cloth moistened with water. This mode requires you to pour about a cup of water directly into the oven before activating the cleaning mode. If your oven has a steam cleaning feature, this can be a great way to clean and care for your appliance. Some older ovens don’t clean on their own, so you’ll have to use elbow grease.

Cleaning the inside of the oven is a challenge, so take a break before you start – you deserve it. Turn off the oven, then thoroughly spray the interior surfaces with the water/vinegar solution (don’t burn yourself!). Then wash each rack one at a time in warm soapy water or a good quality oven cleaner. If you chose a commercial cleaner, spray it inside the oven before closing the door and let it sit for 4 hours.

Then clean it with ammonia and a few drops of dishwashing detergent diluted in a liter of warm water – even old burnt fat should dry immediately. To clean your oven quickly (and with little to no effort), add the juice of two lemons and 1/3 cup water to a saucepan, place it in the oven, and bake at 250 degrees for 30 minutes.

In high temperature cleaning, the kiln reaches extremely high temperatures (usually 800° to 875°F) to burn off the residue and reduce it to ash. If you run a self-cleaning cycle right after cooking, the already high oven temperature will reduce the amount of energy used to bring it up to the maximum level required. A clean oven not only makes work easier, it also makes food taste better and reduces bacteria.

But because a dirty oven takes longer to preheat and can lead to dangerous grease fires, it’s important to get into the habit of cleaning it regularly. For best results, it is important to keep the oven free of food and/or grease. Dirt in the oven can cause odors to settle on other foods and cause excessive smoke during cooking. Steam cleaning removes dirt with heat and water, but manual cleaning is still required later, especially for heavy dirt.

Steam cleaning ovens are a new oven feature that cleans in less time without smoke or odor, but is not as efficient as pyrolytic ovens. If you want to clean your oven without oven cleaner, you can make your own natural oven cleaner using baking soda, vinegar, and water. When things go wrong, these cleaning options will make your oven look brand new. Likewise, frequent cleaning means less thorough cleaning later on, the more maintenance your oven requires, the easier the cleaning process will be.

For the most part, a thorough self-cleaning every four to six months is enough to keep your oven gleaming, says Carolyn Forte, director of the Household Appliances and Cleaning Products Laboratory at the Institute for Good Home keeping. it depends on how often you use the oven.

If you spend a lot of time not cleaning the walls and shelves of your oven, it can start to give off a strange smell when you heat it up, and it can eventually start a fire or ruin your recipes. Cleaning shelves and washing dirty dishes may seem like second nature, but it’s easy to forget to clean your oven. Whether you cook a five-course meal or have never officially cleaned your oven (hey, we’re not judging), your oven needs a deep cleaning, stat.

Bristow notes that it may need to auto-clean the oven more than once to remove grease and really dried-on stains, and it may also need a bit of elbow grease to get rid of residue. Bristow says that if you have porcelain racks instead of metal ones, you can leave them in the oven when using the self-cleaning cycle. Also note that, if you’re lucky, your oven may also have a steam cleaning feature that will quickly take care of small food spills on your grates.

During the cycle, which lasts from half an hour to an hour, the oven door is left unlocked and the internal temperature rises to about 250 degrees Fahrenheit, enough to generate steam that softens and melts leftover food. Self-cleaning high-temperature ovens distribute heat evenly throughout the oven, so you’ll rarely find food leftovers on the sides or ceiling. Ovens, especially those with convection, can have a “steam cleaning” mode – this feature can be found in Samsung, Whirlpool, GE and other oven models.

After reading this article and you are still having self cleaning issues you will most likely need oven repairs in Oklahoma City. To schedule oven repair contact Appliance Repair OKC Services by calling 405-378-4566 or you can also visit our website at https://www.okcappliance.com. Our Google business page can be found at https://cutt.ly/YEnc8qk. Call today!


The post My Oven Does Not Self-Clean? appeared first on Appliance Repair OKC Services | Best Appliance, Washing Machine Repair Company in Oklahoma.

Wednesday, January 19, 2022

My Ice Maker Has Stopped Making Ice?

Ice Maker Repair In Oklahoma City

Refrigerator is making fresh clean ice cubes.


My Ice Maker Has Stopped Making Ice?

It will be summer before you know it and that means warmer days, so here are some Sub-Zero ice maker challenges to get your ice maker back on its feet so you can have the tall frozen glass of water you have. From making sure the ice maker is on to checking for water supply issues, here’s how to have ice on hand. That’s why, if you find that your Whirlpool French Door Refrigerator is not making ice, you need to fix the problem quickly before the warmer days arrive.

There may be several reasons why your ice maker may not be producing enough ice, including low water pressure or a knot at the waterline. If your ice maker is not making ice, there are a few things you can check to fix the problem.

Warm ambient temperature. The number of ice cubes your ice maker can produce is highly dependent on water and air temperature. A Whirlpool refrigerator that does not produce ice may have incorrect temperature settings.

Most hobbyists recommend pouring a cup of hot water into the ice maker tray. Hot water will melt frozen ice fragments without adding chemicals to the ice tray, making it safe to immediately resume ice production in the machine assembly. Be sure to empty the ice bin so that no liquid water or broken ice remains on the clean tray.

If you find ice inside the mold, it means your ice maker is getting water and the problem is probably not the water supply. Water may not enter the icemaker due to a frozen line, a missing filter, or a closed supply valve.

A clogged water filter can restrict water flow to the dispenser and prevent the ice maker from working properly. But if the water filter is clogged, you may see the waterline break and ice build up. After all, anything that is filtered by tap water before it turns to ice will eventually clog the filter.

When this cloudy water remains on the ejector arm and builds up over time, it can cause the ice machine to jam, preventing new ice from falling. If a lot of ice freezes, new ice cannot form and the waterline can also be a problem because it cannot fill the sample.

This should force water into the ice maker and return it to normal operation. Then restore power and listen for the sound of water starting to fill the ice cube tray.

Check the line supplying the valve to make sure it is not swollen or restricted by a bracket. A faulty faucet valve, the small device that connects the icemaker’s water supply hose to the water pipe, can cause a problem where the icemaker’s water supply hose connects to the water pipe. If the water supply valve has sufficient pressure and power is supplied, but the ice maker does not fill with ice making water, replace the water supply valve.

If none of these parts are faulty and the freezer temperature is at least 15 degrees Fahrenheit, replace the ice maker unit. If the ice maker module is faulty, the ice maker will not produce or distribute ice. If the ice maker module has ejector blades, make sure that ice cubes do not get stuck in the blades. Look for ice in the mold and make sure the motor that turns the ice pusher arm is running.

Make sure the water tube doesn’t kink behind or under the refrigerator (it’s best to use 1/4″ copper tubing rather than plastic to prevent kinks). Turn on the refrigerator and wait for the water supply to fill the ice mold. Add a little water manually and let it sit for a minute to remove from Remove the remaining ice cubes from the mold. This will melt the existing ice cubes and anything that may be causing them to stick.

Remove the refrigerator from the wall, turn off the faucet and unplug it. Pressing this button will make it easier to restart the refrigerator. How to turn on/off Manitowoc Yes Press and hold the power button for 3 seconds to turn it off.

You may find it easier to use this button than to unplug your Samsung refrigerator. When the refrigerator door is opened, the door switch turns off the ice maker and water dispenser. The ice maker’s water is supplied from the mains power line to the refrigerator’s house, and a blockage in the valve that allows water to enter the refrigerator prevents the machine from making ice.

If the ice maker is not making ice, but you see the handle swing and hear a hum for about 10 seconds, the water valve is calling for water that is not coming out. This causes the water fill valve to open for a few seconds to fill the ice mold and the cycle repeats.

When the ice bin fills with ice, the ice raises the safety wire, shutting down the ice maker until the level of ice in the bin drops. If the comb that pushes the cubes out of the ice mold is blocked, the ice maker cannot complete its cycle. Once the mold reaches the right temperature, the ice maker ejects the ice cubes and refills the mold with water.

The ice cubes freeze and the mold discharges the ice into the ice bin, which is then ejected into the automatic ice chute. Ice cubes can block the evaporator (the vent at the back of the refrigerator) and cause ice to build up on all walls and ceiling of the freezer. No ice. If you don’t see ice, the water is most likely frozen in the pipeline. The next common possibility that you’re not seeing ice on a slide is that it’s stuck in a trash can.

The ice can partially melt and refreeze together, forming large chunks of ice, or pieces too small to be raked, that’s all that remains at the bottom of the container. This problem most often occurs in people who use ice very infrequently (the basket overflows and freezes) or very often (only ice chips). For example, bends in the water supply line can cause the water to break, preventing the ice cube tray from filling. In other cases, the fact that the Whirlpool Ice Maker is not producing ice may be due to insufficient water supply.

If your ice maker isn’t producing ice at all, or is producing smaller crescents or cubes than usual, it usually indicates a blockage somewhere on the power line. If the ice maker still does not produce ice even when the control lever is lowered, you may have a mechanical or electrical problem. The control lever may have been accidentally moved or lowered, which could cause the ice maker to stop working.

If you have tried the suggestions above and still don’t have a working ice maker then you will be needing ice maker repair in Oklahoma City. Contact Appliance Repair OKC Services by calling 405-378-4566 or visit our website at https://www.okcappliance.com. Our Google business page can be found at https://cutt.ly/YEnc8qk. Call now!


The post My Ice Maker Has Stopped Making Ice? appeared first on Appliance Repair OKC Services | Best Appliance, Washing Machine Repair Company in Oklahoma.

Tuesday, January 18, 2022

My Freezer Is Not Keeping Food Frozen?

freezer repair Oklahoma City OK

Young Male Repairman Fixing Freezer In Kitchen


My Freezer Is Not Keeping Food Frozen?

If your freezer model has the condenser coils behind the unit, this means they will be exposed to dirt. If the coils are very dirty, the refrigerator will not be able to maintain the correct temperature.

Defrost problems can occur if the back of the freezer where the evaporator coil is located is heavily frosted. Frost formation only on the back of the freezer where the evaporator coil is located indicates a problem with the defrost cycle.

If you can hear the compressor running but the refrigerator is not cooling, the problem is most likely frost-clogged evaporator coils or a blocked or broken evaporator fan. If you can hear the compressor motor running and the freezer is still not cooling, the problem may be with the evaporator or condenser coils. If you don’t hear a click, but the freezer is still not cooling, there may be something wrong with the compressor or its starting components. If the problem can be solved by plugging the freezer cord back into the socket or turning off the circuit breaker, check if the contents of the freezer are completely or partially frozen.

If your freezer failed due to a power outage, you will need to do everything you can to prevent all food from defrosting. If the shutdown is not expected to last more than 12-24 hours, the freezer can be covered with a blanket or ice bags added to keep the temperature inside the freezer warm. Re-freeze only if there are still ice crystals or if the freezer is at or below 40 degrees Fahrenheit.

Re-freeze if the freezer temperature remains 40 degrees Fahrenheit or below and if the color and smell are good. Make sure the freezer temperature is around 0 degrees Fahrenheit (-18 degrees Celsius) and the refrigerator is around 37 degrees Fahrenheit (3 degrees Celsius). The freezer temperature may be too low if the frost is light, snowy and seems to be all over the place.

If the environment is too cold, the freezer may not have enough time to maintain the temperature. In addition, using the freezer to cool hot food or frequently opening the freezer will affect the internal temperature. Another common reason you might think your freezer is working but not freezing is the contents being packaged incorrectly. It may sound trite, but a fully stocked freezer can cause airflow blockage, especially if the evaporator fan is blocked by a bucket of ice cream or a bag of vegetables.

If you fill it to the brim, some items may not get enough cold air and remain unfrozen. It may seem strange, but your freezer does its job much more efficiently when it has to chill a lot of food. That is why, even if the compressor motor is running, the freezer cannot maintain a negative temperature to preserve food. Interrupting the cycle will interrupt the cooling of the freezer, but there are many factors that contribute to this problem.

If the appliance repair service cannot repair within one day, or if the refrigerator has a non-working freezer, measures must be taken to protect frozen food from defrosting. There is never a good time to turn off your freezer, but if you take the right steps, you can protect your food. If you have a packed upright freezer or chest freezer, your food should stay frozen for up to two days. If you place it in the freezer, it may temporarily prevent food from thawing.

If you are using a manual defrost freezer, check the inside for frost. Ideally, the internal temperature of the freezer should be 0 degrees Fahrenheit (-17.78 degrees Celsius). Make sure the appliance controls are set to 0°F (-18°C) for freezer and 37°F (3°C) for refrigerator.

If the temperature control thermostat is not working properly, it may interfere with the operation of the cooling system. If the evaporator fan fails, it will not circulate cold air in the refrigerator compartment. In this case, the freezer may still cool down, but the refrigerator does not cool down. However, if the evaporator fan motor fails, the freezer will not cool.

It could be a leak in the sealing system and not enough freon to cool the refrigerator to the desired temperature. A faulty thermostat will not power the refrigeration system and the freezer will not cool. If it breaks, the thermostat won’t be able to accurately read the temperature and tell the device how cold it is in the refrigerator. The temperature in the refrigerator may have been accidentally raised, and if so, the solution is obvious.

If you have set the correct temperature but the food is still defrosting, check if one of the following solutions solves the problem. First, make sure there is enough air circulation in the freezer.

Make sure the vents in the back of the refrigerator are not blocked by boxes of ice cream or frozen vegetables – the vents should be clear to allow cool air to circulate. The job of this freezer is to move air around the condenser coil and distribute it throughout the unit.

The evaporator fan motor draws air from the evaporator coils (cooling) and directs it to the refrigerator and freezer compartments. Located behind the vent inside the freezer, usually at the back, the evaporator fan circulates fresh air. You’ll know it’s an evaporator fan if the noise gets louder when you open the freezer door. To test the evaporator fan motor, the freezer service technician will open the door of the unit and turn the door switch.

If this motor fails, the freezer will not be able to freeze food because the circulating air is not cold enough. Basically, to test the starter relay, you need to unplug the refrigerator and remove it from the compressor motor. If the fan motor fails, replacing it can get the freezer back to normal operation.

When working properly, the freezer keeps your pizza and ice cream frozen, perfect for a midnight snack. Cold air circulates inside the freezer to freeze any perishable food you put in it. Every time you open the freezer door, you release cold air and hot air.

If you’re noticing a lot of these characteristic ice crystals, or it’s been more than a year since you last thawed your refrigerator, a simple thawing will most likely help, allowing the fans and coils to breathe again and keep working. .In most cases, by correcting the problem that caused the frost and letting the refrigerator go through several defrost cycles, the excess frost can be removed and the appliance will return to normal operation.

When the refrigerator is running but not freezing, the seal around the refrigerator door can be another problem. Insert a dollar bill between the door and the refrigerator and see if you can remove the dollar bill with the door closed.

If you are having freezer issues and need freezer repairs in Oklahoma City contact the freezer repair experts at Appliance Repair OKC Services. They can be reached by calling 405-378-4566 or visit the website at https://ift.tt/2WUeR4h. Our Google business page can be found at https://cutt.ly/YEnc8qk. Call now!


The post My Freezer Is Not Keeping Food Frozen? appeared first on Appliance Repair OKC Services | Best Appliance, Washing Machine Repair Company in Oklahoma.

Monday, January 17, 2022

The Food In My Refrigerator Is Frozen?

Refrigerator Repair OKC

Beautiful Housewife Looking At Male Worker Repairing Refrigerator In Kitchen Room


The Food In My Refrigerator Is Frozen?

With this ratio, we typically get a range of 0 to +5 degrees Fahrenheit in the refrigerator and 36 to 38 degrees Fahrenheit in the fresh food section. This way, if the temperature gets too high, the temperature controller cools the air in the refrigerator.

If the thermostat is not working properly, it causes the compressor to work more than it should, which in turn causes food and waste in the refrigerator to freeze. Conversely, the thermostat switches the compressor back on when more refrigerant is needed to cool the appliance. The thermostat is designed to automatically stop working as soon as the refrigerator reaches the set temperature. If the thermostat is defective, it may not turn off and continue to operate, causing the refrigerator to freeze everything stored in it.

If it doesn’t work properly, the refrigerator can get too cold, causing the food inside to freeze and become inedible. A faulty refrigerator can cause a lot of problems, especially when your appliances start freezing your quality food. Plus, frozen food in your freezer could be a sign that your freezer is broken, a headache no one wants to deal with.

Luckily, fridge freezer is a common problem, and the solution is mostly simple. If your refrigerator continues to freeze, then something is slowing down or stopping the evaporation process. Sometimes it is enough to adjust the temperature settings or clean the refrigerator coils to prevent a problem in the future.

If the food in the refrigerator freezes, the controls for the refrigerator and freezer may need to be adjusted. If your food still freezes even after you raise the temperature setting, try to identify the area of ​​the refrigerator where this is happening. Another reason for a refrigerator getting stuck in the fresh food section could be the electronic controls.

Most modern refrigerators use an automatic damper to control the amount of air entering the fresh food section from the freezer. Usually about 20% gets into the fresh food section, but if the damper gets stuck in the open position for one reason or another, it is possible that more air will get into the fresh food and the temperature will drop sharply. In the event of a damper malfunction, it can create excess air flow into the refrigerator compartment, which leads to a gradual decrease in temperature. Unfortunately, if the damper isn’t working properly, it can let in more cold air and effectively turn the refrigerator into a freezer.

If the damper door is stuck in the open position, the constantly incoming cold air will freeze the food in the refrigerator. If it is open or the damper control assembly is faulty, you will need to replace this component to prevent the refrigerator from staying too cold, causing food in the lower chamber to freeze. If it doesn’t work properly, it can cause incorrect temperature settings, causing vegetables to freeze in refrigerator drawers or other frosting to appear inside the refrigerator compartments. If the refrigerator temperature sensor is blocked, it will not be able to correctly detect the temperature to properly control the refrigeration in the fresh food compartment.

If the food closest to the door stays at a safe temperature, raising the temperature in the fresh food compartment by one degree can prevent freezing. Find a refrigerator thermometer to provide a more accurate temperature reading and leave it on overnight. In a refrigerator, it should stop working automatically as soon as the set temperature is reached. The thermostat is designed to automatically stop when the refrigerator reaches the set temperature.

When the refrigerator tries to maintain the set temperature and release cold air at the same time, it can freeze. The end result is that the refrigerator compartment becomes too cold, causing the food in the refrigerator to freeze.

Freezers may also indicate that minor components (such as door seals or air ducts) may need adjustment or replacement. If food freezes, the refrigerator temperature may have been accidentally set too low. This is a common problem that causes food to freeze in the refrigerator.

Refrigerators cool food by continuously heating and cooling the refrigerant from a gas to a liquid. In short, refrigerators are constantly evaporating refrigerant to keep food cold. Freezing occurs more often when there is not enough food in the refrigerator to absorb the cold air.

Despite the manufacturer’s recommendations, if you find frozen food in the refrigerator compartment, you may consider raising the temperature to 39~40 degrees Fahrenheit, which is still very safe for food storage and it is extremely unlikely that the food will freeze. Unfortunately, the less expected downside of a bad gasket on your refrigerator is that as the refrigerator runs more frequently, food near the vents will get very cold. If the seal is broken or worn, the freezer may run too long to maintain its temperature, causing the refrigerator to overcool. If the gasket is damaged and leaking, the refrigerator will constantly work to compensate and this will cause everything inside to start to freeze.

If the gasket leaks, the refrigerator will run continuously, causing everything stored inside to freeze. However, if the seal doesn’t close properly, the freezer is constantly letting cold air in and working even harder to freeze food. However, if the seal is not airtight, it may cause the refrigerator to operate continuously, causing all stored food to freeze.

It can also make the freezer too cold and therefore cause chilled foods to freeze. One solution is to raise the temperature of the freezer, although you must be careful not to set it too high. Random temperature changes can also cause the refrigerant to hold the refrigerant out of the refrigerator, causing food to overheat and spoil. The dial isn’t always the most accurate method of temperature control, so even if it looks high enough, there may be other factors contributing to food freezing.

If food freezes in the refrigerator, you can try to fix this problem. Keeping a close eye on the temperature of your fridge and refrigerator is the easiest way to ensure they work properly in the future. You will not only prevent food from freezing in the refrigerator, but also save energy.

But before you tear your hair out and curse the refrigerator manufacturer, there are a number of steps you can take to prevent food from freezing accidentally. In this article, we will explain how the refrigeration system works, some of the reasons why food can freeze in the fresh food section, and what parts need to be replaced to repair your refrigerator.

Bacteria that cause food borne illness thrive best in a narrow temperature range, and refrigerators are a way to keep our food cold enough to prevent the spread of dangerous germs. Also, when you lightly freeze foods that are very close to cold vents, they may freeze. If they become dirty, covered with dust, the refrigerator has to work hard to maintain the set freezing temperature.

If you are experiencing food being frozen in your fridge then you will be needing refrigerator in Oklahoma City. Contact Appliance Repair OKC Services by calling 405-378-4566 or visit our website at https://www.okcappliance.com or also our Google business page at https://cutt.ly/YEnc8qk. Call today!


The post The Food In My Refrigerator Is Frozen? appeared first on Appliance Repair OKC Services | Best Appliance, Washing Machine Repair Company in Oklahoma.