Thursday, December 30, 2021

My Oven Won’t Self Clean?

Oven Repair Oklahoma City

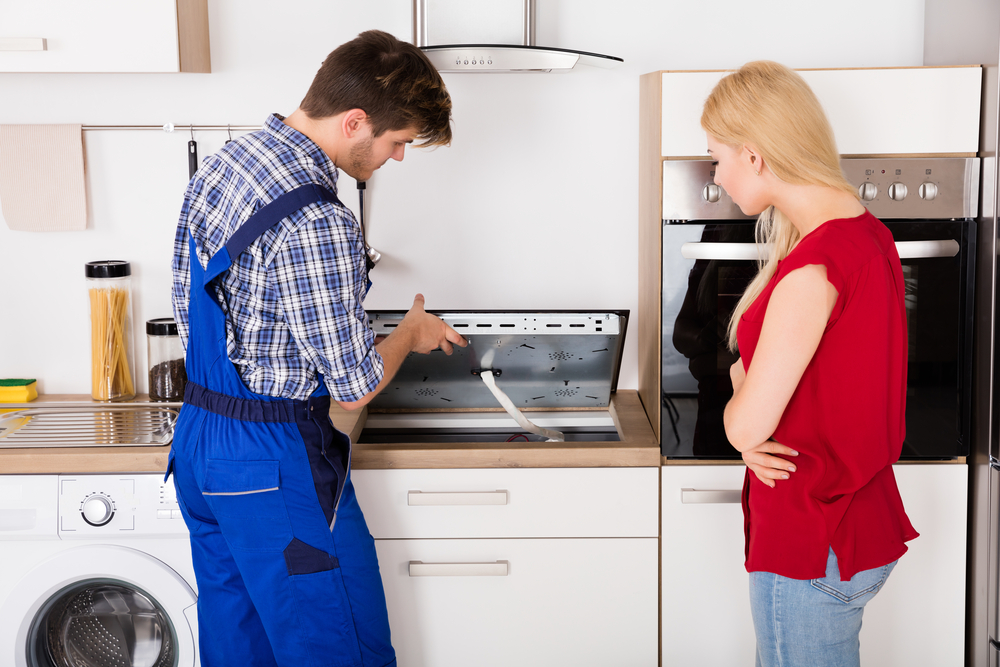
Smiling Repairman Repairing Oven On Kitchen Worktop In Front Of Woman


My Oven Won’t Self Clean?

Before you try to turn on the oven, make sure to wait long enough. Before starting the cycle, be sure to remove all items in the oven. At the end of the cleaning period, let the oven cool down completely; if you have a high temperature to clean the oven, it may take several hours. To make cleaning easier, rotate the oven at 475 degrees Fahrenheit (246 degrees Celsius) for about an hour until it is empty.

The oven will turn off automatically at the end of the cleaning cycle, but it cannot be opened until it has cooled down to normal cooking temperature. Just start a self-cleaning cycle and let it run; At the end of the cycle, use a cloth dampened with water to manually remove loose debris from the smooth heat-resistant enamel coating. When cleaning is complete and the oven has cooled down, the oven may unlock automatically, depending on the model. Your oven is designed in such a way that the door is locked during the self-cleaning cycle, so it will not open and can become a source of danger.

The system safety feature uses a mechanical interlock to keep the oven door closed and locked until the internal temperature reaches approximately 572 Fdeg or 300deg C. The cleaning and cooling steps are completed. At the end of the cycle, the door will remain locked until the oven has completely cooled down and is secure enough to open. During a cycle that lasts from half an hour to an hour, the oven door remains open and the internal temperature rises to about 250 degrees Fahrenheit, high enough to generate steam that softens and melts food debris. Due to these dangerous temperatures, the oven will not allow the self-cleaning function to start if components are faulty or if the door does not close.

Self-cleaning oven doors are locked and opened only after a self-cleaning cycle, when they have cooled down to a temperature low enough for the door to open. If the oven door does not close completely, hot air may escape from the oven. You can check for a small leak by placing your hand in front of the oven while it is on. If you feel hot air coming out of the door seal, then it is not closing properly.

You can reinforce the oven door hinges by opening the door, placing a cloth over each hinge, and slowly closing the door while holding the garment in the hinge. Open the door and check the locking mechanism at the top front of the oven frame above the seal. Use a cloth to wipe in and around the hinges and remove anything that is stuck inside. Lower the retaining latch until it snaps into the groove and repeat on the other side before placing the door back on the oven.

To check the fuse, you need to access the back of the oven again. If the wires are okay, or you have replaced them and the oven is still not working, the next component to check is the fuse. As mentioned earlier, when starting a self-cleaning cycle, the oven heats up to a very high temperature, so a blown fuse is likely the reason the oven is not working. A common sign that a thermal fuse is a problem is that your oven display is working but the heating elements are not.

If the problem persists after waiting a few hours, you can try turning the oven off with the circuit breaker for a minute before turning it back on. Sometimes, if you turn the oven off and on again, you can restart the oven and it will open. Turn off the oven with the power switch for a minute or two before turning the power back on. After replacing, you can reconnect the oven to the power source and see if it works.

Look for molten wires or traces of loose wires from one end of the oven. Use a Phillips screwdriver to remove the screws that hold the top access panel on the back of the oven in place. Open the door slightly and pull it up out of the oven to remove it. If you are cleaning a high-temperature oven and it will not automatically lock during the cleaning process, lock it.

If you start the self-cleaning cycle immediately after cooking, the already high oven temperature will reduce energy consumption to the highest level required. I haven’t told you not to use self-cleaning, because the oven is designed to withstand the self-cleaning cycle anyway; during the self-cleaning process, all components of the oven will be subjected to much greater pressure than the normal cooking cycle. However, since dirty ovens take longer to warm up and may cause dangerous grease fires, it is important to develop a habit of cleaning the oven regularly. However, if your oven is very dirty, you may need to choose a longer cleaning time.

On some ovens, you can specify the cleaning duration; on others, you cannot. Both high-temperature and steam self-cleaning ovens can emit unpleasant burning odors and vapors and even harmful by-products such as carbon monoxide from the oven vents during the cleaning cycle. However, as soon as the flame is ignited in the gas oven, heating starts instantly and can be easily adjusted according to the size of the flame, which allows for shorter cooking times and higher temperatures.

Heating Time To heat the oven to temperature, the electric oven heats up the inner coil to distribute heat throughout the oven. Once activated, electricity will no longer be supplied to the heating elements and the oven will not heat up. This means that in the event of a power outage, your electric oven will not work, but your gas oven will continue to work.

This is especially true for gas ovens that require gas lines to operate. The wires on the back of the oven are often exposed to high temperatures and may malfunction over time. One of the main factors causing this phenomenon is that when the oven is automatically cleaned, it heats up to a very high temperature, which can damage the components inside the oven and interfere with its operation.

Although your oven can withstand some self-cleaning operations, the more you use this feature, the more likely it is that your oven will not turn on again the day after the self-cleaning cycle. If your oven won’t start after completing a self-cleaning cycle, you should really check for any parts that could be damaged by extreme heat. Checking an oven that fails immediately after or during a cleaning cycle is no different from checking an oven in other cases, but there are some common faults that sometimes occur during a cleaning cycle.

For oven repair services in Oklahoma City be sure and contact Appliance Repair OKC Services. They can be reached at 405-378-4566 or you can visit the website at https://ift.tt/2WUeR4h and alternatively you can visit our Google business page at https://cutt.ly/YEnc8qk. Call for service now!


The post My Oven Won’t Self Clean? appeared first on Appliance Repair OKC Services | Best Appliance, Washing Machine Repair Company in Oklahoma.

Wednesday, December 29, 2021

My Ice Maker Won’t Work After Moving?

ice maker repair OKC

Young Male Repairman Fixing Ice Maker In Kitchen

My Ice Maker Won’t Work After Moving?

Make sure you empty the ice container so that there is no liquid water or broken ice on it. If you removed the ice maker bucket, make sure it was replaced correctly.

This should force the water into the ice maker and make it start working normally again. If the water filter has not been replaced for a long time, replace it, and then check whether the ice maker is working properly. The hot water will melt the frozen ice without adding chemicals to the ice tray, ensuring that the ice making process in the machine cluster can start immediately.

A little warm water (with a towel ready to wash) melts the ice plugs. It works wherever there is too much ice, soft or lumpy, accumulating and causing problems. This is a great way to deal with ice adhesion to molds and ice residues that make the molds uneven.

Take out the refrigerator and make sure all electrical connections are correct. Remove the ice from the mold, turn on the power, and wait a few hours to see if the ice pops out. Check if the metal control lever needs to be adjusted to turn the machine back on and resume ice production. The control stick may have been inadvertently moved or thrown, which could interrupt the operation of the ice maker.

Press this button to restart the refrigerator more easily. How to turn on/off Manitowoc Yes Press and hold the power button for 3 seconds to turn it off. You may find it easier to use this button than to unplug the Samsung refrigerator.

Find a water shutoff valve at the back of the refrigerator or under the sink, turn it off, unscrew the copper wire from the back of the refrigerator, put the copper wire in the bucket, open the valve, and check for water leaks. A defective faucet—a small device that connects the ice machine’s water supply hose to the water supply hose—can cause problems with the ice machine’s water supply hose connecting to the water supply hose. If the water inlet valve has enough pressure to be energized, but the ice maker does not inject water to make ice, please replace the water inlet valve.

If none of these parts are defective and the freezer temperature is at least 15 degrees Fahrenheit, replace the icemaker assembly. If the icemaker module is defective, the icemaker will not produce or dispense ice. If the ice maker module has ejector blades, make sure the ice cubes are not stuck in the blades. Find ice in an ice cube tray and check that the motor that drives the ice ejector lever is running.

To defrost the line, turn off the freezer, close the shutoff valve, and pour hot water into the line using a turkey stick. If you’re in no rush, try unplugging it from the refrigerator for up to two hours and letting the ice melt naturally.

This can often be a problem when you find the Whirlpool ice maker is not working but the water dispenser is still working. If the ice maker is not producing ice, but you see your hand moving and you hear a hum for about 10 seconds, the water valve is asking for water, which is not coming in. If the water pressure is normal and voltage is applied to the water inlet valve, the water inlet valve is most likely defective and needs to be replaced. This activates the water fill valve for a few seconds to fill the ice mold and the cycle repeats.

Once the mold has reached the correct temperature, the ice maker throws out the ice cubes and fills the mold with water. When the thermostat or sensor on the ice maker tray reaches about 15 degrees Fahrenheit, the engine starts to release the ice cubes. The engine starts automatically when the ice tray reaches a certain temperature. After turning the ice tray and placing the ice, the water valve will open to fill the tray with water.

Use a plastic tool to gently break off the ice bridge on the ejector lever. Pour some hot water into the molds to melt the old ice and form new ice.

Then turn on the heater to warm up the cubes slightly so that they come off the ice cube tray. He then turns on the small ice maker motor, which rotates the ice ejector lever.

This water then freezes on the ejector fingers, forming an ice bridge that prevents new cubes from falling into the ice bin. When this cloudy water remains on the ejector lever and builds up over time, it can cause the ice maker to jam, preventing new ice from falling. If a lot of ice freezes, new ice won’t be able to form, and the plumbing can also pose a problem as it won’t be able to fill the proof. If the ice bin fills up, this should push the fill bar upward and prevent new ice from forming.

This can restrict or even stop the flow of water into the refrigerator. An obstruction in the line or a closed valve can easily explain the sudden lack of ice if no new ice can form. Some refrigerators are designed to turn off ice or water when the water filter needs to be replaced. A clogged water filter can restrict water flow to the dispenser and prevent the ice maker from working properly.

When the filter becomes clogged, water will not flow into the refrigerator properly and the ice maker will not work properly. Eventually, anything that gets filtered by tap water before turning into ice will eventually clog the filter. Plumbing can sometimes be the reason the ice maker does not create ice problems.

The water from the ice maker enters the refrigerator from the main power cord to the home. The blockage in the valve that allows the water to flow into the refrigerator may be the reason that prevents the ice from making the machine. The water supply line leads to a water injection valve in the refrigerator, which is controlled by the thermostat of the ice maker. The water inlet valve guides the water through the inlet pipe to the mechanized ice maker, which includes an ice mold. The location of the inlet valve varies from manufacturer to manufacturer, but the inlet valve of Kenmore and Whirlpool ice machines is usually located behind the refrigerator.

When the refrigerator door is opened, the door switch will turn off the ice and water dispenser. The door switch is responsible for turning off the ice water dispenser when the refrigerator door is opened. The first step in troubleshooting a non-working Whirlpool ice maker is to make sure the ice maker is turned on. The temperature setting of a Whirlpool refrigerator that does not make ice may be incorrect.

For proper ice making, the temperature of the freezer must be between 0-5 degrees Fahrenheit. The freezer temperature must not exceed 10 degrees Fahrenheit (-12 degrees Celsius) for the ice tray to function properly.

For ice maker repair services in Oklahoma City contact Appliance Repair OKC Services. They can be reached at phone number 405-378-4566 or you can visit our website at https://www.okcappliance.com. Our Google Business is located at https://cutt.ly/YEnc8qk. Call now!

The post My Ice Maker Won’t Work After Moving? appeared first on Appliance Repair OKC Services | Best Appliance, Washing Machine Repair Company in Oklahoma.

Monday, December 27, 2021

My Refrigerator Isn’t Working Correctly?

refrigerator repair okc

Tecnician repairing refrigerator

My Refrigerator Isn’t Working Correctly?

Some refrigerators stop cooling when the door is open or the switch is faulty. If one of the fans fails or the compressor is turned off, the refrigerator does not cool much. If the fan motor isn’t working, you may have a cold freezer, but not in your refrigerator. Your refrigerator has two fans that make up most of the operation of the unit, and if they are not working, this could be the reason that your refrigerator is not cold enough.

Typically, the refrigerator condenser fan and compressor, located at the floor at the back of most refrigerators, will turn on when the thermostat requires more cooling. If you hear the compressor running but your refrigerator is not cooling, the problem is most likely a blocked evaporator coil or a blocked or broken evaporator fan. If the freezer fan is still running but the refrigerator is not cooling, the compressor or compressor start relay may be faulty. If you hear air flowing and a fan running, you should check the refrigerator compressor.

If the fan is okay, check the condenser coils at the back of the refrigerator for dust. If they are dusty, they need to be cleaned as dusty coils mean your refrigerator cannot work properly as it has to work overtime to keep the refrigerator and freezer at the correct temperature.

Sometimes so much dust or dirt builds up on these coils that the heat can no longer be efficiently dissipated and instead enters your refrigerator. If you find a lot of dust accumulated on the coils, plan to clean them once or twice a year to keep the refrigerator properly cooled.

Find the vents in the freezer and refrigerator compartments and remove anything that might block them. Always try to keep the vents unobstructed for maximum cooling and optimal performance. If your refrigerator model has these vents, you can open them to let cooler air through.

The coil is located below or behind the refrigerator and is used to cool and condense the refrigerant. The refrigerant flows through these coils and becomes a gas, making them cool. The job of the evaporator fan is to extract fresh air from these coils and circulate it throughout the device, first through the freezer compartment and then into the refrigerator (or fresh food compartment). The evaporator fan is located behind the freezer wall to circulate cold air throughout the refrigerator. When it stops working, the temperature of the entire device will rise.

To test if it works, you will need to put the refrigerator into diagnostic mode. If you find that the refrigerator is plugged into a working outlet, its circuit breaker has not tripped and the cold control is set correctly, but the unit still shows no signs of life, leave the door closed to keep the cold air out and call the appliance. repairer. If they are dirty, clean them thoroughly and then turn on the refrigerator again.

When the freezer fan is running, it means that the defrost timer and cold control in the refrigerator are set to COOL. If the refrigerator is not cold enough, there may be a problem with the condenser fan motor. If the condenser fan does not work properly, the temperature of the refrigerator may rise and the compressor may overheat. The condenser fan motor is responsible for circulating cold air, and if neither the refrigerator nor the freezer is cooling properly, this is most likely the culprit.

This will cause problems with the refrigerator compressor, which circulates the refrigerant in the system. To fix this, first make sure the back of the freezer compartment is cool and then check if you can hear the evaporator fan running. If this fan fails, cold air will not enter the refrigerator.

If something is blocking the air flow, it may cause an unstable temperature in the refrigerator compartment. Frost build-up in the freezer can also block the air vent, reducing or preventing cold air from entering the refrigerator. If the air damper does not close or open, it can affect the temperature of the refrigerator while the freezer is maintaining the correct temperature. When the compressor stops working, the refrigerator will not be able to cool down properly.

The fans work to cool the compressor and coils, so if they break, the refrigerator will start to heat up. This fan draws air through the evaporator coil, cooling the air and then pushing it through the refrigerator.

This thermostat regulates the voltage to the compressor motor and evaporator fan; therefore, if it does not work properly, it can cause the refrigeration system to run longer than necessary, leading to overcooling of the unit. It seems obvious, but sometimes the thermostat dial is set too low and the temperature of the refrigerator rises. If the engine is running, but the temperature inside the refrigerator is higher than normal and adjusting the thermostat does not solve the problem, several things may break. A defective main control board is very rarely the reason the refrigerator is not cooling properly, but it can happen.

If the refrigerator does not cool properly, one of these parts may be dirty or misplaced. There is a row of cooling coils under the refrigerator, which can cause problems with the refrigerator if they get dirty. Along with these coils, there is a cooling fan that also needs to be cleaned regularly.

Both sides of the LG refrigerator are cooled by cold air, which is drawn into the evaporator coils by a fan that circulates the air in both directions. A faulty evaporator fan motor will cause the refrigeration side cooling slowly to stop due to lack of circulation.

If the defroster is defective, the evaporator coils will freeze and the refrigerator will work harder to keep itself cool. Even if the rest of the refrigerator is functioning normally, if the magnetic seals on the doors, also called “door seals,” are defective, fresh air inside the refrigerator may escape. Over time, coils that are not in the sealed unit can become covered with dust, hair, or pet hair, reducing their ability to keep cold air in the refrigerator. If debris has accumulated on the condenser coils, it will not be able to effectively dissipate heat and the refrigerator will have to cool down constantly.

Another thing that can break down in a refrigerator might be the compressor, which pushes the vapor of the refrigerator into the coils located outside the refrigerator. If the engine is running with a little hum but the temperature is above the normal range, there is likely a problem with the compressor. This is because the thermostat controls how much voltage is applied to the compressor motor and evaporator fan, and when the voltage is out of specification, the refrigerator will run longer and cool food to much colder temperatures than it should.

When your refrigerator isn’t cooling correctly and you are seeking refrigerator repair in Oklahoma City contact Appliance Repair OKC Services. They can be reached at 405-378-4566 or you can visit our website at https://www.okcappliance.com. Our Google business page is located at https://cutt.ly/YEnc8qk. Call now!


The post My Refrigerator Isn’t Working Correctly? appeared first on Appliance Repair OKC Services | Best Appliance, Washing Machine Repair Company in Oklahoma.

Thursday, December 23, 2021

My Gas Oven Not Working But Burners Working?

oven repair Oklahoma City

Young Woman Looking At Male Repairman Examining Oven In Kitchen


My Gas Oven Not Working But Burners Working?

Here are some troubleshooting tips to check when your gas oven is not working but the top burners are working. Hopefully they can help you with any problem with your oven not working.

If everything is in order with the gas supply, then switch to the gas igniter on the oven itself. If the hob igniters are working properly but the oven won’t ignite, the problem is most likely with the igniter and not with the gas.

The igniter may be visible in the oven, or it may be necessary to remove the bottom panel of the oven to access it. After a few clicks, if the igniter is defective, you can smell natural gas when it comes out, then you should turn off the oven and contact the appliance repair company. If your igniter does not spark, you will need to replace your oven burner igniter. After replacing the igniter, turn off the oven.

Remove all oven racks and the baking sheet at the bottom of the oven to gain access to the gas burner and igniter. You can try drying the burner and if that doesn’t work, the igniter wiring needs to be replaced.

Paying to repair this part is much cheaper than buying a new oven as the cost of replacement parts ranges from $ 30 to $ 100. As long as your oven is out of warranty, you shouldn’t let this repair scare you – it’s not necessary. electrician to replace the heating element. Before replacing a sensor that you think is defective, be sure to first check the oven components and cables.

Both gas and electric ovens are equipped with a temperature sensor, a thin tube a few centimeters long, located at the top back of the oven. If the temperature sensor is not an obvious problem, check that both the gas igniter and the heating element are working properly. Check their integrity with an ohmmeter and replace one of the components if it does not work properly.

If the gas line is ok but any of the oven heating elements are not working, the oven will not overheat. Examine the igniter to see if the problem is resolved, double check if you turned off the gas supply and press the ignition button on the stove. Make sure the burner is in the correct position so that the electrode reaches the gas and ignites it before calling a repairman or a warranty technician for your home. However, if the stove and oven do not light up, a technician will need to check the gas line.

If the oven lights up but the oven does not heat up, the problem may be a dirty or faulty igniter. If your grill and stove are working but the oven is not heating up, you may have a faulty igniter, which is the most common cause of oven failure. This seems to be an obvious problem, but anyone can be in a hurry and not realize that one of the heating elements of the oven does not turn on. The reason your oven is not reaching the correct temperature may be due to a temperature sensor, heating element, or gas igniter.

Even if the oven is heated with gas, electricity is required to operate the timer and other components, and if the circuit breaker is tripped, the oven will refuse to heat up. Even if your oven runs on gas, it still needs electricity to run the timer and other components. If the light in the oven is off, the light needs to be replaced. To fix the door, start by unplugging and closing the gas pipe.

If this does not solve the problem, you may need a new igniter or use a gas connection. If your gas oven and gas burner stop working, the problem is likely to be in the gas line and requires professional repair. If all of your stoves have heating problems, it is probably an electrical problem and you need to call a technician or replace the stove.

If only one of the cooking zones does not light up, the problem can be solved. If all but one burner is lit, there is likely a dial problem.

However, when the burner is not heating up, the problem could be the outlet or endless switch. If a running burner does not heat up, the problem is with the infinity switch or the outlet.

If the oven still does not heat up, check the thermostat and switch it on and off. Make sure that the oven control is set correctly for cooking or grilling. Give it time to preheat and check if your oven is at the correct temperature or needs adjustment.

The igniter ignites the gas from the burner and the oven starts to heat up. However, if the igniter does not heat up enough, the oven will not ignite and you will most likely smell gas.

Each time you turn on the oven, the igniter opens, allowing gas to flow right through the valve. After the igniter heats up, the gas valve opens and allows gas to flow through the burner. When the igniter absorbs electric current, it heats up to a high temperature and ignites, and also causes the bimetal in the furnace safety valve to deform and open the valve to release the flammable gas.

To find the ignition fuse for your gas stove, you need an instruction manual. The great thing about a gas stove is that even if the electric ignition is not working properly, you can still turn on the stove. If you have a gas stove, you can light it with a match if the ignition does not work.

If you have an electric stove, it needs electricity to heat it up. But unlike a coil or electric stove, you need to turn on the stove to cook something on the gas stove.

Fortunately, in most cases this problem is caused by problems with the power supply, gas, gas igniter, burners, or, in rare cases, a temperature control thermostat. If you have successfully used the same gas oven for months or years and suddenly have difficulty cooking, the problem could be with a heating element, digital control, or other components in your oven.

While you may eventually need professional help, we can help you fix some common reasons your electric or gas oven may not heat up properly. Just do not make any repairs requiring replacement items if the oven is still under warranty, as this will void the warranty. If the troubleshooting and repairs suggested above do not work, your oven may have a blown internal fuse, professional recalibration may be required for proper heating, or the relay switch may be faulty, or the control board may be damaged.

The holidays are not far away so make sure your oven is serviced and working correctly. For oven repairs in Oklahoma City contact Appliance Repair OKC Services by calling 405-378-4566 or visit our website at https://www.okcappliance.com or you can also visit our Google business page at https://cutt.ly/YEnc8qk. Call now!


The post My Gas Oven Not Working But Burners Working? appeared first on Appliance Repair OKC Services | Best Appliance, Washing Machine Repair Company in Oklahoma.

Wednesday, December 22, 2021

My Ice Maker Doesn’t Seem To Be Getting Water?

Ice Maker Repair OKC

Ice Maker Needs Repair


My Ice Maker Doesn’T Seem To Be Getting Water?

Ice makers require 3 to 5 liters of water per minute to make an entire batch of ice. If the water filling system is frozen or not working for other reasons, when you look into the ice maker, you may notice a lack of ice or very small ice cubes. This is a good sign for inspecting the parts that feed water to the ice maker and not the ice maker itself.

Make sure the water line is not kinked behind or under the refrigerator (to avoid kinks, a 1/4-inch copper tube is much better than a plastic fill line). Also, be sure to check if there is water in the plumbing connected to the refrigerator. To check the water inlet valve, we recommend turning off the water in the refrigerator and disconnecting it for safety.

The water inlet valve is one of the most likely reasons for the ice maker to stop working, especially if you find that there is no ice in the ice maker. A defective faucet – a small device that connects the ice maker’s water supply hose to the water hose – can cause a problem where the ice maker’s water supply hose connects to the water hose. You can purchase an ice maker connection kit and do it yourself, or call a technician or plumber to install a built-in water filter when you replace the valve. Only one waterline is connected to the refrigerator; However, the refrigerator has two plastic plumbing lines that go from the dual water valve to the ice maker and water dispenser.

The water for the ice maker enters the refrigerator from the main power line to the home, and a block in the valve that allows water to flow into the refrigerator can be what is preventing the machine from making ice. If you don’t feel ice in the water line, it may be because the ice is blocking the pipe inside the freezer itself. If you find ice inside the ice cube trays, it means water is entering the ice maker and the water supply is probably not the problem.

If you suspect that the problem is with the ice machine, such as a dirty water filter or a problem with the water inlet valve, you should call an ice machine technician. The pipes can sometimes be the reason why the ice machine does not produce ice problems. This will restrict or even prevent water from flowing into the refrigerator.

Alternatively, you can defrost the plumbing with a hair dryer or leave the refrigerator unplugged for more than two hours. Power on the refrigerator and listen to the water supply to fill the ice mold. Then turn on the power and listen for the sound of water filling the ice cube tray.

Remove the lid of the ice maker to check how much water enters the ice cube tray during each cycle. Find ice in an ice cube tray and check that the motor that drives the ice ejector lever is running.

According to the size of the ice cubes produced, tighten or loosen the screws to reduce or increase the amount of water. High ambient temperature: The number of ice cubes that the ice maker can make depends largely on the temperature of water and air. This prevents the ice maker from getting enough water to make ice and actually release ice cubes.

Also, if your ice maker uses water that passes through a water filter and you use a lot of ice cubes, you need to replace the water filter more frequently. This will cause water or water not to flow slowly from the water dispenser and ice maker. The bent water pipe may allow water to pass through, but there is not enough water, so the ice maker will not work properly.

If the problem is kinking, then when you take out the refrigerator, the plumbing is straightened. No Ice – If ice does not form, the water in the line is most likely frozen. This can often be a problem when you find the Whirlpool ice maker is not working but the water dispenser is still working.

Remove the refrigerator from the wall, close the water tap and unplug it from the mains. Remove any frozen items from the device and let the refrigerator stand until the ice has melted. Try to insert the filter into the refrigerator body, then push and twist the filter to lock it securely in place.

Manually remove any remaining ice from the mold by adding water and letting it stand for one minute. If you are not in a hurry, try to unplug it from the refrigerator for up to two hours to let the ice melt naturally.

Sometimes when you are not using the ice machine for a long time, the low temperature will actually freeze the spiral motor behind the freezer wall. If the ice maker does not make ice even though the lever is lowered, there may be a mechanical or electrical problem. The lever may be moved or thrown unintentionally, which may interrupt the operation of the ice maker.

You should only check the control board after you have verified that other parts of the refrigerator are working properly. The control board often breaks down and therefore does not transfer energy to the parts of the refrigerator. Sometimes an electrical problem can prevent the solenoid from opening the water valve, or you may have other fridge waterline problems. If your refrigerator doesn’t have water flowing into the ice maker, there are a few things you can check to try and fix the problem.

Usually the problem of the ice maker not filling up with water can be caused by many reasons, but fortunately, you can fix most of them yourself at home. If the problem is complex, you can always rely on LG support. But before we go any further, let’s look at some of the questions we get about issues with water not filled with water.

Needless to say, the ice maker needs water to make ice, but it is difficult for untrained eyes to judge whether the ice maker is getting enough water. The ice maker receives water through a small pipe from the refrigerator to the water pipe, funnel or water filter. The water inlet valve is an electric valve, which can supply water to the water dispenser and ice maker when it is opened. The location of the inlet valve varies from manufacturer to manufacturer, but the inlet valve of Kenmore and Whirlpool ice machines is usually located behind the refrigerator.

The fill valve directs water through the fill tube to the mechanized ice maker, which includes an ice mold. This activates the water fill valve for a few seconds to fill the ice mold and the cycle repeats. When this cloudy water remains on the ejector lever and builds up over time, it can cause the ice maker to jam, preventing new ice from falling.

This will empty the water tank and the new water will take time to cool down. In this case, you can also check the pressure of the water in the refrigerator, as at low pressure, the water can freeze in the filling tube.

If you are having ice maker issues and need ice maker repair in OKC contact Appliance Repair OKC Services by calling 405-378-4566. You can also visit our website at https://www.okcappliance.com or also our Google business page at https://cutt.ly/YEnc8qk. Call now!


The post My Ice Maker Doesn’t Seem To Be Getting Water? appeared first on Appliance Repair OKC Services | Best Appliance, Washing Machine Repair Company in Oklahoma.

Tuesday, December 21, 2021

My Freezer Is Running Too Warm?

freezer-fridge repairs OKC

Serviceman Repairing Freezer-Refrigerator With Toolbox In Kitchen


My Freezer Is Running Too Warm?

Therefore, in addition to keeping the coolest appliances in your home as low as possible and properly packaging your food for storage, here are some proven and authentic methods that will allow you to enjoy uninterrupted coolness in a happy and healthy refrigerator. Although there may be many problems with the freezer, there are also many simple repair methods that can immediately retrieve frozen food. Here are the five most common freezer problems that Sears has encountered time and time again, and the possible culprits.

An obvious sign is that the freezer looks too cold and the refrigerator looks too hot. If the freezer is cold and the refrigerator is hot, it may be that the refrigerator and the cooling components of the freezer are working properly. If the refrigerator is not cold enough, it may be that the condenser fan motor blades are stuck or the condenser fan motor is faulty.

If the refrigerator is hotter than usual and the compressor is running almost continuously, you may have a problem with the condenser fan motor. If you hear the compressor motor running and the freezer is still not cooling, there may be a problem with the evaporator or condenser coils. A refrigerator repair technician can inspect capacitor models for problems.

If this all seems too big, or you are unable to reach the condenser coils as most Sub-Zero refrigerators are heavy, it may be wise to have a professional Sub-Zero repair company safely clean the condenser coils without further damage. or damage to the appliance.

The freezer will not be able to cool down if the compressor is not working properly. If the starter relay is faulty, the compressor may intermittently or not operate at all and the refrigerator will not cool sufficiently. If the refrigerator is not cooling enough, the temperature control thermostat may be faulty.

If the fan is not working, cold air will not enter the refrigerator compartment. When this fan is not working properly, your freezer may look fine, but your refrigerator will be hot. If frost has accumulated anywhere in the system, the freezer should continue to operate normally, but the refrigerator will heat up.

If the freezer starts to form ice in the wrong places, such as in the vents or on the evaporator coils, it could mean that the freezer is at the correct temperature, but the refrigerator is too hot. Interrupting the cycle will interrupt the refrigeration of the freezer, but there are many factors that exacerbate this problem.

In most cases, fixing the problem that caused the icing and running the freezer for a couple of defrost cycles will eliminate the excessive freezing and the appliance will return to normal. If the defrost control board stops working, the refrigerator will not be able to efficiently dissipate heat, resulting in high temperatures. A defective thermostat does not transfer energy to the cooling system and the freezer compartment does not cool.

Sometimes, when the refrigerator’s thermostat is not working, it will interfere with the normal operation of the rest of the refrigerator. If your compressor is not working properly, your refrigerator will not be able to cool anything and stop working completely. If there is too much food in the fresh-keeping compartment, cold air may not circulate properly, causing the refrigerator to become hot.

It may sound strange, but your freezer is much more efficient at doing its job when it needs to keep a lot of food cold. If the environment is too cold, the freezer may not have enough time to maintain its temperature. If the temperature is too high, it will be difficult for the appliance to bring the internal temperature to the desired temperature.

Frost build-up in the freezer can also block the air vent, reducing or preventing cold air from entering the refrigerator. If a significant amount of ice has formed on the engine, defrost the freezer and see if that solves the problem. If the fans and compressor in the refrigeration system are running, but the refrigerator or freezer is not cooling properly, check for airflow or defrosting problems. If the compressor and fans operate normally but do not operate often enough or long enough to maintain the correct temperature in the fresh food and freezer compartments, the cold control may be faulty or not calibrated.

If the fan is defective, the temperature in the freezer compartment will rise slowly, and the temperature in the fresh section will rise faster, and the compressor will run longer and more frequently than usual. If the fan does not run when turned on, the coolant temperature will rise and the outer walls may be very hot to the touch. The fans work to cool the compressor and coils, so if they break, the refrigerator will start to heat up. To check the evaporator fan, you must turn off the refrigerator and access the fan on the back of the back of the freezer compartment.

Unplug the refrigerator, and then remove the cover of the evaporator fan located at the rear of the freezer compartment. Remove the rear refrigerator access panel and find the condenser motor fan-it is located next to the compressor. This is especially important because your refrigerator relies on compressors to cool all working parts and keep them running smoothly.

If you replace the evaporator fan motor or any part of it, you will need to turn the refrigerator back on and make sure the problem is resolved. Another reason the freezer works but does not freeze is a faulty evaporator fan. Typically, most refrigerators use a fan to move the cold air in the freezer to the evaporator, and then the air is pushed into the area of ​​the refrigerator to keep it cool.

The purpose of the fan is to draw heat away from the coils, and when the fan fails, your refrigerator does not cool enough, so it will continue to run longer than it should. The evaporator fan is located in the freezer and circulates cold air in the refrigerator when the compressor is running. The job of the evaporator fans is to draw fresh air from these coils to circulate it throughout the unit, first through the freezer and then into the refrigerator (or fresh food compartment). Both sides of the LG refrigerator are cooled by cold air, which is drawn into the evaporator coils by a fan that circulates the air to both sides.

The coil is located below or behind the refrigerator and is used to cool and condense the refrigerant. Sometimes, too much dust or dirt accumulates on these coils, so that the heat can no longer be effectively dissipated, and instead enters your refrigerator. If you find that a lot of dust has accumulated on the coil, plan to clean it once or twice a year to keep the refrigerator cool.

With the holidays upon us a non working freezer is a problem you don’t need at this time. For freezer repairs in OKC contact Appliance Repair OKC Services. They can be reached by calling 405-378-4566 or you can also visit our website at https://www.okcappliance.com or alternatively our Google business page at https://cutt.ly/YEnc8qk. Call today!


The post My Freezer Is Running Too Warm? appeared first on Appliance Repair OKC Services | Best Appliance, Washing Machine Repair Company in Oklahoma.

Monday, December 20, 2021

My Refrigerator Freezer Is Cold But The Refrigerator Is Warm?

refrigerator repair service okc

an appliance repair technician in work clothing repairing a refrigerator


My Refrigerator Freezer Is Cold But The Refrigerator Is Warm?

If there is a lot of ice on the motor, please defrost the freezer to see if the problem can be solved. If the coil freezes again, the defrost heater assembly should be checked to make sure it is working properly. To temporarily put the refrigerator into operation, remove the rear panel of the refrigerator and remove all accumulated frost (pour hot water on the coils preferably).

If frost has accumulated anywhere in the system, the freezer should continue to operate normally, but the refrigerator will heat up. If the freezer is cold, but the refrigerator is hot and the evaporator coils are frozen, the problem may be in the defrost system. If any part of the refrigerator’s defrosting system fails, ice can build up on the evaporator coils, causing the refrigerator to work harder to keep itself cool.

If the evaporator fan motor fails, the refrigerator or freezer may become too hot. When the engine fails, the fan cannot move the cold air and you will find that your LG refrigerator stays cool, but the freezer is working. If the fan motor fails, cold air will not enter the refrigerator.

If the condenser fan does not work properly, the temperature of the refrigerator may rise, and the compressor may overheat. Typically, refrigerator condenser fans and compressors located near the floor behind most refrigerators will turn on when the thermostat needs more cooling. If the refrigerator is hotter than usual and the compressor runs almost continuously, there may be a problem with the condenser fan motor.

If the fan is defective, the temperature in the freezer will rise slowly, and the temperature in the fresh section will rise faster, and the compressor will run longer and more frequently than usual. When this fan is not working properly, your freezer may look fine, but your refrigerator will be hot. If the freezer starts to form ice in the wrong places, such as in the vents or on the evaporator coils, it could mean that the freezer is at the correct temperature, but the refrigerator is too hot.

When the refrigerator is not cold but the freezer is cold, the problem is most likely that a mechanism in the refrigerator is not working properly. Generally, most refrigerators use a fan to move the cold air in the freezer to the evaporator, and then push the air into the refrigerator area to keep it cool. Without this fan, the refrigerant will not be cooled enough to maintain the refrigerator temperature. If you have a cold refrigerator freezer but it is hot, the evaporator fan motor may be malfunctioning.

The evaporator fan is located in the refrigerator and circulates cold air throughout the refrigerator when the compressor is running. A small fan and motor are installed near the evaporator to help draw air into the coil and circulate it in the refrigerator and freezer. Such fans and motors, called evaporator fans and motors, draw air into the evaporator coil and circulate it in the freezer and refrigerator. It should be started when the compressor is started, and the sound of the fan should be heard in the freezer compartment and the air flowing in it should be felt.

Make sure that the vents at the back of the refrigerator are not blocked by ice cream boxes or frozen vegetables-the vents must be unobstructed to allow cold air to circulate. It should be noted that refrigerators with condenser coils on the back will not have fans. If the defrost heater is not turned on, frost will form on the coil, and eventually air will not be able to pass through the coil to cool the freezer or refrigerator.

However, if the defrost system is not working properly, the evaporator coils will freeze, leaving the Samsung refrigerator hot but cold in the freezer. Another possibility, when the Maytag fridge freezer is cold but the fridge is hot, is a faulty evaporator fan motor. When you find that your refrigerator is not cooling but the freezer is operating normally, a faulty evaporator fan motor is a common problem.

The cold control is a temperature control switch that supplies power to the compressor and fan in the refrigerator. If the compressor and fan are operating normally, but the frequency or time of operation is not sufficient to maintain the correct temperature of the fresh food and freezer compartment, the cold control may be faulty or not calibrated. The FDA requires the refrigerator to be set at 40 degrees Fahrenheit or lower and the freezer compartment temperature to be set at 0 degrees Fahrenheit.

If you have a cold freezer but the refrigerator is still hot, you may need to call a qualified technician to take a closer look. If these fixes exceed your comfort level or your defrost system needs repairs, call a qualified refrigerator repair service. A same day home appliance repair can help with any GE refrigerator repair to restore the temperature in the refrigerators. If a problem is discovered and your refrigerator is repaired, Appliance Repair OKC Services can help.

We can help troubleshoot when the refrigerator is hot, the freezer is cold, from frozen evaporator coils to a faulty damper regulator. Whether it’s frozen evaporator coils or a faulty thermistor, we’ll figure it out to get your refrigerator back up and running. We’ll cover the most common reasons your refrigerator won’t cool, but the freezer still maintains its temperature.

If you go through this checklist and the temperature of your fridge or freezer is still not where it should be, you may face a more daunting problem. There are several possible reasons the refrigerator does not store cold milk or ice cream frozen. If the freezer fan is still running but the refrigerator is not cooling, the compressor or compressor start relay may be faulty.

The compressor is the part of the refrigerator that compresses and expels refrigerant vapors into the coils outside the refrigerator. It pulls air through the evaporator coil, cools it, and then pushes the air through the freezer and refrigerator.

If the air door is not closed or opened, it will affect the temperature of the refrigerator while the freezer compartment maintains the correct temperature. If you cannot feel fresh air entering the refrigerator (but you know that the evaporator fan is working), the damper is likely to be stuck or in the closed position. The fresh food side of the LG refrigerator is cooled by letting the air in the freezer through the flip cover.

Likewise, if the refrigerator is full, objects can block the ventilation holes through which cold air can enter the interior of the refrigerator. If there is too much food in the fresh food compartment, the cold air may not circulate properly, causing the refrigerator to become hot. A freezer full of food is a common reason the refrigerator stays cool and the freezer gives out.

If your fridge is not working and you need refrigerator repair in OKC be sure and contact Appliance Repair OKC Services. Call 405-378-4566 or visit our website at https://www.okcappliance.com or also our Google business page at https://cutt.ly/YEnc8qk. Call now!


The post My Refrigerator Freezer Is Cold But The Refrigerator Is Warm? appeared first on Appliance Repair OKC Services | Best Appliance, Washing Machine Repair Company in Oklahoma.

Friday, December 17, 2021

My Dishwasher Has Stopped Draining?

dishwasher repair okc

Young Male Technician Fixing Dishwasher With Digital Multimeter


This acts as a vent to prevent an air lock in the exhaust pipe, but the air gap can sometimes become clogged with debris. While this is inappropriate in most cases, it serves the same purpose as an air gap – preventing wastewater from flowing back into the dishwasher. If the hose is kinked or clogged, it can prevent water from flowing out, leaving a puddle in the dishwasher.

Unplug the dishwasher. Remove the lower front panel. Disconnect the hose from the drain pump. If you see blockages at both ends of the hose, carefully remove it using a straightened wire hook. To check for a blockage, you will need to remove the lower front panel and locate where the grooved tube connects to the drain pump. Do not try to clear an obstruction with a water snake – dishwasher hoses are not designed to withstand the cutting motion of tools and can easily puncture.

Cleaning the dishwasher drain pipe and other drain pipes under the sink will remove blockages if they are causing drain problems. Once you have correctly identified the cause of your dishwasher blockage, make sure you have what it takes to unblock the drain. If your dishwasher still won’t drain after troubleshooting these areas, hire a professional to evaluate the system.

Calling a repairman. If you’ve tried all of the above solutions and your dishwasher still won’t drain, it is possible that several parts of the dishwasher are faulty. While there can be a number of reasons a dishwasher won’t drain the water, the problem can often be resolved with a few quick troubleshooting steps. Here are some reasons your dishwasher won’t drain and how to fix it.

It is a versatile tool that prevents large pieces of food, napkins or other debris from entering and clogging the drain. Over time, it can become clogged due to the accumulation of various debris – a telltale sign is water seeping through the air gap when the dishwasher is turned on. The most common reason the dishwasher stops draining water is if the filter or water pump is clogged with food debris.

If you don’t use the chute or clean it frequently, food and debris can build up in the chute and prevent the dishwasher from draining properly. If the disposal container contains unmilled food, or if food residues settle in the drain hose under the disposal unit, this can prevent the dishwasher from draining properly. Complete disposal of waste or an air gap in the connecting hose can prevent the dishwasher from draining properly.

If any of these are clogged, the water can be blocked when draining from the dishwasher, leading to backups and even leaks. Once water starts to drain, it may stop flowing back into the dishwasher. If your dishwasher is running and the water starts to stagnate in your sink, your dishwasher may have a plinth. If the dishwasher continues to drain, there may be water in the base of the machine, the drain hose may be below the water level, or you have a faulty flow meter.

If water continues to drain after incorrectly correcting these problems, consult your user manual or call a plumber. To determine if your dishwasher is not working due to over-draining, look for the following symptoms. If you feel that the dishwasher is continuously draining water after being turned on, you may have a leak that fills the base of the dishwasher with water, thus activating the flood protection switch. If your dishwasher won’t drain the water, the first thing to do is check the filter.

Filters are an integral part of your dishwasher and require maintenance in order to operate efficiently. Filters trap soaked food particles and prevent excess food and grease from getting back into the dishwasher.

However, if the filter screen becomes clogged with this debris, it may prevent the water from draining. Our dishwasher cleaning tips recommend that you clean the filter regularly to prevent clogging and ensure proper water drainage.

Clean the filter and siphon with a stiff brush and warm soapy water (the filter and siphon can be found on the bottom of the dishwasher). Even if the dishwasher is draining, remove the siphon and filter and wipe thoroughly with soap and water. If your dishwasher doesn’t have a removable basket, clean the filter and just take care of the area around the drain.

The dishwasher is equipped with a filter basket inserted into the drain, which prevents food residues and other objects from entering the pipes. The dishwasher filter and drain basket work together to collect food debris during the wash cycle, preventing contaminated water from recirculating on the dishes during washing. Over time, they can become clogged with food debris and soap suds, which can build up water in the dishwasher.

A common problem with dishwashers is that they don’t stop draining water, wasting water and interfering with dishwashing. Check your user manual twice, but most dishwashers take a while to drain. However, if something does not work properly, the drain will remain active after this initial period, which will prevent the dishwasher from performing any cleaning.

Depending on how the dishwasher is loaded, sensors inside the dishwasher can detect that the load is complete, even though the water has not yet been drained. During a busy day, it’s easy to accidentally spill regular dishwashing liquid on the unit, which can easily form enough lather to prevent proper drainage. For example, using regular dish soap as a last resort can cause clogging and cause water to drain to the bottom of the dishwasher.

If you are tired of your dishwasher not draining, stop wasting time washing dishes by hand and do some good old research to figure out the problem and hope to find a solution. Dishwasher phones are common in the plumbing industry, but fortunately, solving the problem with undrained dishwashers is usually simple and you can solve it yourself.

The most common problems that cause water to build up in the bottom of the dishwasher include clogging, poor maintenance, malfunctions, and broken or faulty parts. One of the problems we most often encounter at Beyer Plumbing when it comes to slow drain dishwashers is a clogged drain filter. Water in the bottom of the dishwasher is caused by a blockage in the filter, drain, drain hose, drain pump or air gap.

When food or sediment builds up inside these systems, the dishwasher will not drain the water properly. As we briefly discussed at the beginning, the drain can get clogged with debris. Dirt can build up in the drain pipe, causing waterlogging and blockages.

Like dishwasher filters, the drain pump can easily be blocked by food debris and accumulated grease. To ensure that all water from its lower components is removed, the dishwasher uses a drain pump at the end of the cycle. In some cases, this pump can draw in both air and water, causing the dishwasher to stop draining water.

If you have a dishwasher full of water that just won’t drain or drains very slowly you might be seeking dishwasher repair in Oklahoma City. For these repairs contact Appliance Repair OKC Services. They can be reached by calling 405-378-4566 or you can visit our website at https://www.okcappliance.com. Also our Google business page can be visited at https://cutt.ly/YEnc8qk. Call now!


The post My Dishwasher Has Stopped Draining? appeared first on Appliance Repair OKC Services | Best Appliance, Washing Machine Repair Company in Oklahoma.

Thursday, December 16, 2021

My Oven Won’t Turn On?

oven repair OKC

Woman Showing Oven To Appliance Repair Technician In Kitchen


When the igniter absorbs electrical current, it heats up to a high temperature and ignites, and also causes the bimetal in the furnace safety valve to deform and open the valve to release the flammable gas. If your igniter does not spark, you will need to replace your oven burner igniter.

If your gas oven and gas burner stop working, the problem is likely to be in the gas line and requires professional repair. However, if the stove and oven do not light up, the technician will need to check the gas line.

The igniter is the most common part that cannot be ignited in a gas oven. To determine if the igniter is defective, observe the igniter with the oven turned on. If the igniter looks normal, you can restore power, set the oven to heat, and observe the igniter at the beginning of the heating cycle. To test the igniter, turn off the oven circuit breaker, and then make sure that the power is off by making sure that the oven lights, clock, and other electrical functions are not working.

Remove all oven racks and the baking sheet at the bottom of the oven to gain access to the gas burner and igniter. First make sure that the oven is turned off and disconnected from the power source A and that the gas supply is turned off (the gas shut-off valve is usually located behind the appliance) A Then remove the grates from the oven. an igniter, usually found somewhere in the bottom of the oven.

You will most likely have to remove the top of the oven in order to properly inspect it. If you have a multimeter, you can use it to test the oven (make sure it is unplugged first), but in most cases, you will need to call a professional to repair or replace the sensor for you.

If it is defective, neither the oven nor the lamp will be able to ignite. If the temperature control thermostat fails, it may prevent the oven from turning on. A defective thermostat can prevent voltage from reaching the igniter, preventing the oven from heating up.

If the oven gets too hot, the fuse may blow on some electrical models. A blown fuse will cut off the power to the oven and prevent it from operating.

You can replace the fuse, but to ensure that it will not blow again, you need to find and solve the underlying problem. If the oven fuse is blown, you need to check the oven components and their wiring to determine the cause before replacing the fuse.

If your oven has internal fuses, the fuse may have blown due to faulty wiring or components. Blown fuses indicate a problem elsewhere in the oven, such as a short circuit in the wiring or a problem with the control board. If the stove ignites but the oven does not heat up, the problem could be a dirty or faulty igniter. If the hob igniters are working properly but the oven won’t ignite, the problem is most likely with the igniter and not with the gas.

If it is not working properly, it could be the reason the stove or oven won’t turn on. If the sensor is accidentally hit during cooking or cleaning and now touches the wall of the oven, the cooking temperature will be unstable.

If there are no signs of damage, turn on the oven for a minute or two, and then check if any components are actually heating. If the food looks normal, turn on the oven for one minute and then turn it off. Adjust the temperature to 300 degrees Fahrenheit and check the thermometer after the oven is fully heated for 10-15 minutes.

If everything is in order with the gas supply, then switch to the gas igniter on the oven itself. If your oven overheats, the fuse will blow, turning off the power to the oven.

The burner may fail or fail and eventually stop heating. If you cannot preheat any burners, the problem is most likely that the terminal blocks are damaged and need to be replaced. An unheated oven is usually the result of a malfunctioning igniter (gas oven) or heating element (electric oven). Sometimes the gas supply may be difficult to reach the oven.

If you have a gas stove, you can light it with a match if the ignition does not work. If the light in the oven is off, the light needs to be replaced. Turn off the oven (turn the switch to the off position) before making any changes.

If the circuit breaker trips or the fuse blows, reset the circuit breaker or replace the fuse, and then try to turn on the oven again. If the switch is normal, check the socket-you can test the oven on a separate socket for testing. If the circuit to which your stove is connected has tripped, you need to reset it to re-ignite the stove so that it can ignite normally. If the voltage is disconnected on only one leg due to a circuit breaker trip or a blown fuse, the oven will not light up.

Even if a gas-fired oven is used, the timer and other components require electricity to operate. If the circuit breaker trips, the oven will refuse to heat. If the temperature in the oven is too low, a fire will start. Likewise, an oven thermometer can help you determine whether the oven temperature is usually lower or higher than the set temperature.

These are just a few of the most common problems that prevent an electric oven from igniting. In this guide, we’ll look at these reasons and explain what you should do if you find your oven won’t turn off. The following troubleshooting guide outlines some of the more common reasons the stove won’t turn on. We’ll show you how to check your oven for each of these problems, as well as steps you can take to repair your appliance.

For any replacement parts required, refer to your oven manual to ensure you have purchased the correct part. If you are not sure where the manual for your oven is, you can find information online for the model number you found on a small metal plate. or a label somewhere on the oven. Checking if a blown fuse could be dangerous and work you might want to seek help from an oven repairman. If you decide to do this yourself, first make sure the oven is turned off and unplugged from the power source.

If you are facing problems with your oven and need oven repair in Oklahoma City contact Appliance Repair OKC Services. They can be reached by calling 405-378-4566 or visit our website at https://www.okcappliance.com. You can also visit our Google business page at https://cutt.ly/YEnc8qk. Call today!


The post My Oven Won’t Turn On? appeared first on Appliance Repair OKC Services | Best Appliance, Washing Machine Repair Company in Oklahoma.

Wednesday, December 15, 2021

Water In The Ice Maker Isn’t Freezing?

ice maker repair service Oklahoma City

Young Male Repairman Fixing Ice Maker In Kitchen


For ice makers not freezing water be sure and check skirting boards and clumps can block the water line, just like you can completely close the water valve at the back of the refrigerator. Make sure that the water pipe is not kinked behind or under the refrigerator (1/4 inch copper pipe is much better than plastic filled pipe to avoid kinks). Find a water shutoff valve at the back of the refrigerator or under the sink, turn it off, unscrew the copper wire from the back of the refrigerator, put the copper wire in the bucket, open the valve, and check for water leaks.

A defective faucet—a small device that connects the ice maker’s water supply hose to the water supply hose—can cause problems with the ice machine’s water supply hose connecting to the water supply hose. If the water inlet valve has enough pressure to be energized, but the ice maker does not inject water to make ice, please replace the water inlet valve. If none of these parts are defective and the freezer compartment temperature is at least 15 degrees Fahrenheit, replace the ice maker assembly.

Unplug the refrigerator from the mains. Close the water tap. Loosen the two screws that secure the ice maker to the wall of the freezer compartment. Then move the refrigerator away from the wall, close the water tap and unplug it from the mains. Then turn on the power and listen for the sound of water filling the ice cube tray.

Remove the lid of the ice maker to check how much water enters the ice cube tray during each cycle. Find ice in an ice cube tray and check that the motor that drives the ice ejector lever is running.

Use a small funnel and hot water to defrost the pipe, or unplug the pipe and defrost it in the sink. Check the manufacturer’s instructions for the safe way to defrost the device with a tube. If the filler tube is frozen, you will need to defrost it using hot water poured onto the tube using the turkey, or remove the portion from the refrigerator and defrost it in the sink.

If the water supply line is kinked, you need to readjust it so that water can flow freely through it again. If the water pipe is blocked by minerals or is too small, the water pipe will not be able to provide the correct water flow to the ice maker. A clogged water filter, a kinked hose in the water supply line, or a malfunctioning water inlet valve can restrict the flow of water to the ice maker.

If the water supply line to the ice maker is frozen, this is a sign that the entire system is too cold or that the refrigerator itself is exposed to too low external temperatures, and these situations can lead to excessive freezing. Low water flow will prevent the ice maker from removing the cubes from the evaporator plate – they will eventually build up and cause freezing. The water filter may need to be replaced, and if the freezer is really too cold, try raising the temperature.

While this may cause the frozen inlet tube to thaw, it will also thaw food. Even in a refrigerator with a good temperature, the inlet hose to the ice maker can freeze, causing the entire appliance to stop before starting. To remedy this, use a hair dryer with a medium or low setting and blow hot air through the water supply tube until all of the collected ice has melted and drained off. This activates the water fill valve for a few seconds to fill the ice mold and the cycle repeats.

The ice cubes freeze and the mold dumps the ice into an ice bin, which then goes into an automated ice tray. Ice cubes can block the evaporator (air vent at the back of the refrigerator) and cause ice to form on all the walls and ceiling of the freezer. Check the ice chute or ice outlet in the container to make sure the ice cubes are not frozen or obstructed.

Make sure you empty the ice container so that there is no liquid water or broken ice on it. Also, be sure to remove as much ice from the tray as possible, as accumulated ice can cause the water in the tube to freeze. Hot water will melt frozen chunks of ice without adding chemicals to the ice tray, ensuring that the ice-making process can begin immediately in the machine cluster.

Most home improvement experts recommend pouring a cup of hot water into a frozen ice tray. You can try defrosting the ice maker with a little hot water, but this may not solve the underlying problem.

Low water flow means the ice maker will not be able to release ice cubes from the evaporator plate. When this cloudy water remains on the ejector lever and builds up over time, it can cause the ice maker to jam, preventing new ice from falling. If a lot of ice freezes, new ice won’t be able to form, and the plumbing can also pose a problem as it won’t be able to fill the proof.

According to the size of the ice cubes produced, tighten or loosen the screws to reduce or increase the amount of water. When the water pressure drops, it sometimes causes the water in the pipe to freeze. Ice accumulation can cause the filling pipe to freeze, so if the filling pipe freezes repeatedly after thawing, a defective valve may become a problem.

The fill valve directs the water through the fill tube to the mechanized ice maker, which includes an ice mold. In addition, the flowing water helps release the ice, allowing it to fall into the container. When the ice becomes large enough, the machine collects the ice by increasing the temperature of the evaporator plate. Then turn on the heater to warm up the cubes slightly so that they come off the ice cube tray.

As water continues to flow over the blocked ice, it continues to form until it turns into a huge block of ice. If cold air from the freezer cooling coils circulates around parts that should not be there, the ice maker water may freeze in the wrong place. When this happens, the Whirlpool Fridge Dispenser will stop working, affecting the ice but not the water. This is why when your Whirlpool refrigerator isn’t dispensing ice or water it can seem like a big deal.

We will describe the reasons why you might have a Whirlpool refrigerator that is not feeding ice or water from a stuck ice maker to a clogged water filter. This is why if you find your French Whirlpool fridge is not making ice, a quick troubleshooting step is necessary before the warmer days. Freezing of an icemaker in a refrigerator can be caused by a frozen icemaker fill tube, a faulty water inlet valve, a freezer temperature too low, or a water filter that needs to be replaced. If it has been a while since you last changed the water filter on your Sub-Zero refrigerator, this may be the reason your ice maker is not receiving a steady stream of water.

If your ice maker isn’t freezing water or won’t make ice and you need ice maker repair in Oklahoma City contact Appliance Repair OKC Services by calling 405-378-4566 or you can visit our website at https://www.okcappliance.com or also our Google business page at https://cutt.ly/YEnc8qk. Call now!


The post Water In The Ice Maker Isn’t Freezing? appeared first on Appliance Repair OKC Services | Best Appliance, Washing Machine Repair Company in Oklahoma.

Tuesday, December 14, 2021

My Freezer Is Leaking Water?

Freezer Repair OKC

freezer repair okc


However, if water is still leaking in your freezer after performing these simple checks and fixes, you may have to go to the appliance store and buy a new one. This leak in the back of the freezer is usually due to a damaged valve or hose connected to the water dispenser or ice maker. If you see water dripping or collecting on the outside of the pipe, you have a leak.

Another possibility is there is a leak in the water line from the water valve to the top of the freezer, replace it for about $ 10.00. I had a leak at the bottom of the back of the freezer and I noticed a pump in the freezer. fresh water corroded and cracked. I had the water dispenser hose replaced, but it still leaks from the bottom. Ice or debris can clog this tube, causing water to stagnate and water into the freezer.

If it is cracked or damaged, water may drain from the bottom of the appliance. The seals can age and break, or the waterline connections to the icemaker can loosen, leading to leaks, which can cause water to accumulate underneath and over the entire surface of the freezer.

This happens when food particles or other debris clog the drain hose, which can cause ice to build up and eventually leak water from the freezer and freezer. This happens when food particles or other debris clog the drain hose, which can cause ice to build up and eventually leak water from the freezer and freezer. Unfortunately, if food, ice, or debris clogs the drain line, the water cannot escape, causing a leak. If there is a plug of dirt or soot, the solution will clear the tube and allow the waste water to drain freely.

If this does not solve the problem, it may be necessary to manually remove the debris blocking the check valve at the end of the drain hose.

Reconnect the drain hose and plug and reconnect the freezer. In some brands of freezers, the defrost drain is directed along the back of the interior of the freezer rather than outward, causing water to accumulate under the fruit and vegetable drawers at the bottom of the freezer. freezer. If the defrost drain is blocked by ice, defrost water will overflow from the drain and drain from the bottom of the freezer. The defrost tube is what transports the water to the drain pan, where it eventually evaporates.

When the defrost drain (available at the back of the freezer in most freezers) is blocked, be it a food particle, a stack of frozen meals, ice, or a combination of both, the appliance should work again. If this drain is blocked by a pile of objects in the freezer or a debris blocking the line, the freezer condenser coils will have to run overtime and water will drip from them.

Once the line is defrosted, turn the freezer back on and press it against the wall. Try opening the freezer or freezer door and see if it closes by itself; otherwise it could be the cause of the frost. Likewise, if too much food is placed against the back of the fridge-freezer, water can push water into the salad drawer, which can then flow out of the front door of the appliance. Water may drip from the freezer ceiling around the rear ventilation area.

If you have water leaking and require freezer repairs in Oklahoma City be sure and contact Appliance Repair OKC Services. Call 405-378-4566 to schedule freezer repairs or you can also visit our website at https://www.okcappliance.com or alternatively our Google business page at https://cutt.ly/YEnc8qk. Stop that water from leaking by calling for repairs now!


The post My Freezer Is Leaking Water? appeared first on Appliance Repair OKC Services | Best Appliance, Washing Machine Repair Company in Oklahoma.