Thursday, March 31, 2022

My Oven Won’t Self-Clean?

oven repair Oklahoma City Oklahoma

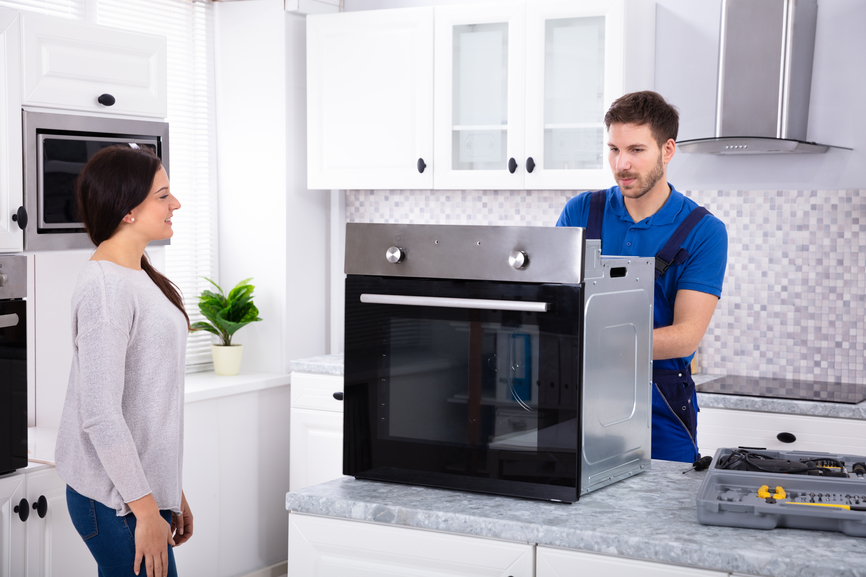
Male Worker Repairing Oven While Young Woman Stands In Kitchen


My Oven Won’t Self-Clean?

A common theme, the automatic oven cleaning mode was just used on the oven and now it does not work, the glass is broken, there is no clock, the door does not open, the door does not close. While your oven can handle some self-cleaning, the more you use this feature, the more likely it is that the oven won’t turn on again a day after the cleaning cycle. I won’t tell you not to use self-cleaning because ovens are designed to withstand the self-cleaning cycle anyway; During self-cleaning, all oven components are subjected to much more stress than during a normal cooking cycle.

If you perform this function immediately after cooking, the already high oven temperature will reduce energy consumption to bring it up to the maximum required level. The heating element inside your oven has to work very hard to reach the excessive temperatures required for the self-cleaning cycle, and if you don’t want it to burn out completely, heating it enough to melt the lead shouldn’t become a habit. Sometimes, after completing the cleaning cycle, the oven does not unlock (hangs during cleaning), and it can be difficult for the average consumer to solve the problem. If the self-cleaning cycle was interrupted by opening the door and latch, and now the door cannot be closed, there may be a door activation switch on the front of the oven.

If you try to use the oven after performing a cleaning cycle, if the control panel displays the message “Lock”, “LOC”, “Door locked” or the lights flash, you must first check the door latch switch. After replacement, you can reconnect the oven to the power supply and see if it works. Turn off the oven and make sure it has cooled down; then just take out the items to check. Keep in mind that the oven must be cold before the cleaning cycle begins, so if the oven is hot or hot, let it cool down before moving on to the next step.

You should wait 1 to 3 hours to make sure your oven has cooled down before moving on to the next step. After the cleaning period is over, allow the oven to cool completely; if you have an oven that can be cleaned on high heat, this may take a few hours. When you’re done cleaning, let the hot-clean oven cool, then clean or vacuum up any leftovers. After thirty minutes, your oven will be clean – of course, once it’s cooled you’ll need to wipe off excess moisture and debris.

A high temperature cleaning oven will typically reach 900 to 1000 degrees, which is more than double the normal temperature (sometimes more than triple), so make sure you don’t have anything on the stove. Heat can damage or warp oven grates, causing more headaches than cleaning. If the oven is excessively dirty, a larger fire may occur. Children and pets may be at risk of burns as the outer surface of the oven is also very hot, so never leave children or pets unattended in the kitchen while cleaning.

Large spills inside the oven will leave a layer of ash that may require manual cleaning. However, cleaning can be costly, as the internal workings of the oven can be problematic after cleaning, and the fumes from the cleaning process can be irritating. What if my oven isn’t completely clean after this If the cleaning cycle is complete and you notice that everything doesn’t meet your needs, you can use a non-abrasive oven cleaner (any solution we discussed above will do) to wipe it down. once. If you’re still having problems with the cycle, you’ll probably need to call a repairman to replace the interlock motor and switch, control board, thermostat, or some other component that’s preventing the oven’s self-cleaning cycle from starting.

For example, if a cooking or grill element is on the verge of failure, running the self-cleaning cycle of the oven will likely cause the element to fail at that time rather than three weeks later. Checking an oven that has failed immediately after or during a cleaning cycle is no different than checking an oven for any other occasion, but there are a few common failures that sometimes occur during a cleaning cycle. While it’s generally best to avoid using this feature and clean your oven with old-fashioned elbow grease and approved cleaners, if the self-cleaning feature has left your oven inoperable, here’s what you can check to see if you can get it. working again. The self-cleaning function works by emitting steam or heat throughout the interior of the oven to release – and burn off in the case of high temperature ovens – the remnants of hardened food.

Just run a self-cleaning cycle and let it run; at the end of the cycle, manually remove loose debris from the smooth, heat-resistant enamel coating of the oven with a cloth moistened with water. However, self-cleaning steam cycles tend to create most of the steam near the bottom of the oven (where the water is poured), so while this is effective in removing food debris from the bottom of the oven and lower side walls, you may still need to manually clean the ceiling and upper side walls. Clean your oven regularly after cooking and cooking. Of course, you don’t have to thoroughly clean the oven after every cooking, but there will be less buildup when cleaning the oven, which can reduce smoke levels when using the self-cleaning function.

If you are having oven issues and need oven repair in Oklahoma City contact Appliance Repair OKC Services by calling 405-378-4566 or visit our website at https://www.okcappliance.com. Alternatively you can also visit our Google business website at https://cutt.ly/YEnc8qk.


The post My Oven Won’t Self-Clean? appeared first on Appliance Repair OKC Services | Best Appliance, Washing Machine Repair Company in Oklahoma.

Wednesday, March 30, 2022

My Ice Maker Isn’t Making Ice?

ice maker repair

Young Male Technician Checking Fridge Ice Maker With Digital Multimeter

My Ice Maker Isn’t Making Ice?

Your ice maker may fail if there is ice in the mold but it won’t eject. Often the ice may not be completely frozen when it comes out of the ice maker. When the temperature in the freezer is too high, it may be too hot for it to form or remain frozen.

If the freezer is too hot, the ice cubes will melt, appear smaller, or deform. If the ice bin is not used often or has become too full, thawing and refreezing can cause ice cubes to accumulate. A frozen water line may result in small ice cubes or no ice. Air in the system may cause the dispenser to drip or form small/empty ice cubes.

If the water filter is installed incorrectly, it may reduce the flow of water to the ice maker, resulting in small ice cubes, little or no ice production. Flushing the system is necessary every time the filter is changed or the first time the refrigerator is installed in the water supply line. When replacing the water filter, the system must be flushed before it operates properly. While the pipe can be cleaned or thawed and water pressure adjusted, a failed valve must be replaced.

If the water supply valve has sufficient pressure and power is supplied, but the ice maker does not fill with ice making water, replace the water supply valve. If the water pressure is sufficient, use a multimeter to check the power supply to the water supply valve. Make sure the water inlet valve is not closed or restricted by a bracket or clasp. The water supply line can be removed from the back of the refrigerator, and the pressure is adjustable.

Make sure the water supply line is not kinked behind or under the refrigerator (it’s better to use 1/4″ copper tubing rather than a plastic fill line to prevent kinks). If the plumbing is frozen, turn off the refrigerator and locate the water supply shut-off valve under the sink or behind the refrigerator. Find the water supply stopcock behind the refrigerator or under the sink, close it, unscrew the copper pipe from the back of the refrigerator, put the copper pipe into a bucket, open the faucet and see if water is leaking. When checking the water supply line, make sure that the water supply is properly connected to the cold water network and that the water supply stopcock is fully open.

To make sure you have clean ice and unobstructed water flow, you should replace your freezer water filter according to the manufacturer’s recommendations. Sub-Zero recommends replacing your refrigerator water filter every 6-12 months to avoid blockages that restrict water flow and ice production. If the water filter becomes clogged or dirty, it will prevent water from entering the ice maker and the ice maker will not produce ice.

If it’s been a while since you changed the filter, it’s probably clogged and water can’t flow into the ice maker (you’ll likely notice the ice cubes get smaller or smaller before it gets completely clogged). If the plumbing is clogged, water cannot come out and ice does not form. Not enough, it can also make sure that the water line does not fill the ice mold.

If a lot of ice freezes, no new ice can form, and the waterline can also be a problem because it can’t fill the sample. A less serious failure can occur if too much water causes the ice tray to fill with ice. Make sure to remove as many ice cubes as possible from the tray, as the remaining ice cubes can cause the water in the small fill tube to freeze. Ice buildup will cause the water inlet pipe to freeze, and if the water inlet pipe freezes repeatedly after defrosting, it may be a valve failure.

The water fill valve opens for a few seconds to fill the ice mold and the cycle repeats. If the ice maker is not producing ice, but you see the ice ejector lever move and a buzzing sound is heard for about 10 seconds, the water valve is calling for water that is not coming out.

Look for ice cubes in the mold and make sure the motor that turns the pusher arm is running. The hot water will melt frozen ice cubes without adding chemicals to the ice maker tray, making it safe to resume ice making in the ice maker assembly immediately. If your ice maker uses tap water (straight water), make sure the water flows freely and reaches the portable ice maker.

A defective faucet valve—the small device that connects the ice maker’s water supply hose to the water hose from the ice maker’s water supply hose to the water hose—may cause problems where the ice maker’s inlet hose connects to the water hose. If your freezer is working properly, you have the control lever in the ON position, but it still doesn’t work or make ice, it could be a problem with the ice maker unit as a whole or the ice maker solenoid valve. water manufacturer in the back. Either of these two factors can cause the Sub-Zero refrigerator to not produce ice due to limited water supply. If your home’s water pressure is below 40 psi, ice production may be delayed or stopped.

If less than 3/4 cup of water is dispensed, the water pressure is likely insufficient to make ice. The water supply valve may fail if the water supply valve is blocked by mineral deposits preventing the valve from opening.

To schedule ice maker repairs in Oklahoma City contact Appliance Repair OKC Services by calling 405-378-4566 or visit our website at https://www.okcappliance.com to also our Google business page at https://cutt.ly/YEnc8qk. Call now!


The post My Ice Maker Isn’t Making Ice? appeared first on Appliance Repair OKC Services | Best Appliance, Washing Machine Repair Company in Oklahoma.

Tuesday, March 29, 2022

Water Is Leaking From My Freezer?

Freezer Repairs Oklahoma City

Serviceman Repairing Freezer With Toolbox In Kitchen

Water Is Leaking From My Freezer?

The most common cause of water leaking from the freezer to the refrigerator is a backup defrost drain. Sometimes a clogged defrost drain can become blocked by ice cubes, causing water to leak into the refrigerator. If your refrigerator and freezer are not having cooling problems, a piece of ice in the drain could be causing water to enter the refrigerator.

Water accumulation and low temperatures may cause the drain system to freeze and water to leak outside the refrigerator. If your refrigerator has an ice maker or water dispenser, the water line may be clogged or frozen. If water is leaking from the front of the refrigerator, the drain hose may be clogged.

If there is a leak from the back of the refrigerator and you find it immediately after using the water supply function (if applicable) or if the ice maker has just been filled, then you have a leak from the water supply valve. You have no water supply from your refrigerators if you can find it quickly after using the water line feature, if you have just filled the ice machine, or immediately after turning off the water supply. A leak could be caused by a loose or damaged plumbing that connects the refrigerator to the plumbing. If you have a modern refrigerator equipped with a water filter and water filter, this could be the source of your refrigerator leak.

If the drainage system is restricted or clogged, water will drain into the refrigerator. Leaks can also occur under the refrigerator if the tray is filled with too much water before it has evaporated.

The pool collects residual water from various cooling systems until it is evaporated by the condenser fan. Self-defrosting refrigerators have a drain pan at the bottom of the refrigerator that collects dissolved water that evaporates over time from a condenser fan that blows hot air onto the pan. The freezer drain hose will drain the defrost water into the tray at the bottom of the freezer.

The refrigerator drain hose drains excess water from the automatic defrosting system to the drain where it eventually evaporates. The refrigerator’s automatic defrost system includes a drain hose that drains excess water into the drain pan. Excess water in the drain pan. Sometimes the remaining water in the defrost drain hose can freeze, resulting in a clog causing the water under the refrigerator to overflow.

If the evaporator drain line becomes clogged, water overflows and seeps along the inside walls of the freezer and onto the floor. If for some reason the drain line becomes clogged, instead of going down, the water will overflow, and you will end up with water under the basket or even on the floor. If you find water in the fruit and vegetable drawers or notice water from the refrigerator dripping onto the floor, it is likely due to a clogged defrost drain. In some brands of refrigerators, the defrost drain runs along the back of the inside of the refrigerator instead of outward, causing water to pool under the refrigerator drawers at the bottom of the refrigerator.

A clogged defrosting drain, a damaged defrosting tray, or a loose water pipe are the three most common causes of a refrigerator leak. Unfortunately, since refrigerators run on ice, water, and condensate, a leak can be caused by several problems.

Excessive humidity in the air can add water already in the refrigerator and cause the refrigerator to leak. An uneven refrigerator can prevent condensation (water) from entering the drain pan under the refrigerator and evaporating, instead water is lost inside and outside the refrigerator. The refrigerator is naturally permeable to water, but it must be collected in a tray under the refrigerator where it can safely evaporate without wetting the floor. As water accumulates as a result of the defrost cycle, it may leak from the refrigerator onto the floor.

When refrigerant doesn’t circulate easily, it builds up in the pipes, forcing the refrigerator to work harder than it’s pumped; this creates additional condensation around the coils, which causes water to drip onto my kitchen floor, looking My fridge is leaking. In addition to leaking water from the back of the refrigerator, you may also notice that the refrigerator water dispenser isn’t working properly because a connection issue restricts water flow.

Check for water on your kitchen floor near the refrigerator, first check for leaks in the plumbing to the ice maker. If you see water dripping or pooling along the outside of the pipe, you have a leak.

Although the water pipe between your home and the appliance may leak, this is unlikely. Although the water pipe between your home and the appliance itself may leak, it will require damage to the pipe. If you still find water leaking from your Electrolux refrigerator, especially from under the refrigerator, the drain pan may be damaged. If my fridge is level and the drain isn’t clogged, but you still see the daily puddle, the water line may be the problem.

One of the most common causes of commercial refrigerator water leaks is a clogged drain, which is relatively easy to fix. Occasionally, food particles or ice can clog the defrost drain of the LG refrigerator, resulting in a leak under the refrigerator or behind the food drawers. If ice is causing a blockage, manually defrost the refrigerator or flush the drain with hot water to defrost the LG refrigerator to clear the blockage.

When the underlying drain becomes clogged or frozen, the resulting water will overflow and drip into the refrigerator below. Refrigerators with an automatic defrost function have a drain line that extends to the bottom tray to drain the water generated when the bottom tray is defrosted.

For freezer repairs in Oklahoma City contact Appliance Repair OKC Services by calling them at 405-378-4566 or you can visit our website at https://www.okcappliance.com or also our Google business page at https://cutt.ly/YEnc8qk. Call today!


The post Water Is Leaking From My Freezer? appeared first on Appliance Repair OKC Services | Best Appliance, Washing Machine Repair Company in Oklahoma.

Monday, March 28, 2022

My Refrigerator Is Cycling On And Off Too Much?

Fridge Repair OKC

Man repairing fridge with customer


My Refrigerator Is Cycling On And Off Too Much?

With a little more attention to your refrigerator, you may find that it runs all the time. Remember that in most cases your refrigerator only keeps running because it hasn’t reached the desired temperature to keep your food cold. If the refrigerator is leaking hot air, the defrost cycle must be performed continuously to keep the room cool.

In order for refrigerators and freezers to maintain the correct temperature, the compressor runs most of the time. The thermostat can signal the start of the compressor and as soon as the refrigeration cycle starts it sends a stop signal. When the refrigerator is turned on, the thermostat sends a signal to the start capacitor to turn on the compressor and start the refrigerator’s refrigeration cycle.

The refrigerator goes through a cycle that turns on the compressor to cool the air and pushes it into the refrigerator to ventilate. Refrigerator compressors do not run all the time, but turn on when the temperature inside the refrigerator exceeds a certain level. If the evaporator fan is not working properly, the compressor will have to work harder to cool the refrigerator.

After the compressor in the refrigerator has been running for 8-10 hours for the set time period, the defrost timer initiates a defrost cycle that turns the compressor off to give it time to defrost. The refrigerator should run for 4-8 hours before shutting down and starting the defrost cycle. Every 12-15 hours, a refrigerator defrost cycle should begin, which uses a defrost heater to melt frost that has accumulated on the evaporator coils.

Frost stops the evaporator coil from working effectively, so the refrigerator runs a defrost cycle periodically to remove it. When the defrost heater stops working, frost builds up quickly on the refrigerator coils, causing the refrigerator to continue to operate. If this defrost system does not work properly, the condenser coil will remain frozen and the refrigerator will continue to operate because the refrigerator will not be able to cool the freezer compartment.

When the refrigerator is running all the time, the unit’s defrost heater may have stopped doing its job of melting ice that can condense around the wrong areas of the refrigerator, such as the evaporator coils, that can make it all work. When a faulty defrost termination thermostat fails, it will not work properly and the refrigerator will continue to operate. Check the defrost thermostat; if it’s not at the right temperature, the refrigerator won’t do its job. If the thermostat is not doing the job of the thermostat, ice particles will build up on the coils, causing the refrigerator to run constantly because it is not receiving the signal that the refrigerator is at the correct temperature.

If you constantly open the refrigerator to remove things, cold air comes out of the refrigerator. Refrigerator and freezer door seals are another possible reason why your refrigerator won’t stop working. A damaged door seal can prevent the refrigerator from closing properly, causing cold air to escape from the refrigerator.

Usually, if the gasket is worn enough to keep the refrigerator running, you will be able to feel the cold air escaping when the door is closed. If the refrigerator is running continuously, the door seal may be torn or damaged, or if the door is not closed tightly, hot air may enter the refrigerator and cause the evaporator coil to freeze.

There are a number of reasons why a refrigerator may run continuously, including dirty condenser coils, a bad door seal, or too much food in the refrigerator. One of the most common refrigerator problems is that the device runs too frequently. The fridge needs to be running to keep food cool, and a fridge that runs all the time can be very noisy.

Since refrigerators are fairly quiet, running your fridge all day long probably won’t disturb the peace in your home. If you’ve been in the kitchen all day and noticed that your refrigerator won’t turn off at all, then you’ve got a problem. If you notice that your refrigerator is constantly turning on and off, or if the continuous hum becomes loud enough to be noticed, your refrigerator may be broken.

If your refrigerator is shutting down and you can get it to work by turning the refrigerator off and on with the thermostat knob, the thermostat may be the problem. If so, your refrigerator will cycle on and off more frequently than in a home where someone lives alone in a cold climate.

If the defrost timer is faulty, the refrigerator will continue to operate. The defrost timer may not prompt you to restart your Whirlpool refrigerator after it has gone through a defrost cycle.

A fridge that keeps running is noisy and annoying, but it also adds to your bill. Worse still, a constantly running refrigerator will drastically increase your energy bills, as the refrigerator is one of the most energy-hungry appliances in any home.

Depending on how often the refrigerator door is opened, the compressor in the refrigerator should run four or five times a day. Typically, a refrigerator compressor runs for 4 to 8 hours straight before shutting down. Other factors that affect refrigerator run time include clogged vents inside the best bottom freezer refrigerator, dirty or damaged door seals, and interior lights that won’t turn off when the door is closed.

To schedule refrigerator repairs in Oklahoma City contact Appliance Repair OKC Services by calling 405-378-4566 or visit our website at https://www.okcappliance.com to also our Google business page at https://cutt.ly/YEnc8qk. Call now!


The post My Refrigerator Is Cycling On And Off Too Much? appeared first on Appliance Repair OKC Services | Best Appliance, Washing Machine Repair Company in Oklahoma.

Friday, March 25, 2022

My Washer Door Doesn’t Open?

washing machine repair okc

Repairman repairing washing machine at kitchen


My Washer Door Doesn’t Open?

The most common reason for a Whirlpool washing machine door to stick and fail to open is a faulty lid switch (including latch). If you’ve taken everything else into account and still can’t open the washer door, the lock itself is most likely broken. Whether your washer door is blocked by excess water, rusty baseboards, or hinges, you can fix it over time.

If you still think your door lock can be repaired, you may want to call a repairman first to have a look at the car. Some models of washing machine doors won’t open if there is still water in the drum, so if you can empty the machine, you might be able to fix the problem. If you still see water in the drum, your machine may be having problems draining, causing the door to lock up.

The drain pump can sometimes become clogged or completely broken, which can cause the door to block. If your washer stops in the middle of a cycle and the door won’t open, it may be because the washer is full of water that needs to be drained before the door can open. If you interrupt or pause the cycle, the door may remain locked until it can be safely opened. When the machine is in motion, the door will automatically lock to prevent access to the moving parts.

The pressure switch tells the machine where the water level is, and on some models the door lock itself will not unlock if the pressure switch is faulty because the machine receives a signal that the machine is still full of water. Turn the washer back on to see if the pressure switch resets and the machine unlocks. Drain the machine to release as much water as possible, then wait for the machine to cool down. As stated in the wash codes, leave the machine off for at least one minute or so.

It could also be a problem with the pressure switch, as when the machine lock is still energized, your washer cannot restart to empty and open the door. Many models of washing machines are programmed to lock the door handle until there is no water left in the drum. If your washer has a door on the outside of the unit and a handle facing the edge of the door, you can try pressing the latches to open the door.

If your machine’s handle is facing outward (as shown in the picture of the washing machine), you can release the latch with a garden line or threaded line around the edge of the door. The handles on these machines can be fragile and attempting to open the door when it is locked could damage the lock. During the disassembly of the cover, you may notice cracks and dents on one or more parts. If the machine continues to spin even after you have lifted the lid, you may need service.

When the machine overheats, the lid closes to prevent opening. The thermal lock works by heating and expanding, so even if the washer is turned off, the washer door will not open immediately. If the bath water is too hot for the washing machine to unlock the door, just wait for the washing machine to cool down and the door will unlock.

When dealing with an LG washing machine door that won’t open, turn off the machine, unplug it, and wait for about 45-60 seconds. Keeping your washing machine clean will help prevent clogged drain filters and ensure that the drain runs smoothly and the door opens properly. When the lid of your Samsung washing machine no longer snaps on, chances are your washing machine will no longer wash your clothes, let alone start up. LG intentionally programs LG washing machines to remain locked until the water runs out.

Then drain the water and clean the hinges so that the machine runs smoothly. If there is no water in the machine, the problem is most likely a damaged or faulty door or a problem with the switch. The problem with a closed door is usually caused by too much water left in the machine, but this is an easy fix. In this case, the problem is with the door lock or unlock mechanism and can happen to almost any car, no matter if it is 3 years old or older.

Some machines may have a manual shutdown mechanism that will allow you to temporarily bypass the problem. In these cases, try to manually replace the two parts of the door lock, namely the lock and the latch of the door opener. If your door lock is damaged and won’t close properly, your best bet is to replace it. The lock and switch assembly can fail both mechanically and electrically.

Keep in mind that every brand and model of washing machine is different and there are a number of reasons why a washer door won’t open, so the solutions above may not help unlock every locked washer door. If you’ve done your homework, looked through the manufacturer’s manual that came with your device, and still can’t open the washing machine door, it’s probably time to seek professional help.

This way you won’t need a brand new machine when a small part fails. That’s why, all of a sudden, when the wash is finished, you reach for the door handle as usual and find that it won’t open.

To schedule washing machine repairs in Oklahoma City contact Appliance Repair OKC Services by calling 405-378-4566 or you can visit our website at https://www.okcappliance.com. Also our Google business website can be found at https://cutt.ly/YEnc8qk. Call now!


The post My Washer Door Doesn’t Open? appeared first on Appliance Repair OKC Services | Best Appliance, Washing Machine Repair Company in Oklahoma.

Thursday, March 24, 2022

My Gas Oven Is Slow To Heat Up?

oven repair services Oklahoma City

Woman Trying To Use Her Oven


My Gas Oven Is Slow To Heat Up?

Sometimes it is possible that your gas oven is heating up, but you are seeing the wrong temperature on the display. If you have turned on your gas oven and it is not heating up, there are several possible causes that need to be addressed. Regardless of the cause, a technician should fix the oven before it gets worse.

In these cases, a professional technician will be required to repair the device. If your oven is gas, the master will turn off the gas supply before starting the repair. Sometimes a Portland technician can test your oven for bad current. As soon as you detect an unexpected smell, it is recommended to turn off the oven and call a professional master.

If you’re installing new elements and the oven still doesn’t work, there may be an electrical problem. If you took the simple steps to check for a problem with the oven components and found that it still doesn’t work, the problem may be with the control board or relay board. If the oven takes longer than usual to light up, this is the result of an electrical problem.

If you notice food taking longer to cook than it should or coming out of the oven undercooked, your oven may not have reached the correct temperature.

The time it takes for the oven to reach the set temperature varies from oven to oven. After turning on the preheat, a more expensive oven will heat up to the desired temperature as quickly as possible. Bring the temperature up to 300 degrees Fahrenheit and check the oven thermometer after 10-15 minutes when the oven is fully heated. Check the temperature inside the oven with an oven thermometer after 20 minutes and then every 20 minutes for the next 90 minutes or two hours after that.

Preheat the gas oven to 350 degrees Fahrenheit (176.67 degrees Celsius) and measure the temperature after 20 minutes and every 20 minutes for the next hour and a half after 2 hours.

An igniter or spark will ignite to keep the safety valve open until the oven reaches the set temperature. If the igniter is too weak to open the oven gas valve and ignite the gas, or if it is completely broken, the Wolf gas oven will not heat up. A leak can make the stove’s igniter too weak to open the safety valve that prevents gas from entering the igniter.

You can identify this problem by turning on the igniter and waiting for it to ignite the gas. In a gas oven, often weak firearms cause the oven to preheat for a long time. This may seem like an obvious problem, but anyone could be in a hurry without noticing that one of your oven’s heating elements won’t turn on.

An oven that does not heat is usually caused by a faulty igniter (gas oven) or heating element (electric oven). If the burner ignites but the oven doesn’t heat, the problem may be a dirty or defective igniter. If you have a gas stove, you can make a fire with matches if the electric ignition doesn’t work. If both the grill and stove are working, but the oven isn’t heating, it could be a faulty igniter, which is the most common cause of oven failure.

A dirty or defective igniter may be visible in the oven, or you may need to remove the bottom panel of the oven to gain access to it. If the igniter looks normal, you can turn the power back on, set the gas oven to preheat, and watch the igniter at the start of the heat cycle. To test the igniter, turn off the oven switch, then make sure the power is off, making sure the oven lights, clock, and any other electrical functions are not working.

Even if the oven is gas heated, timers and other components require electricity to run, and if the switch is tripped, your gas oven will refuse to heat. Ovens use a lot of electricity when cooking and baking, and something as simple as a power surge can trip a switch.

When you select the cooking or grilling function in the gas oven, the control system sends current to the igniter or spark electrode. All this time, after turning on the oven, you must monitor whether the igniter or spark starts to glow or not.

After a few clicks, if the igniter is defective, you may smell natural gas as it comes out, after which you should turn off the oven and contact an appliance repair company. When you set the temperature on a gas oven, you should hear a few faint clicks followed by the typical gas ignition hiss.

If you start hearing abnormal clicks and buzzing, this is a great sign that something is wrong with your oven. If the oven does not heat up properly and an error code appears on the LED display, the code indicates what is happening.

If the door still won’t close, the door sensor may need to be replaced. Like other light bulbs, the light inside your oven will go out from time to time.

If the stove is not heated properly, the food will be overcooked or undercooked. We will look at the 5 most common reasons why the Wolf oven does not heat up properly for quick and effective troubleshooting. An oven is an indispensable appliance that delivers hot and satisfying food to your family.

If you are having oven issues and need oven repair in Oklahoma City contact Appliance Repair OKC Services by calling 405-378-4566 or visit our website at https://www.okcappliance.com. Alternatively you can also visit our Google business website at https://cutt.ly/YEnc8qk.


The post My Gas Oven Is Slow To Heat Up? appeared first on Appliance Repair OKC Services | Best Appliance, Washing Machine Repair Company in Oklahoma.

Wednesday, March 23, 2022

My Ice Maker Isn’t Getting Water?

Ice Maker Repair In Oklahoma City

Refrigerator is making fresh clean ice cubes.


My Ice Maker Isn’t Getting Water?

Often this can be a problem when you find that your Whirlpool ice maker is not working but the water dispenser is still working. If you are still having problems with water not entering the ice maker and making ice, the problem is likely with the water supply lines.

Water may not enter the built-in ice maker due to frozen lines, a missing filter, or a closed water supply valve. When a Samsung ice maker doesn’t add water, it’s usually due to frozen or clogged pipes, a missing filter, or the ice maker needs to be reset.

If the plumbing is clogged, water cannot come out and ice does not form. The waterline can also freeze, preventing water from passing through the waterline and filling the mold with ice. If a lot of ice freezes, new ice cannot form and the waterline can also be a problem because it cannot fill the sample. When this cloudy water remains on the ejector arm and builds up over time, it can cause the ice machine to jam, preventing new ice from falling.

If the water supply valve has sufficient pressure and power is supplied, but the ice maker does not fill with ice making water, replace the water supply valve. If the ice maker’s fill tube is frozen, the house water pressure may need to be higher to get water into the ice maker, or there may be dirt or a faulty water inlet valve. The fill pipe supplying water to the ice maker in the refrigerator may freeze and prevent water from entering the ice maker.

Accumulated ice can cause the water inlet tube to freeze, so the problem may be a faulty valve if the inlet tube repeatedly freezes after defrosting. A clogged water filter, a kinked water hose, or a defective inlet valve can restrict water flow to the icemaker. If the water flow from the water spout improves, the filter is clogged and must be replaced. Ignoring replacement can lead to problems with the water dispenser and ice maker.

Some refrigerators are designed to shut off ice or water when the water filter needs to be replaced. The ice maker receives water through a small pipe from the refrigerator to a water pipe, funnel, or water filter. The refrigerator has only one pipe; however, the refrigerator has two plastic water pipes that run from the dual water valve to the refrigerator’s ice maker and water dispenser.

The water supply tap itself will be located on the back wall of the refrigerator or under the kitchen sink. The rupture valve is an optional item that can be installed by a plumber or refrigerator installer in the water supply line between the refrigerator and the shutoff valve. The location of the water inlet valve varies by manufacturer, but on Kenmore and Whirlpool icemakers, the water inlet valves are usually located behind the refrigerator.

When the correct temperature is reached, the voltage charge signals the water inlet valve to open, allowing water to drain into the ice tray. This force works to fill the ice cube tray with water, and once the ice is ready, drop it into the container. If the ice bin becomes full, the ice bin should raise the fill bar and prevent new ice from being made. If the water pressure is so low that the water flows in a trickle and the temperature of the freezer is zero, it has no chance of creating an ice tray.

Hot water will melt frozen ice cubes without adding chemicals to the ice maker tray, making it safe to immediately resume ice making in the ice maker group. Manually remove any remaining ice from the mold by adding a little water and letting it rest for one minute. Restore power to the refrigerator and wait for the water supply to fill the mold. Lower the control lever again and wait approximately 10 seconds for the solenoid to actuate and fill the mold with water.

In addition to not adding water, you can reset the ice filter if it does not produce ice or if the performance level is low. Once the ice maker’s filter catches too much debris, it won’t be able to do its job, causing a blockage. After all, anything filtered by tap water before it turns into ice will eventually clog the filter.

You can try defrosting the ice maker with a small amount of hot water, but this may not solve the underlying problem. The first way to defrost ice is to turn off the refrigerator and defrost the freezer compartment and refrigerator. You should have a refrigerator with ice cubes to store food in the refrigerator while it is defrosting.

That’s why, if you find that your Whirlpool French Door Refrigerator is not producing ice, you need to fix the problem quickly before the warmer days arrive. If you’re still getting ice cubes but they’re not as good as they used to be, your line may be in the early stages of freezing. Make sure that the water supply is properly connected to the cold water source and that the water supply stopcock is fully open.

To schedule ice maker repairs in Oklahoma City contact Appliance Repair OKC Services by calling 405-378-4566 or visit our website at https://www.okcappliance.com to also our Google business page at https://cutt.ly/YEnc8qk. Call now!


The post My Ice Maker Isn’t Getting Water? appeared first on Appliance Repair OKC Services | Best Appliance, Washing Machine Repair Company in Oklahoma.

Tuesday, March 22, 2022

My Freezer Is Making a Clicking Sound?

Freezer Repair

appliance repair technician working on freezer


My Freezer Is Making A Clicking Sound?

Freezer clicks can be from the freezer condenser coil, compressor, starter relay, or condenser fan. If a dirty
condenser coil is the culprit, the clicking sound of the freezer is actually the sound of the freezer compressor
turning on repeatedly. If your freezer is still cooling effectively, but you hear a clicking sound (it could also be a
rubbing sound, a clicking sound, or no sound), check the condenser fan.

If the condenser fan is not running with the compressor running, guess what will happen. Under normal conditions, the
compressor does not need to run as often as it effectively cools the freezer. An incorrect start relay starts the
refrigeration process, causing the compressor to start compressing the refrigerant gas.

Once the compressor has cooled down, you will hear another click as the compressor starts up again. Running will cause the
compressor side to overheat and “click” – no cooling. When the compressor draws too much current, the superheat overheats
and “CLICKS” occurs. The overload will click when it cools down and send current through the circuit again.

Since the temperature is too high, the clicking is likely related to the compressor overload relay. The clicking noise is an
overload that shuts down the compressor when it overheats when trying to start with a faulty start/PTC relay.

You can tell it’s a problem with your fan if the clicking sound is fast. In any case, if you feel like the clicks are too
frequent, it’s best to quickly check to see if anything is wrong. If the clicks become excessive, loud, or are accompanied by
other problems, this could be a sign of a broken freezer. If your freezer is constantly clicking, a replacement
part will be required.

Before moving the freezer and replacing parts, it’s best to make sure you know what normal noise is. Yes, there are many
normal freezer sounds that are not related to the problem. As you can see, there is often no single possible cause for a
freezer problem. There are several common causes of clicks in freezers that are actually completely normal.

It is recommended that you use these simple troubleshooting methods to see if you can quickly fix the freezer clicking
issue. One of the main causes of an annoying click from the freezer is compressor problems. One of the most common
reasons a freezer won’t stop clicking is that you haven’t cleaned the condenser coils for a while. If you’ve managed to
stop the freezer from clicking by cleaning the condenser coils, replacing a faulty start relay, or redoing the condenser
fan, remember the solution that worked.

If you think that the starting relay may be the reason for the clicking of the freezer, it is easy to verify this on
your own without calling a specialist yet.

In addition to clicking, a bad start relay means your freezer is unlikely to be cold enough to store food. You can’t
live with one tick for too long, but you can’t even fix the tick yourself. A ticking freezer in St. Peters, Missouri is
very annoying and means something is seriously wrong with your freezer.

All freezers make some noise when plugged in and running, but that noise should be a soft buzz, not a loud click. From
time to time it is quite normal to hear a click, buzz and rumble. When you hear that click, it’s the sound of your
freezer not getting cold anymore and you’d better get it fixed quickly. The main circuit board inside the freezer
can also make clicking sounds, as can some ventilation and ventilation systems.

The clicking noises are most likely caused by a dirty condenser, which means your freezer’s cooling system needs to be
cleaned. This causes a clicking noise, causing the freezer to constantly run coolant and causing the freezer to
heat up normally. The condenser coils may start making clicking noises when they enter the defrost cycle. The condenser fan
may freeze, the blades may bend and scratch or snap into another part of the freezer, or they may stop working.

The coil condenser is located at the bottom of the back of the freezer. In newer models, the coil can be located
anywhere on the back. The condenser coil is located next to the compressor, on the back or bottom of the freezer. Make
sure to pull the compressor out far enough so that you can access the back of the freezer.

Before you start touching the coils, you need to turn off the freezer. What the defrost timer does is heat up the
evaporator coil in the freezer.

No matter what you see or hear, the refrigerant just isn’t cooling or circulating. If your freezer isn’t cooling enough
and is ticking like clockwork every five minutes or so, a dirty condenser coil in your system is most likely the culprit.

If the start relay/ptc relay is faulty, the compressor will not start and a clicking sound will be heard at 2-5 minute
intervals. Let’s hope the compressor starts up and the new components don’t break like the old ones. If the compressor is
defective, the compressor must be replaced by an authorized technician.

For freezer repairs in Oklahoma City contact Appliance Repair OKC Services by calling them at 405-378-4566 or you can visit our website at https://www.okcappliance.com or also our Google business page at https://cutt.ly/YEnc8qk. Call today!


The post My Freezer Is Making a Clicking Sound? appeared first on Appliance Repair OKC Services | Best Appliance, Washing Machine Repair Company in Oklahoma.

Monday, March 21, 2022

My Refrigerator Is Freezing My Food?

refrigerator repair okc

Technician Checking Refrigerator With Screwdriver


My Refrigerator Is Freezing My Food?

Set is a common problem that can cause food to freeze in the refrigerator. If the refrigerator freezes food at its lowest temperature, this is a sign that you need to increase the temperature, install a thermometer and check if the coils are dirty. After cleaning the refrigerator coils, check if the refrigerator continues to freeze food. If they get dirty, dusty, your refrigerator will have to work harder to maintain the set freezing temperature.

If you clean the coils, it may be enough to regulate the temperature inside your refrigerator. Sometimes it is enough to adjust the temperature settings or clean the refrigerator coils to prevent a problem in the future. If you’ve tried adjusting your fridge temperature control and all of the above didn’t work, you may have a real problem. If you have adjusted the temperature sensor in the refrigerator and rearranged the food, but the problem persists, check the temperature in the freezer.

If your refrigerator is freezing food, try replacing the temperature sensor, rearranging the food, adjusting the freezer temperature, checking the magnets, cleaning the coils, changing the thermostat, or checking the dampers. If your food freezes even after you raise the temperature setting, try to identify the area of ​​the refrigerator where this is happening. If food freezes, the temperature in the refrigerator may be accidentally set too low. If something suddenly freezes in the refrigerator, the most common problem is temperature related.

A faulty refrigerator can cause a lot of problems, especially when your appliance starts to freeze your excellent foods. Fortunately, most of the reasons why the refrigerator freezes food are due to easily fixable problems. In particular, bottom freezers can cause a lot of freezing problems in the refrigerator. This is a common problem and many people wonder why they have frozen food in their refrigerator.

Plus, frozen food in your freezer could be a sign that your freezer is broken, a headache no one wants to deal with. This is probably one of the main reasons why food near this part of the refrigerator freezes and everything else is not. This can cause the refrigerator to hypothermia and freeze everything inside within minutes. When the refrigerator freezes food, the damper may be damaged or stuck in the open position.

If the gasket is damaged and leaks, the refrigerator will constantly work to compensate, which will cause everything inside to start freezing. If the refrigerator is relatively empty, all the cold air will sink to the bottom of the cavity and freeze the food. If there aren’t enough items in it, cold air will settle on the bottom shelf, potentially freezing the food stored there. If a well-stocked refrigerator doesn’t have a lot of food, cold air can sink to the bottom of the refrigerator, so keep it full but not too full, or the food may not cool properly.

Food near the vents may freeze as the refrigerator tries to maintain the set temperature while expelling cold air. If the air damper is not working properly, the refrigerator may become too cold, causing the food inside to freeze and become inedible. If the thermostat is defective, it may not turn off and continue to operate, causing the refrigerator to freeze everything stored in it. The thermostat may be defective.

You may have set your refrigerator thermostat much higher than expected, which not only caused everything to freeze, but resulted in higher energy usage and higher bills. Return the thermostat to the manufacturer’s recommended setting and wait approximately 24 hours for the temperature in the refrigerator to stabilize. When a refrigerator stops working properly, there is usually a long list of problems, including temperature control.

If the seal is broken or worn, the freezer may run too long to maintain its temperature, causing the refrigerator to overcool. In deep-freezer refrigerators, heat rises in the refrigerator compartment, and the bottom is usually the coldest part. In models with a freezer compartment, food may freeze at the bottom of the refrigerator.

Some Side-by-Side refrigerators (especially older models) have a vent that directs cold air from the freezer to the refrigerator to the freezer to the refrigerator. Similar to a damper on your fireplace, the damper closes the vent between them to keep excess cold air from entering the freezer after the fridge has reached the optimum temperature. Thoroughly clean the refrigerator, look for vents that may be clogged with ice.

If freezing temperatures occur in the fresh food section, you may suspect that the damper assembly needs to be closed if it is working properly. Another reason you might experience sub-zero temperatures in the fresh food section could be damper control. Normally about 20% gets into the fresh food section, but if the automatic shutter gets stuck open for one reason or another, more air can get into the fresh food and the temperature drops dramatically.

If the food closest to the door stays at a safe temperature, raising the temperature in the fresh food compartment by one degree can prevent freezing. In this case, move the temperature sensitive food to another part of the refrigerator. Usually, if you take it after your refrigerator has completed its cycle, you will find frozen food. This can lead to spoilage of food or opening of cans when the liquid freezes.

To schedule refrigerator repairs in Oklahoma City contact Appliance Repair OKC Services by calling 405-378-4566 or visit our website at https://www.okcappliance.com to also our Google business page at https://cutt.ly/YEnc8qk. Call now!


The post My Refrigerator Is Freezing My Food? appeared first on Appliance Repair OKC Services | Best Appliance, Washing Machine Repair Company in Oklahoma.

Friday, March 18, 2022

My Clothes Are Wet And My Dryer Isn’t Heating?

Dryer Repair OKC

Dryer repair


My Clothes Are Wet And My Dryer Isn’t Heating?

There are several reasons why the dryer heats up but does not yet dry the laundry, and it may take several hours for the final drying. If you check all these boxes and the gas dryer isn’t drying your clothes yet, it could be something more serious. If you have to run the dryer twice to dry your clothes, you may have a kinked ventilation hose behind the dryer.

Then remove the ventilation hose from the back of the dryer and shake it. To turn the heat back on, you’ll need to replace the fuse located next to the dryer’s exhaust fan. If the heating element is not working properly, the dryer will continue to run and end the cycle, but the dryer is not hot enough to dry the laundry.

If the dryer is not drying clothes but is overheating, it is likely due to one or more of the reasons described in this article. To understand what might be causing the problem, we first need to understand how a washer dryer dries clothes. In this guide, we will see how to fix a washer dryer that keeps your clothes warm and damp.

One of the most frustrating things for a homeowner is when you load wet clothes straight from the washer into the dryer and turn it on. That is, if you are using the wrong settings on your washer or your washer is simply broken, it can wet your clothes more than the dryer can dry completely. If your dryer feels very hot but you have to run it for a very long period of time to make sure your clothes are dry, a clogged vent may be the culprit.

Clogged dryer vents also restrict airflow into the dryer and increase drying time, not to mention dangerous dryer fires. A clogged or dirty dryer vent can prevent your clothes from drying, and the dryer will smell bad, putting you and your family in serious danger. Clogged vents trap excess hot air inside the dryer drum, but lack of airflow can prevent clothes from drying.

Since the lock blocks warm, moist air from the dryer drum, this can cause the dryer to overheat. Stacking things like towels and sheets can cause the dryer to heat to a lower temperature and sometimes even shut down thinking the clothes are dry. The next step is to check the dryer settings, if they are incorrect, this can cause the dryer to heat up but not dry the clothes.

If you have a problem that your clothes are not completely dry after the drying cycle is completed. Sometimes your clothes won’t dry because you’ve chosen the wrong cycle or you don’t have enough heat to work. Choosing the wrong cycle can cause the dryer to overload or overheat and eventually damage the heating element, fuses, thermostat and sensors.

If one of these heating elements breaks or fails, the gas dryer may not work at all or only run part of the drying cycle. When the heating element fails, the dryer may not reach the right temperature, causing your clothes to not dry. Over time, the high limit thermostat can wear out, preventing the dryer from heating up properly. If the dryer is also equipped with a high limit thermostat, if the temperature becomes too high, this part will also cut off the electricity supply to the dryer heating element to avoid fire.

The cyclic thermostat switches the heating element on and off. Most dryers have several of these thermostats inside to help regulate the air temperature. Most dryers work the same way, they use heated air inside the drum to dry clothes.

It is very important that any drying machine can maintain a constant amount of hot air inside the drum for the correct drying of the clothes. Ultimately, dryers cannot work normally without a heating element for the production of hot air, which leads to the wetting of clothes. The main heating element is responsible for the supply of hot air into the drying machine and ensuring uniform feeding of heated air throughout the entire drying cycle.

Turn on the gas dryer to expose the heating components, following the manufacturer’s instructions. After removing the back panel of the dryer, you can find the heating coil by looking for the wire that is coiled together.

When any of these components are clogged, the dryer won’t work properly and your clothes won’t dry. If your washer isn’t draining completely, or isn’t getting enough water out of your clothes, your dryer will have a harder time getting the job done. There are a variety of reasons why a tumble dryer is no longer drying effectively, many of which can be addressed. Things can quickly get worse when the dryer stops working properly.

Finding your clothes still wet at the end of the drying cycle can be a dire situation. The laundry in the dryer is dried by rotating the drum. It’s a whole different story when the hair dryer doesn’t heat up at all. If your clothes haven’t dried at all after two or three washes, you may have had a blown thermal fuse problem, even if you chose the highest temperature.

Heating elements wear out naturally over time, but an overloaded dryer, poorly cleaned lint screen, or poor ventilation can speed up the process. A damaged thermostat can send an incorrect signal to the main control board and prevent the dryer from heating.

If you have checked everything you know how to check and still are having problems and need clothes dryer repairs in Oklahoma City contact Appliance Repair OKC Services by calling 405-378-4566 or by visiting our website at https://www.okcappliance.com or by visiting our Google business page at https://cutt.ly/YEnc8qk. Stop going to your relative’s house or a laundromat to dry clothes by calling for service now!


The post My Clothes Are Wet And My Dryer Isn’t Heating? appeared first on Appliance Repair OKC Services | Best Appliance, Washing Machine Repair Company in Oklahoma.

My Clothes Are Wet And My Dryer Isn’t Heating?

Dryer Repair OKC

Dryer repair


My Clothes Are Wet And My Dryer Isn’t Heating?

There are several reasons why the dryer heats up but does not yet dry the laundry, and it may take several hours for the final drying. If you check all these boxes and the gas dryer isn’t drying your clothes yet, it could be something more serious. If you have to run the dryer twice to dry your clothes, you may have a kinked ventilation hose behind the dryer.

Then remove the ventilation hose from the back of the dryer and shake it. To turn the heat back on, you’ll need to replace the fuse located next to the dryer’s exhaust fan. If the heating element is not working properly, the dryer will continue to run and end the cycle, but the dryer is not hot enough to dry the laundry.

If the dryer is not drying clothes but is overheating, it is likely due to one or more of the reasons described in this article. To understand what might be causing the problem, we first need to understand how a washer dryer dries clothes. In this guide, we will see how to fix a washer dryer that keeps your clothes warm and damp.

One of the most frustrating things for a homeowner is when you load wet clothes straight from the washer into the dryer and turn it on. That is, if you are using the wrong settings on your washer or your washer is simply broken, it can wet your clothes more than the dryer can dry completely. If your dryer feels very hot but you have to run it for a very long period of time to make sure your clothes are dry, a clogged vent may be the culprit.

Clogged dryer vents also restrict airflow into the dryer and increase drying time, not to mention dangerous dryer fires. A clogged or dirty dryer vent can prevent your clothes from drying, and the dryer will smell bad, putting you and your family in serious danger. Clogged vents trap excess hot air inside the dryer drum, but lack of airflow can prevent clothes from drying.

Since the lock blocks warm, moist air from the dryer drum, this can cause the dryer to overheat. Stacking things like towels and sheets can cause the dryer to heat to a lower temperature and sometimes even shut down thinking the clothes are dry. The next step is to check the dryer settings, if they are incorrect, this can cause the dryer to heat up but not dry the clothes.

If you have a problem that your clothes are not completely dry after the drying cycle is completed. Sometimes your clothes won’t dry because you’ve chosen the wrong cycle or you don’t have enough heat to work. Choosing the wrong cycle can cause the dryer to overload or overheat and eventually damage the heating element, fuses, thermostat and sensors.

If one of these heating elements breaks or fails, the gas dryer may not work at all or only run part of the drying cycle. When the heating element fails, the dryer may not reach the right temperature, causing your clothes to not dry. Over time, the high limit thermostat can wear out, preventing the dryer from heating up properly. If the dryer is also equipped with a high limit thermostat, if the temperature becomes too high, this part will also cut off the electricity supply to the dryer heating element to avoid fire.

The cyclic thermostat switches the heating element on and off. Most dryers have several of these thermostats inside to help regulate the air temperature. Most dryers work the same way, they use heated air inside the drum to dry clothes.

It is very important that any drying machine can maintain a constant amount of hot air inside the drum for the correct drying of the clothes. Ultimately, dryers cannot work normally without a heating element for the production of hot air, which leads to the wetting of clothes. The main heating element is responsible for the supply of hot air into the drying machine and ensuring uniform feeding of heated air throughout the entire drying cycle.

Turn on the gas dryer to expose the heating components, following the manufacturer’s instructions. After removing the back panel of the dryer, you can find the heating coil by looking for the wire that is coiled together.

When any of these components are clogged, the dryer won’t work properly and your clothes won’t dry. If your washer isn’t draining completely, or isn’t getting enough water out of your clothes, your dryer will have a harder time getting the job done. There are a variety of reasons why a tumble dryer is no longer drying effectively, many of which can be addressed. Things can quickly get worse when the dryer stops working properly.

Finding your clothes still wet at the end of the drying cycle can be a dire situation. The laundry in the dryer is dried by rotating the drum. It’s a whole different story when the hair dryer doesn’t heat up at all. If your clothes haven’t dried at all after two or three washes, you may have had a blown thermal fuse problem, even if you chose the highest temperature.

Heating elements wear out naturally over time, but an overloaded dryer, poorly cleaned lint screen, or poor ventilation can speed up the process. A damaged thermostat can send an incorrect signal to the main control board and prevent the dryer from heating.

If you have checked everything you know how to check and still are having problems and need clothes dryer repairs in Oklahoma City contact Appliance Repair OKC Services by calling 405-378-4566 or by visiting our website at https://www.okcappliance.com or by visiting our Google business page at https://cutt.ly/YEnc8qk. Stop going to your relative’s house or a laundromat to dry clothes by calling for service now!


The post My Clothes Are Wet And My Dryer Isn’t Heating? appeared first on Appliance Repair OKC Services | Best Appliance, Washing Machine Repair Company in Oklahoma.

Thursday, March 17, 2022

My Oven Isn’t Heating Up But The Stove Works?

Oven Repair Oklahoma City

Smiling Repairman Repairing Oven On Kitchen Worktop In Front Of Woman


My Oven Isn’t Heating Up But The Stove Works?

We’ve explained why your oven won’t heat up, especially with the burner still on. An oven that does not heat is usually caused by a faulty igniter (gas oven) or heating element (electric oven). The reason why the oven is not reaching the correct temperature may be related to the temperature sensor, heating element or oven igniter.

If the temperature sensor is not an obvious problem, check the correct operation of both the gas pilot and the heating element. If the oven temperature sensor is not working properly, this may be the reason why the oven does not heat up very much or not at all. If it still doesn’t heat up properly, you can use an ohmmeter to make sure the sensor is working.

If your oven has a heat sensitive bulb, check to see if it’s burnt out. The oven igniter must be placed under a cover of some kind and must be near, if not near, the burner’s gas inlet.

A dirty or defective igniter may be visible in the oven, or you may need to remove the bottom panel of the oven to gain access to it. Heating elements are usually located inside the oven, and access to the igniter is possible from below. The heating element is inserted into the back of the oven and is usually held in place with a pair of screws. The purpose of the temperature control thermostat is to control the temperature inside the gas oven and then start the fire when the oven temperature gets too low.

Thermostats measure the temperature inside the oven cavity by turning the electrical resistance on and off to maintain the desired temperature. Like electrical appliances, gas ovens also have thermostats that keep the oven at a constant temperature by adjusting the size of the flame on the burner accordingly. Even if the oven is gas heated, the timer and other components require electricity to operate, and if the switch trips, your gas oven will refuse to heat up.

My gas oven doesn’t heat well, although the stove seems to be working fine. As for the more serious problem of your gas oven not heating at all, you may have a damaged oven burner or ignition electrode. If you’re installing new elements and the oven still doesn’t work, there may be an electrical problem.

There may be a problem with the oven thermostat, electronics, or fuse if the oven has fuses. In the event that the electric oven is not working and the hob is still working, the situation is very similar to that of a conventional gas stove. There may be times when your oven is working fine, except that it doesn’t heat up to the right temperature every time.

If the cooking element is not working, the oven may not reach the set temperature, or it may take longer to reach that temperature, and the food tends to burn on top. If your oven is electric, the cooking element will likely provide 90% of the cooking heat, and the grill will provide the rest so that the food cooks evenly.

To make sure your oven is baking unevenly, you can also try baking a pie or roasting a whole chicken. Your oven does not cook evenly, this may also be due to the position of the pans or pans you are using. If you make multiple toasts and notice that some pieces are more toasted than others, your oven will not cook evenly. If you notice food taking longer to cook than it should or coming out of the oven undercooked, your oven may not have reached the correct temperature.

When your oven is not working properly, it can seem like there can be an endless number of reasons. In most cases, when an oven fails, it is a sign that there is a defective part.

A faulty relay can also cause the oven to stop working or not reach the proper temperature when trying to use an electric oven. Depending on how often you use the oven and how old the oven is, the two heating element relays can burn out after a while.

The gas igniter is the most common reason for an oven not working even when the stove is on. The igniter ignites the gas coming out of the burner and your gas oven starts to heat up. If the igniter looks normal, you can turn the power back on, set the oven to heat, and watch the igniter at the start of the heat cycle. To test the igniter, turn off the gas oven switch, then make sure the power is off, making sure the oven lights, clock, and any other electrical functions are not working.

If the burners ignite but the oven does not heat up, the problem may be a dirty or defective igniter. When you turn on the oven, the oven light may glow red even if it is not working properly. The elements of an electric oven are the part that generates heat and often glows red when turned on. The oven control thermostat is a temperature controlled switch and therefore has contacts that power the cooking and grilling elements.

If the Bake or Broil elements are not receiving power, the integrity of the corresponding oven thermostat contacts can be checked with a multimeter. My gas oven just doesn’t get hot enough to cook anything, but my stove works great, I set it to 350 and it doesn’t even get to that. It looks like it’s already enabled. If the troubleshooting and repairs suggested above fail, your oven may have blown an internal fuse, may need professional recalibration to heat properly, or there may be a faulty relay switch or damaged control board.

If you are having oven issues and need oven repair in Oklahoma City contact Appliance Repair OKC Services by calling 405-378-4566 or visit our website at https://www.okcappliance.com. Alternatively you can also visit our Google business website at https://cutt.ly/YEnc8qk.


The post My Oven Isn’t Heating Up But The Stove Works? appeared first on Appliance Repair OKC Services | Best Appliance, Washing Machine Repair Company in Oklahoma.

Wednesday, March 16, 2022

There Is Water In The Ice Mold Of My Ice Maker But It Isn’t Freezing?

Young Male Technician Checking Fridge Ice Maker With Digital Multimeter

There Is Water In The Ice Mold Of My Ice Maker But It Isn’t Freezing?

At the start of the ice making cycle, an electrical signal is applied to the water valve to fill the ice mold with water. Remove the ice maker lid to check how much water enters the mold during each cycle. If the ice maker mold is empty, you can manually pour approximately 4 ounces of water into it.

Turn off the ice maker control lever by pulling it up, then lower it again and wait a few seconds to see if the mold starts to fill with water. The water fill valve opens for a few seconds to fill the ice mold and the cycle repeats. The fill valve directs water through the fill tube to the mechanized ice maker assembly, which includes the ice mold and ice mold. The small one leads to the water fill valve in the refrigerator, which is controlled by the ice maker thermostat and the ice maker thermostat.

The ice maker receives water through a small pipe from the refrigerator to a water pipe, funnel, or water filter. Water may not enter the built-in ice maker due to frozen lines, a missing filter, or a closed water supply valve. For example, a bend in the water supply line can cause the water to break, preventing the ice cube tray from filling. If you check the ice mold tray and see little or no water or ice, the water line may be blocked somewhere.

If the plumbing is clogged, water cannot come out and ice does not form. Clogs and buildup can block the water supply line and cause the water valve downstream of the refrigerator to close completely. Make sure the water supply line is not kinked behind or under the refrigerator (it’s better to use 1/4″ copper tubing than plastic line to prevent kinks). Find the water supply stopcock behind the refrigerator or under the sink, close it, unscrew the copper pipe from the back of the refrigerator, put the copper pipe into a bucket, open the faucet and see if water is leaking.

After finding the water inlet valve, check if the screen or filter is clogged with debris. If the water supply valve has adequate pressure and power, but the refrigerator ice maker does not fill with water to make ice, replace the water supply valve. If the ice maker’s fill tube is frozen, the house water pressure may need to be higher to get water into the ice maker, or there may be dirt or a faulty water inlet valve. Even if the refrigerator is at a good temperature, the water supply pipe to the ice machine may freeze, causing the entire unit to stop before it can be started.

Low water flow will cause the ice maker to fail to remove ice cubes from the evaporator plate – they can build up over time and cause ice to form. This overcooling causes the freezer to reach temperatures well below freezing, causing ice to form on the ends of the water lines that supply the ice maker. In a typical home freezer, the water is surrounded by icy air, causing the ice cubes to freeze from the outside in. If the cold air from the freezer cooling coil is circulating around the part where it shouldn’t be, the water entering the ice maker could freeze in the wrong places.

Cloudy ice cubes that contain air pockets melt faster, making drinks thinner and watery faster than drinks made with clear ice cubes. When the ice meets the hot air in the chute, the surface ice melts back into the water, so the ice appears wet most of the time. The ice may partially melt and refreeze together to form chunks of ice, or ice cubes that are too small to rake in, which are all ice cubes that remain at the bottom of the container. The easiest way to reduce cloudiness is to boil a pot of water and place it in an ice cube tray.

Another way to get clean water is to put a whole tray of ice cubes in the small freezer and put it in the freezer. With clean lines, your ice maker will have enough water pressure to fill the tray and your ice cubes will get bigger. The hot water will melt stuck ice cubes without adding chemicals to the ice maker tray, making it safe to resume ice making in the ice maker assembly immediately. Once the molds have reached the right temperature, the ice maker-refrigerator begins the harvest cycle, popping the ice cubes and filling them with water.

The ice cubes freeze, the mold pours the ice into the ice bin, and the ice cubes are ejected into the automatic ice bin. Depending on the size of the ice cubes produced, turn the screw in or out to reduce or increase the amount of water. Put the rolled towel in the ice outlet area of ​​the refrigerator door, and then slowly pour the kettle into the chute with the door open.

First, check the chute on the door for ice, a few ice cubes, or a layer of frost. If your refrigerator has an ice blaster that won’t pop, this could be one of several reasons.

If the line is frozen, you can completely remove the ice maker from the freezer and let it thaw, or use warm water (in a turkey stick or spray bottle) to thaw without removing it. Operation may be due to lack of water or slow water flow from the water dispenser and ice maker to the refrigerator. From there, it only takes a few minutes for the water to turn into ice.

If you are having issues with your ice maker freezing ice and need ice maker repairs in Oklahoma City contact Appliance Repair OKC Services by calling 405-378-4566 or you can visit our website at https://www.okcappliance.com or alternatively our Google business page at https://cutt.ly/YEnc8qk. Call now!

The post There Is Water In The Ice Mold Of My Ice Maker But It Isn’t Freezing? appeared first on Appliance Repair OKC Services | Best Appliance, Washing Machine Repair Company in Oklahoma.