Friday, July 29, 2022

My Washing Machine Won’t Start?

washer and dryer repair okc

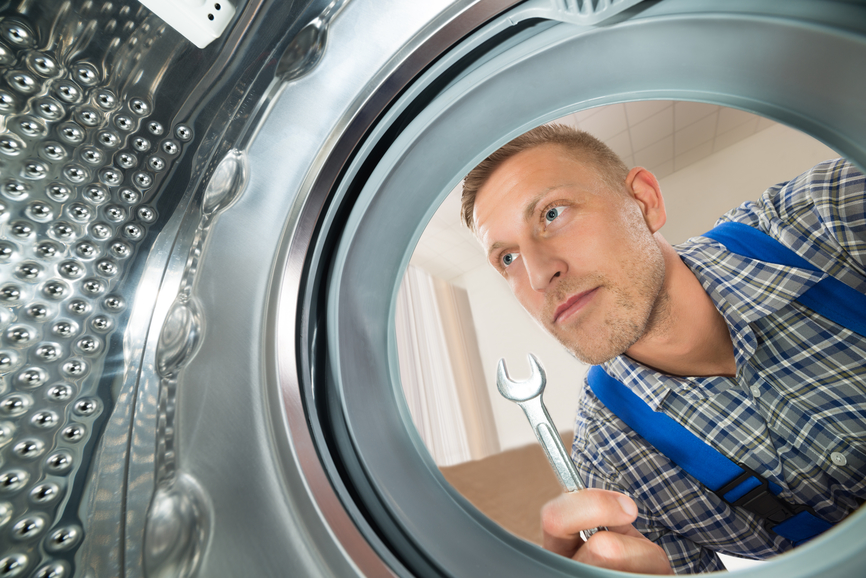
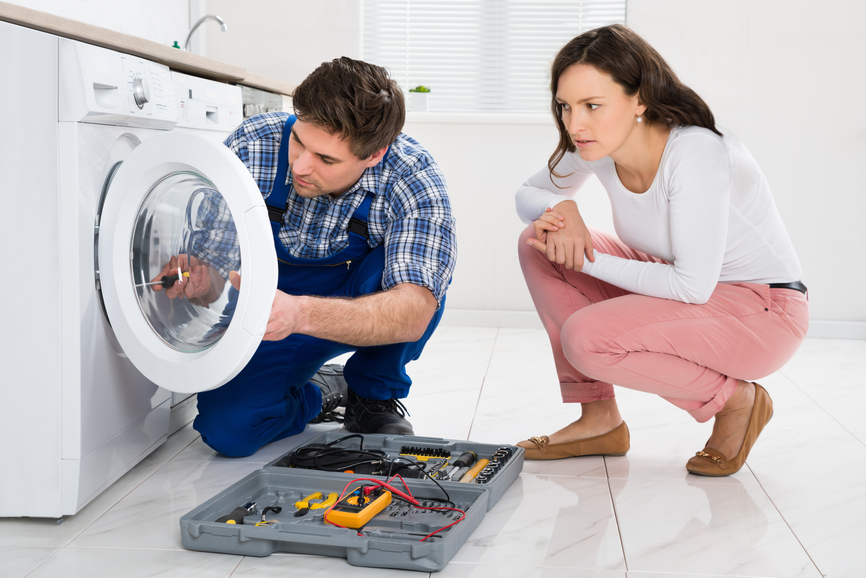
Mature Woman Looking At Male Technician Repairing Washing Machine


My Washing Machine Won’t Start?

If the washer does not begin, but only makes one sound, it is possible that the washer is draining something. One issue that you are going to need to address in your washing machine troubleshooting is that your washing machine simply does not start. If it is not an electrical issue, the washing machine not turning on may be having a problem with the motor. If you can hear the washer trying to turn on, but then fail, your motor has failed.

If everything else fails, then a bad part may be stopping your washer from starting. If you do not see any signs of damage, reconnect your washer to check the electrical supply to the circuit board(s). If the washer does not boot up after pulling the timer knob, check it for continuity using a multimeter. To check, just push forward on the timer and try restarting the washer again.

You will also want to check the timing knob and the lid switch, just in case any of these parts are the reason why your washer is not turning on. To make sure that the lid switch is at fault, disconnect power to the washer, and then pull a cord out from underneath.

If The lid/door switch is broken, it is never sent a close signal, and your washer will never believe that it is safe to begin. A broken lid/door switch cannot send the signal, so your washer still thinks it is unsafe to start washing. The washer knows that the door is open using a lid/door switch, which has a pressure tab which detects when the door is closed, and that you are safe to begin a washing cycle. Front-loading washers use the door switch, latch, and slammer, which you have to press in order for the washer to begin.

The starting switch can be tested and replaced in a rather straightforward procedure for top-loading washing machines, and is part of the computer in front-loading washers. For older top-loading washing machines, the start switch (and usually a defective timer) can be replaced by removing the rear plate from the top control panel. If a mechanical timer knob does not align correctly with the graphics on the control panel, you may try troubleshooting your washing machines problems by moving the timer forward slightly. If the lid switch works, but the washing machine still does not boot, see if the washing machine has a specific fuse within the control panel to deal with this.

If you have checked for all of the above issues and the washing machine still does not start, then do not panic, this may still be a repairable issue. If you had a hard washing day, running a few loads consecutively with no problems, but your machine will not start anymore, it may be that it is overheating. If you run a few loads, one after another, without issue, but suddenly find that your washing machine will refuse to start, it is possible that overheating is to blame. If the overheating happens only once or twice, that might not be an issue, but if your washing machines motor is constantly overheating, it is crucial that you figure out what is really causing this.

As a result, this may result in your washing machine stopping working suddenly, and such a sudden power loss could cause your washing machines control board to break. A bent circuit breaker may also cause sudden power loss in your washer. Wear can lead to your washing machines control knobs no longer engaging properly with the spool, so that you cannot adjust time or any other functions in the washing machine. Your washers lockout may be affected by several problems, such as a switch that is not working properly or is damaged.

If your knobs in your washing machine switch power or switch power are cracked or broken, then your washing machine might not turn the switch on. The number one reason why your washing machine stops working all of a sudden is because there is not any electricity. Motor If your washing machines motor gets too hot, your washing machine will turn off so that it can cool down before you can run it again. Simply let your machine cool down for a couple of hours before trying to start it again.

If you cannot get access to your washing machines outlet to reset your machine manually, then shut the circuit breaker. Check and reset the breaker if needed (or change a fuse), and then try starting your washing machine again. If your washer still does not start, disconnect or flip the circuit breaker off, then switch back on until the breaker firmly clicks in place, and plug the machine back into an outlet.

As always, you will want to disconnect the washer from the wall to avoid any injuries. While this might sound like a smart idea, check back in with your washer if it is still connected. The first thing you want to do is to make sure that you are not overloading your washing machine with loads that it cannot handle. Unfortunately, finding out that your washing machine is not going to start often happens when you are completely loaded up with dirty clothes.

Your washing machine will make a few sounds, but if you begin to notice that it is making weird sounds you have not heard before, that is a great sign that something is wrong. If the buzzing noises you are hearing while trying to use the washer are accompanied by a burning smell, your machine might be in serious trouble. If the washing machine is not spinning, that could be an indication of a problem requiring a repairman, but usually, a simple DIY repair can make the washing machine function again.

Remove the power supply to the washing machine before troubleshooting or trying a repair. If this is an issue caused by your appliance being too hot, simply allow the machine some time to cool, disconnect and let the machine sit for several hours, and then try to reconnect.

To schedule washing machine repairs in Oklahoma City contact Appliance Repair OKC Services by calling 405-378-4566 or you can visit our website at https://www.okcappliance.com. Also our Google business website can be found at https://cutt.ly/YEnc8qk. Call now!


The post My Washing Machine Won’t Start? appeared first on Appliance Repair OKC Services | Best Appliance, Washing Machine Repair Company in Oklahoma.

Thursday, July 28, 2022

My Dishwasher Is Making Loud Noises?

dishwasher repair service okc

Smiling Woman Behind Technician Repairing Dishwasher In Kitchen


My Dishwasher Is Making Loud Noises?

If your dishwasher makes a loud droning noise when it is running, then a likely culprit is a bad bearing in your circulator pump. A dishwasher making loud noises when not in use may indicate that there is an issue with the circulation pump. Experts say the most common reason for dishwashers that sound noisy is a circulator pump. Another reason for strange grinding dishwasher sounds is if there is not enough water spraying in the machine.

The noise can also happen if you start your dishwasher after a long time with no usage. A dishwasher making noises during refilling, which sounds like a buzzing noise or vibration, may also be due to hammering from water. If the dishwashers drainage pump is not working correctly, this could cause the dishwasher to make a buzzing, grinding sound, or other sound, when it starts to drain at the end of a washing cycle. If a solenoid on your drain valve is stuck open or closed, this could cause the dishwasher to produce a buzzing noise.

Some dishwashers that have an independent sewage pump have a drain valve solenoid that opens and closes during the drain cycle, either stopping the dishwasher from draining or allowing it to flush. A dishwasher has one or two pumps, usually one combined drain pump, that helps wash dishes as well as clean drains.

The dishwashers pump is an integral part of the drainage system, a piece that cycles the water so it can be used again. The impeller is responsible for moving the water through the dishwasher. If this part is damaged or worn, it may make the dishwasher produce loud buzzing sounds or make creaking sounds.

This may result in squealing or rattling sounds when you first run your dishwasher. If your dishwashers motor is defective or is about to go out, this may manifest itself as rattling. If a product gets stuck in the area where the cutter blade is located, or part of the cutter blade breaks, a grinding or bumping sound can occur while your dishwasher is operating.

Your dishwasher usually makes noises if there is a part that is broken, if anything is loose, if bearings are damaged, or if the motor shaft has been knocked out. If there is anything jammed in the drain tub, or the pump is not working properly, your dishwasher will make strange sounds when you run it on a dumping cycle. Check around and inside the drain pump for debris, and if the noise continues after cleaning the unit, replace the drain pump.

Make sure you have turned off your dishwashers power and water supply before you get near the pump. If your pump motor is faulty, repairing or replacing it should greatly reduce your dishwashers noise. Whether you can replace the impeller sprockets without replacing either pump depends on the model of your dishwasher.

The flushing or dumping pumps use impeller fins to move water around in your system, but if one of the fins breaks, or if the impeller is not moving correctly, this could result in a loud clattering or grinding sound in your dishwasher. Squealing or drone sounds could be an indication that the dishwashers wash or drain pump is having problems.

This kind of sound would be heard when a dishwasher is changing cycles; such as, as a dishwasher switches between recirculating and draining modes. After completing the cycle, a snapping sound can occur with the dishwashers latches as it opens or closes. The solenoid inside the dishwasher can also make a popping sound when it is activated while it is emptying.

To fix the sound of knocking or clanking, simply re-arrange your dishes inside of your Bosch dishwasher making the noise, making sure that you are allowing the spray arm to spin completely, without obstruction. To solve rhythmic clattering or banging, rearrange the dishes inside the dishwasher so that there is room for the spray arms.

If you are hearing the sound of knocking while washing, ensure dishes and silverware are properly stacked and the spray arms are free to turn. If you are hearing a thudding or clanking noise during the wash cycle, your dishwashers spray arm might bump into dishes that were not stacked correctly.
If you hear a banging sound during the Drain cycle, this is likely caused by the Drain Hose slamming into your cupboard as the water is drained out of your dishwasher. If your dishwasher was installed recently, a banging sound may occur because the drain hose is banging against this cabinet or wall while operating. If your newly installed dishwasher is making banging noises, then it is likely you installed it too close to your cabinets, and your drain line is vibrating against cabinet walls.

A partially-clogged drain pipe may make a wild, hollow, bubbling sound, as well as eerie sounds that come from the sudden draining hours after your dishwasher has been running. A broken piece of dishes or glassware, or a food particle trapped in a jam, may make grinding noises as the pumps empty water.
Over time, the diaphragm within your dishwashers water entry valve may wear out, and it may produce a shrieking or loud whirring noise. Over time, the bearings within The circulator can wear and cause a continuous squealing or droning sound throughout your washing cycle.

The whirring sound of water flowing through an intake fill valve, or gentle motor-pump whirring are common dishwasher sounds. When a dishwasher starts its normal cycle, it starts with a brief flushing cycle, and then the inlet water valve begins the tub-filling process. Depending on the model, your dishwasher might have one pump that is responsible for the draining and circulating water, or it might have two or three individual pumps.

To change a washing or draining pump, you will need to first disconnect your appliance from the power and water supplies, as well as the drainage pipe at the bottom of your sink. Carefully remove any gunk from the pump, which will help to make the dishwasher run quietly as it empties water. Close the door and hit Start, allowing your dishwasher to restart its cycle.

If you can’t find the cause of the dishwasher problems then call for dishwasher repair in Oklahoma City and be sure and contact Appliance Repair OKC Services by calling 405-378-4566 or visit our local website at https://www.okcappliance.com or also our Google business website at https://cli.re/Dyq1ME. Call now!


The post My Dishwasher Is Making Loud Noises? appeared first on Appliance Repair OKC Services | Best Appliance, Washing Machine Repair Company in Oklahoma.

Wednesday, July 27, 2022

My Ice Maker Has Stopped Making Ice?

ice maker repair okc

automatic ice maker malfunction in modern refrigerator in freezer


My Ice Maker Has Stopped Making Ice?

Some GE fridges have a sensor or a timer which stops the ice maker from working if you need to change your water filter. A clogged water filter may limit water flowing to the ice and water dispensers, preventing the ice maker from working correctly.

If a waterline is clogged, the water cannot get out, and you cannot brew your own ice. Because the water has to go through your filter, when it is filled with sludge, the water cannot go through. Eventually, everything that is been filtered from the water coming from the tap, prior to being turned into ice, eventually gets trapped in your filter.

If a whole load of ice gets stuck, there is no way for any more ice to be formed. The waterline may also pose a problem, as there is no way to refill your sink. A blockage in a line or closed valve can easily cause an unexpected ice shortage if new ice cannot be formed. This can occur due to the older ice being stuck in the mold, or simply the pieces of the ice being broken up, and thus resulting in broken or incomplete ice.

Or lines are having things naughty coming from a blockage, and the ice you end up with might not taste good. If your ice maker is not producing any ice at all, or is producing crescents or smaller-than-normal cubes, this is usually an indication that there is a clog somewhere in your supply lines.

If your ice maker is not producing ice, or the cubes are smaller or misshaped, a problem could be the water fill pipe. If your ice makers fill tubes are clogged with ice, it could be because you need more water pressure from the home to ensure that water flows to the ice maker, or there may be mud or defects in the water intake valves.

If the water inlet valve has adequate pressure and is receiving power, but the ice maker is not filling up with water to produce ice, then change the water inlet valve. The location of the water inlet valve depends on the manufacturer, but the Kenmore Ice Maker water inlet valve and Whirlpool Ice Makers are usually located behind your fridge. If your water inlet valve is not working properly or is getting inadequate pressure, the ice maker cannot function correctly.

To test your water inlet valve, first turn off your water supply and disconnect the refrigerator
at this should take just a brief moment, so you won’t need to worry about items inside your fridge being affected if you leave the doors closed. Slide your fridge away from the wall, shut the water supply valve, and unplug it. The door switch turns off the ice and water dispensers when you open the refrigerator door.

A smaller wire leads to a fill valve inside the refrigerator that is controlled by an ice maker thermostat An ice maker thermostat. The water line may need checking, both the place the water supply line attaches at the rear of the cooler, and where it attaches to the ice maker within the cooler. Locate the water shutoff valve behind the refrigerator or below the sink, shut it off, unscrew the copper supply line from behind the refrigerator, place the copper supply line into a bucket, open the valve, and see if any water comes out.

Turn back on the power to the refrigerator, and listen to see the water gushing in the tin. The water fill valve is turned on for several seconds to refill the ice mold again, and the cycle repeats. Remove any remaining ice from the mold by hand, adding a bit of water and leaving for one minute.

Once the mold has reached a suitable temperature, the ice tool will push out the ice and fill the ice mold again with water. When a thermometer or a sensor in the mold reaches approximately 15 degrees F., a motor cycles to eject the cubes.

Once water has frozen, the heater switches on to heat it up slightly, then the machine cycles to release the ice to the waiting tray. The hot water melts the frozen bits of ice, adding no chemicals to the ice makers tray — making it safer for you to start making ice again right in the makers build.

A bit of warm water (with a towel on hand for cleaning) melts any ice clogs. When you are ready for ice-cold water, you place the cup under diffusion and let the ice loose. Wait for three or four hours to let the ice freeze, then check to see if any of the ice is coming out now.

Look in the ice molds for the ice, and check to make sure that the motors turning the arms to expel the ice are working. Check that the arm is positioned correctly and moving freely (depending on the amount of ice in the bucket). First, check if there is ice dam, some pieces of ice, or a layer of frost blocking a doorway chute.

Make sure that your water service is connected correctly to your cold water service, and the water shutoff valve is completely open. When changing water filters, you must flush your system before they work correctly. Usually, changing out the water filter is a simple matter of opening up the cap, twisting it off, and pulling out the old filter, and then twisting the new one into place.

If your ice maker is not making any ice, but you see the ice-ejection arm swaying into action, and you hear a whirring sound for 10 seconds or so, it means that your water valve is asking for water, which is not coming. An unusual buzz coming from your fridge when the ice maker is supposed to fill up with water indicates that a shut off valve is involved. A bad shutoff valve–the small piece of hardware that connects the water pipe from the ice makers water hose to the water line–can be causing problems at the point where the ice makers water pipe meets the water line.

To schedule ice maker repairs in Oklahoma City contact Appliance Repair OKC Services by calling 405-378-4566 or visit our website at https://www.okcappliance.com to also our Google business page at https://cutt.ly/YEnc8qk. Call now!


The post My Ice Maker Has Stopped Making Ice? appeared first on Appliance Repair OKC Services | Best Appliance, Washing Machine Repair Company in Oklahoma.

Monday, July 25, 2022

My Freezer Interior Lights Not Working?

freezer repairs okc

freezer repair Oklahoma City


My Freezer Interior Lights Not Working?

A defective door light switch is also likely to occur if the new light bulbs are not working. The switch could be broken, and springs on the tabs which are squeezed when you close the door to turn the lights on and off could be broken. If the switch is having problems, then you might not have light on when opening your cooler. The issue is the switch that turns on and off the light when you open and close the refrigerator-freezer.

Normally, opening the refrigerators doors causes the lights to come on all the way. The door switch controls the light in your refrigerator, and it is triggered whenever you open or close the door. The door wiring harness contains wires that supply electricity to the door switch, turning on or off interior lights when the door opens or closes. If you notice your refrigerators LED lights do not turn on after moving your fridge, your doors wire harness might be shaken loose.

If you flip the doors switches several times and the lights turn on, it could simply be loose wires inside. If your door switch is not working, you might notice that the Whirlpool fridge lights are either flashing, or not turning on at all. If the fridge lights are flashing or do not turn on, it is important to check different parts, including the switch, socket, and light bulb itself. If replacing the light bulb does not solve your problem with GE Refrigerator Light, check door switch or cover.

Dry out the light socket and base of bulb, then try to re-screw bulb. If power is available to your fridge lights, and if your bulb or light is not bad, then you should check your light sockets next. Since the socket is a live-voltage circuit, you must disconnect the power before checking the socket. If the bulbs are working, test voltage on the contacts of the socket.

If the lights inside are not working, inspect the bulb and check it is in good condition. If the fridge or freezer compartment has a conventional bulb, check if the bulb is loose in the socket, and tighten if necessary. If you notice the LED lights on a GE fridge are not working, the first place to look is at the bulbs. When you notice the fridge lights are not working, check the reasons mentioned above, and get in touch with a professional to have them repaired.

If your fridge light is not coming on anymore when you open the refrigerator door, you will have to determine what is causing the issue so that you can figure out how to solve it. If you also have such a push-button refrigerator, and the light is not working, your first step is going to be checking to see if the push-button is damaged in some way. If there is any malfunction, then the lights inside the fridge will cease working, so getting this fixed early is essential. With a new bulb and new door switch, the light should turn on again.

When you shut the refrigerator door, the light is turned off, and a spring-loaded plunger makes the electrical connection as you open the door, which turns on the light. When the door is closed, they press the switch, which signals that the light is turned off. The LED lights are turned on and off with a little switch located at the door hinge. If the door is opened for more than 10 minutes, the LED light will turn off automatically in order to conserve energy.

Once the door has been opened for ten minutes, the internal lights turn off. If the doors of a Sub-Zero freezer are left open for at least ten minutes, the lights dim in order to keep them from getting too hot. If lights are dimming in any compartments since the doors were opened, restart the electronics control board.

If the refrigerator was moved or installed recently, and you removed the doors, make sure that your electrical plugs are connected correctly. If you have done all the above, but still no green light, then check the electrical cords going from the light board to the ice maker. You may want to try changing out a bulb or the light assembly to see if the light starts working.

If the lights do not still work, then it is time to call in a professional appliance repair technician. Various specialized technicians suggest replacing the light on the refrigerator first, to see if it solves the problem. Check if your doors are not left open long Check door switches controlling LED lights LED lights Double-check if wiring is connected Power cycles my Whirlpool refrigerator received a replacement LED light.

Close the fridge door and open it again Restart the timer on the LED light. The door switch is another crucial item that is inside of a fridge, which allows voltage to enter into the bulbs first. This causes a jammed door contact to the light controlling unit.

If you notice that the refrigerator and freezer lights are off, it is possible that Sabbath Mode has been accidentally enabled on your control panel. By selecting Sabbath Mode, your temperature setting remains unchanged, but your control panel lights, interior lights, and audio controls are turned off. You may notice that when you switch to that mode, or turn off Sabbath mode, both lights and panel will turn on.

For freezer repairs in Oklahoma City contact Appliance Repair OKC Services by calling them at 405-378-4566 or you can visit our website at https://www.okcappliance.com or also our Google business page at https://cutt.ly/YEnc8qk. Call today!


The post My Freezer Interior Lights Not Working? appeared first on Appliance Repair OKC Services | Best Appliance, Washing Machine Repair Company in Oklahoma.

My Refrigerator Is Constantly Running And Cycling?

refrigerator repair service okc

appliance repair technician working on refrigerator


My Refrigerator Is Constantly Running And Cycling?

Obviously, my fridge is connected to the grid and gets electricity (it is running all the time), so it is not really a feasible solution for most. This would result in my fridge running, but it would not be cooling down to its preset temperature inside.

If your thermostat is not doing its thermostats job, the ice particles are going to be building up on the coils, and that is going to make your refrigerator run continuously, because it is not getting a signal that the refrigerator is at the correct temperature. As mentioned, dirty or clogged coils will make the fridge run continuously, which is not healthy for it. The dirtier your coils become, the longer your fridge runs, and the more power it uses. If your condenser coils are noticeably dirtier, the fridge will be running continuously trying to keep itself cold.

This is usually happening all around the condenser coils, and it may prevent them from doing their jobs correctly, leading your fridge to operate for much longer than necessary. Specifically, condenser coils are responsible for sending the heat collected from within the fridge back out.

If this defrost system is malfunctioning, the condenser coils will stay frozen, causing the fridge to operate continuously since the fridge cannot defrost its interior. If the refrigerator is venting hot air, then the defrost cycle will need to be running continuously in order to maintain the cooling environment. Several times per day, the defrost heater is turned on for several minutes to melt away any frost that might have built up on your refrigerators evaporator coils.

If your defrost heater assembly is not working, your fridge is not defrosting, and frost will continue to build up on the evaporator coils. The frost prevents the evaporator coils from working effectively, so the refrigerator runs periodic defrost cycles to remove it. When the defrost heater is running continuously in your fridge, it might stop doing its job, melting ice which might have condensed in the wrong areas in the refrigerator, like on the evaporator coils, causing it to be running continuously.

If this is not working properly, whether the defrost itself, a timer, a control board, or the thermostat, this could leave your defrost running constantly. A fridge may be running every 20 minutes when it has malfunctioned thermometer, damaged seal, or is placed too near to wall. While this depends on how frequently you open it and how much food is in there, it is common for the refrigerator to run on and off intermittently.

The cycles may increase if you have a finite amount of items inside your refrigerator, since that takes pressure off your refrigerator. Cycles happen for a few reasons, ensuring that your refrigerator is cooling your food and maintaining stable temperatures. Factors influencing a fridges cycle are outside temperatures, internal contents, and frequency of door openings.

The most common reason why a thermostat setting is not correct is because your refrigerator is running continuously, which is a freezer temperature setting too high. The most common reason why your Whirlpool Refrigerator keeps running is because the thermostat is incorrectly set. Your Whirlpool fridge also might have contaminated or clogged condenser coils if it is running often, so be sure to regularly clean the appliance.

If dirty condenser coils are why your fridge is running constantly, fixing this problem is actually pretty simple. If you have never cleaned the coils at the back of the fridge, as many homeowners do not, this is the best place to start. To clean your fridges condenser coils, you will want to disconnect your appliance, remove the grill protector, and brush off any dust or pet fur you can.

Even a brand-new appliance is not going to constantly be running, so if your fridge is, then take a look at the condenser coils. When your condenser is not getting the heat out of the refrigerator as it should, the refrigerator needs to work harder to keep the unit cool. If the evaporator fan does not function correctly, the compressor will have to work harder to keep the fridge cold.

You might have an issue with your evaporator fan motor, which is what blows air over your evaporator coils in periods when your compressor is running. To solve this common issue, disconnect the fridge and locate the evaporator fan motor in the freezer compartment. If your fridge has a bottom freezer, and you notice the temperature is higher than should be in the area between the vegetable crisper and freezer, it may be indicative of a condenser fan motor problem.

Most of the time, keeping the freezer too cold can make the refrigerator run overly hard and run continuously, which is not healthy. If that is the case, then your fridge is going to be turning on and off much more frequently than if it were in a home with just one person living in a colder climate. Your refrigerator will still be trying to keep this temperature, but it is instead running constantly. When your defrost heater stops working, frost quickly builds up on the coils in your fridge, leading to your fridge running constantly.

A general rule is if your fridge is running more than a couple hours, you may need to look into some of the fixes listed above, or call in a repair professional. If your fridge is running continuously and does not seem to be stopping, and you cannot seem to locate the source, then it is time to call in refrigerator repair services by professionals at Appliance Repair OKC Services.

To schedule refrigerator repairs in Oklahoma City contact Appliance Repair OKC Services by calling 405-378-4566 or visit our website at https://www.okcappliance.com to also our Google business page at https://cutt.ly/YEnc8qk. Call now!


The post My Refrigerator Is Constantly Running And Cycling? appeared first on Appliance Repair OKC Services | Best Appliance, Washing Machine Repair Company in Oklahoma.

Friday, July 22, 2022

My Dishwasher Isn’t Draining?

dishwasher repair okc

appliance repair tech repairing domestic dishwasher in the kitchen


My Dishwasher Isn’t Draining?

The first place to look to see if the water is not leaking out of the dishwasher is the drainage pipe that runs from the dishwasher to your garbage disposal. Once you have got your dishwasher back into place, start your dishwasher for one cycle, and check the lower part of the appliance for any water. To make sure that all the water is removed from your dishwashers lower components, your dishwasher uses a pump to flush itself out at the end of a cycle.

To inspect your drain or pump for clogs, you should remove your filter to reveal your dishwashers lower-level drain and pump. Once you have checked for and removed any clogs in your drain pipe, you must reconnect it to your dishwasher. To fully inspect your dishwashers drain hose for any clogs, you will have to remove the lower front panel of the dishwasher. Before you can repair the dishwasher, it is essential that you remove the appliance from power supply and let it run dry.

Even after the dishwasher is draining, take out the traps and filters and scrub them thoroughly with soap and water. If your dishwasher does not have a removable basket, scrub out the filter and just attend to the areas around the drain.

If cleaning the filter in the dishwasher has not solved the problem, the next thing that may prevent the dishwasher from draining is a blocked drain pipe. If a portion of your dishwashers water is draining, but draining is slow, with water remaining at the bottom of the dishwasher, then a clogged filter may be to blame.

When food or sediment builds up inside the filter clogs, your dishwasher does not drain as it should. When this happens, the water cannot drain as it should, which causes the dishwasher to back up.

Maybe your dishwasher is not draining properly because there is an issue with the drainage pipe or the checking valve. Your dishwashers inability to drain may be the result of one of the problems mentioned above, and you may be able to repair it on your own. If the drain on your sink is not clogged, then it is likely that your dishwasher is to blame.

If your dishwasher is still sitting with water, the next thing you might want to try is cleaning out your sinks air gap. Dirty water will occasionally drain back into your dishwasher, and air gaps keep this from happening. It can get clogged over time with all kinds of gunk building up — one telltale sign will be to see water pouring through the air gap when you open your dishwasher.
This air gap can get clogged, meaning the air gets trapped instead in the drain pipe of the dishwasher. Fortunately, most dishwashers include an air gap located near your tap, which allows the air to get out of the drain. A full disposal or an air gap in a connecting pipe may keep water from properly draining out of the dishwasher.

When the dishwashers hose is connected to a sink with no garbage disposal, the air gap–a little, slit-shaped tube (often made from stainless steel)–is installed at the top of the sink, directly above the faucet. Under your kitchen sink, in a cabinet, your dishwashers drainage hose will enter the top of your air gap, so the bottom of the air gap empties into a sink drain beneath your sink bin, or your garbage disposal, if you have one.

If a blockage is not located near the end connected to your dishwashers drain pump, pull out the hose where it attaches to the garbage disposal, or plug in your garbage disposal with an air stopper, to check that end for a blockage. To check for a clog, you will have to remove the lower front panel and find the location of where the tubing line attaches to the dishwashers drain pump. A bent drain pipe–the light, ribbed plastic pipe connecting the dishwashers drain pump to your trash disposal (or to an airlock)–can stop the water from flowing out.

In some cases, the pump may pull in air along with water, causing the dishwasher to stop draining. In certain cases, one of these components can fail, leaving you with a dishwasher filled with water. If your dishwasher makes grinding noises, or seems to be struggling more than usual, it might be time to change your pump and drainage motor. Since it is very common for things to stick to your drain, try cleaning it out using a solution of equal parts baking soda and vinegar.

If cleaning your drain does not work, you should check your appliances filter to see if there is a blockage, and clean it. Next, use a cup to get rid of all excess water in the interior of your dishwasher, and then use towels to absorb any remaining water so that you can get the drain out. If any water remains inside of the dishwasher, you will have to flush out the water again before proceeding to the next step.

The dishwashers filter and drainage basket work together to capture food residues from the washing cycle, keeping the contaminated water from returning to your dishes when you are cleaning. Some dishwashers have separate filters and drain baskets, but others have a single piece that does both jobs. Dishwashers usually have a plastic filter/basket designed to catch food and trash, to keep food and trash from getting into the drainage pipe.

Dishwashers have different types of filters and drainage assemblies, but all filters are located at the bottom of their bowls, and they may become clogged by undissolved detergent, food scraps, product labels, and any other insoluble material that makes its way from your plates into the dishwasher. The catch-all in the interior of your dishwasher is what keeps large pieces of food, napkins, or other trash from going into the drain and clogging it.

If this is the case in your house, then it is not a bad idea for Appliance Repair OKC Services to come out and install an air gap to allow the dishwasher to drain more effectively.

If you can’t find the cause of the dishwasher problems then call for dishwasher repair in Oklahoma City and be sure and contact Appliance Repair OKC Services by calling 405-378-4566 or visit our local website at https://www.okcappliance.com or also our Google business website at https://cli.re/Dyq1ME. Call now!


The post My Dishwasher Isn’t Draining? appeared first on Appliance Repair OKC Services | Best Appliance, Washing Machine Repair Company in Oklahoma.

Thursday, July 21, 2022

My Washing Machine Has Stopped Spinning?

washer dryer repair

Young Repairman With Spanner Looking Inside The Washing Machine


My Washing Machine Has Stopped Spinning?

One of the most common reasons why a washing machine stops spinning is that the pump that is clogging is not able to drain properly. If your drain pump is clogged, it cannot drain water, so your machine does not spin.

When the washing machine cannot spin the water off your clothes, or it cannot get all of the water off of the machine, you will get a wet, heavy load. Aside from the filling and draining of the water, spinning the machine is how clothes are cleaned. The spin on the drum of your washer is also how water is eventually spun off of your clothes, so they get to your dryer less wet all over.

Its drum will spin as well (but more quickly) as it pulls the water out of your clothes. If your drum stops spinning halfway through your cycle, try turning off your appliance, dumping out any water, and then rearrange your laundry. If this happens, the drum cannot rotate anymore, no spin cycle is performed, and no laundry is washed.

If the washing machines drum is spinning, but it is not going to spin quickly, then the problem may be something as simple as a loaded unbalanced. Interestingly, an unbalanced load could also be the inverse of a problem, with a spinning cycle inefficient and failing to complete. To avoid damage, todays machines spin slower if a load is not balanced, stopping and starting the spin cycle in order to attempt to re-align the load.

An unbalanced laundry load may result in drainage problems and/or spin problems with the machine. Spinning your wash load quickly, where only a single piece of laundry is heavy, could cause your machine damage. If the items you are washing are too heavy, the machine might not have enough momentum to continue spinning.

The above issues are the most common reasons your machine might not spin. Here are a few more common reasons that we tend to see washing machine failures that are related to spinning issues and drainage issues. Fortunately, a lot of the reasons why your washing machine is spinning cannot be fixed quickly and easily. If your washing machine is not spinning, that may be an indication that something is wrong, and you need to call in the repairman, but usually, a simple DIY repair will make the washing machine spin again.

If your washing machine does not empty or spin the clothes by the time your cycle is done, you know. If your washer is spinning, but your clothes are still soggy, it could mean your belt is damaged, or that your system is spinning not fast enough. If your washing machine is not spinning, you should check for signs of excessive heat or wear on your drive belt. If you started the washing machine and returned when it was supposed to finish, only to find that it was still spinning, there might be something wrong.

If your washer is filled with water, but is not stirring, it is more than likely that a switch on your lid is bad, belt is busted, or there is an issue with your motor. A clogged drainage trap may be a common, non-mechanical cause of front-loading washing machines that do not spin.

If the drain trap itself becomes clogged, the machine will shut down. The machine automatically turns off when it perceives that load is imbalanced, in order to avoid mechanical damage.

When a wax motor fails, a door latch will not be engaged, preventing the machine from spinning. If either the door lock or slammer fails, you will see a digital error code, and the washing machine will stop stirring and rotating. If a plastic tab is broken, the washer may stop on some cycles.
A torn drive belt, or a drive belt that has fallen off a pulley, may result in the washer stirring throughout the washing cycle, but – in spite of the motors whirring noise – the drum remains stationary throughout the spinning cycle. A worn clutch may stop the washing machine spinning, or it could result in slow spin speeds, leaving your clothes damp after one cycle. Additional symptoms that your clutch might be the reason for your problems are catching on to-brake dust or shavings under your washing machine, a mild burning smell, or loud noises while spinning.

If you are sure that your loads are balanced, but your clothes are still coming out with drips, it is possible you will need to get the damaged engine pulley, tub bearing, belt, or clutch replaced. On top-loading washing machines, you should also check to make sure that the drive pulley is turning freely both in spin and in agitation, and that nothing is blocking movement of the agitator or washbasket, which could be causing a belt to slide off the pulley.

Loading incorrectly may result in an uneven load, which may either cause a scuff and clang, or result in the washer not spinning at all. To prevent causes, the Beko washer automatically checks your load and stops the spinning process if it is not evenly distributed within the Drum. As a safety precaution, the washing machine shuts off, which causes the load to stop halfway through — before the water is flushed out and/or the clothes are spun.

As a result, your washing machine does not get up to an appropriate spinning rate, leaving your clothes dripping wet by the end of the cycle. Therefore, reaching proper speeds in the spin cycle becomes impossible, leaving your clothes still soggy at the end of the spin cycle. The time in the spin cycle will bounce back and forth wildly and the washing machine will eventually grind to a halt, but your clothes will be wet anyway. Brushes may become worn out over time, meaning that your machine will fill with water and flush normally, but your wash will be unable to spin, and your clothes will not be cleaned efficiently.

If your machine is draining very slowly (or does not drain at all), a blockage somewhere in the draining system is most likely to be to blame. Anything that impacts the capacity of your washing machine to properly remove the water from it is going to result in the water backing up in your washing machine, as there is just no other place for the water to go.

To schedule washing machine repairs in Oklahoma City contact Appliance Repair OKC Services by calling 405-378-4566 or you can visit our website at https://www.okcappliance.com. Also our Google business website can be found at https://cutt.ly/YEnc8qk. Call now!


The post My Washing Machine Has Stopped Spinning? appeared first on Appliance Repair OKC Services | Best Appliance, Washing Machine Repair Company in Oklahoma.

Wednesday, July 20, 2022

Why Is My Commercial Ice Machine Not Making Ice?

commercial ice machine repair OKC

cube ice in commercial ice making machine


Why Is My Commercial Ice Machine Not Making Ice?

A problem with your ice is ultimately going to be a problem with your reputation. This could lead to your ice maker not being filled to capacity, or the ice machine not producing ice at all. If pressure is too low, the water does not flow through to the ice maker to create ice. Regardless, whether or not the ice maker cycles into freezing during this phase of the call, monitor the water flowing in to refill it, and ensure that it stops.

Some ice machines will continue filling with just a bit more water once the machine cycles into freeze, but if the ice machine continues to fill up until it has a consistent flow from the drain pipe, inspect the fill solenoid. If your ice machine has a water filter (and it should), check that it is not blocked, limiting the flow. Check to see that your water delivery valve is not closed, or restricted, by brackets or shackles. When your ice machine does not stop making ice, check shutoff arms & switches, the water intake valve, and control modules.

If you notice that there is frost or ice accumulation within the machine, and the machine is not stopping making ice, the water inlet valve must be tested for electrical and mechanical failure. You can test valve continuity and test inline water pressure to conclusively determine whether a part is defective. If you suspect a faulty stem in your ice machine, such as a contaminated water filter or an errant water intake valve, then you should call a water appliance repair professional. Make sure to change your water filter at all times, and to clean any parts in your ice machine.

If the machine is air-cooled, see if you need to clean the condenser unit or have it replaced. Failing to clean your condenser on a regular basis could result in machine jams and other annoyances for ice quality and production. If you are still not getting any ice after checking to make sure the ice dispenser is powered and the correct temperature, a frozen or clogged water line may be to blame.
This issue is irrelevant if you find no unusual accumulation of ice or freeze inside your unit.

Frozen, unusual accumulations of ice inside a machine can cause the release arms, springs, and other components to become stuck. This will result in longer periods during ice machines discharge cycles, can cause a tripping of a solid-state controller due to an error of long-cycle times, and increase ice production costs.

If your ice machine is not cold enough to freeze the ice, the ice machine will not know when to produce another batch. If your commercial ice machine is not making as many cubes as it used to, you will have to call the business appliance repair crew to see what may be wrong. If you have replaced your filters and the machine is still not making ice, then you may need to call a professional commercial ice maker repair team in Panama City, Florida. You can defrost a commercial ice machine by turning it off, as well as turning off your water supply.

The best solution for avoiding being faced with an uncomfortable surprise when your ice maker is off is you understand how to keep it up, and specifically, to completely clean it out before turning it off, if that is what you want. As we suggested in our earlier post that describes what is an ice maker, routine maintenance is the best way to prolong the lifespan of your machine. Poor maintenance will cause your machine to operate less effectively, either because of pollution or wear.

Often, just turning down your AC or moving the boxes further from the ice machine will allow the machine to run at its best. If the machines thermostat is registered too high, it could impact the machines ability to produce an appropriate volume of ice. If the location is above its recommended temperature, every machine is not capable of producing its maximum amount of ice.

If possible, move the machines to cooler locations, and observe whether your machines thermostat drops. Check if you have to adjust a control arm in order to power your machine back on and restart the ice output. If your ice machine does not turn into freezing mode when the floating switch is lifted, or water has reached a level probe, then the operation of the floating switch assembly or the level probe needs to be checked.

You need to adjust the amount of water that the machine uses to fill up a mold on each filling and freezing cycle. If this ice machine problem is with a water-cooled machine, check to see if there is any water flowing, that the water is not warm, check that the header pressure regulator valve has not gone off-set or completely failed, and if possible, remove the water lines and check inside the condenser for any clinging ice or mud. If ice seems to drop too slow from the evaporator, and harvesting pressure is good, test the strong flow of water in your Hoshizaki ice machine while it is harvesting, and check the distribution nozzles are clean. You should replace your water filters every six months if your water is strong, or every 12 months if not.

If temperatures look good, but water is freezing before reaching your ice machine, an expert can help with Delaware restaurant equipment repairs. If you tried these tips to fix ice makers, and the ice makers are still not working, reconnect the fridge and use Appliance Repair OKC Services flexible repair schedule for refrigerator repairs. If all is working correctly, continue to plug the fridge in and wait a couple hours to see if there is any ice.

To schedule ice maker repairs in Oklahoma City contact Appliance Repair OKC Services by calling 405-378-4566 or visit our website at https://www.okcappliance.com to also our Google business page at https://cutt.ly/YEnc8qk. Call now!


The post Why Is My Commercial Ice Machine Not Making Ice? appeared first on Appliance Repair OKC Services | Best Appliance, Washing Machine Repair Company in Oklahoma.

Tuesday, July 19, 2022

My Freezer Is Frosting Up On The Inside?

freezer repair okc

repair tech repairing freezer with customer


My Freezer Is Frosting Up On The Inside?

Frost within the freezer is caused when water comes in contact with the coils within your appliance, freezing them. This condensation, or humidity, will freeze, creating various types of ice inside your freezer.

Even when the airflow is fine, high levels of humidity will result in a side-to-side freeze. If the freezer is packed tight to the machinery, and the air cannot move around as it should, you can get some areas to freeze. Putting a freezer outside can mean that the appliance has to work harder, particularly when it is cold, and this may lead to a freeze.

If your doors are not sealed correctly, moisture may get inside, freeze, and create frost. This is because each time you open your refrigerator door, hot air gets inside, which causes humidity, which then results in even more ice. As a result, each time you open the freezer door, the moist hot air gets deposited onto your frozen foods, which causes the ice to form.

When a freezer door does not seal properly, the cold air inside your freezer escapes, causing the development of icing. As discussed earlier, ice buildup can occur in the freezer if the gasket in the door does not close properly.

One of the most common causes of freezer frost is the door gasket, also known as a seal. A worn or damaged gasket (door seal) allows hot air in while allowing cold air out, contributing to freezer ice.

If ice that forms in your freezer is not coming from your ice machine, there is too much moisture in the freezer–ice forms in the freezer for the same reasons that freezes do. When you let foods sit with a lot of accumulated frost too long, moisture escapes the food, forming ice crystals on the foods surface. Then, moisture creates more ice, if you take out the food that has been stored for some time, it prevents frost and ice from building up. Moisture getting into the freezer is usually what causes this extra amount of ice, so keep a close eye on it.

Hot foods placed in the freezer also create humidity, causing the buildup of frost. Putting warm foods into your freezer immediately brings heat as well as moisture into your ice chests freezer compartment, which, as mentioned above, is a major culprit for creating frost accumulation.
When your ice scoop door is not shut tightly — hot air gets into your freezer and causes a frost buildup inside. This is because the harder your freezer has to work to maintain a proper temperature, the higher the chance that there is too much air running through it, causing even more ice buildup. Sometimes, people will set it at its lowest temperature, which is incorrect, and it can lead to ice building up in your freezer, which could cause food to spoil. Building ice inside of your freezer causes a whole host of problems for your appliance and for the food stored inside.

A chest freezer uses up all its capabilities to achieve a freezing temperature in order to keep the food inside safe, which causes freezer burn and ice accumulation. Every time you open the chest freezer door, the temperature inside the appliance increases, forcing the freezer to work harder to maintain frozen foods. According to GE Appliances, placing hot or warm foods inside a freezer brings moisture into the appliance, causing a freeze on the inside walls.

When you open the doors on full-sized freezers, which lets warm air enter, that air quickly chills back down once you close the doors again, which lessens the risk of more freezer frost. If you have checked your door seals and reduced how long the door is opened, but still see a lot of frost, this is an indication that your freezer is still running with too much moisture. Leaving your freezers door open allows humid air in, leading to ice crystal formation, causing the frost to build inside your freezer, and, over time, an increasingly inefficient cooling.

Any cracks, tears, or gaps in your seals will allow damp air to enter the freezer, leading to the formation of ice crystals (frost) on your food packages and the walls of the freezer, which in turn causes problems with cooling. The easiest way to prevent the accumulation of frost is to test to see if your refrigerators seals are still capable of sealing in air. Over time, the seals in the magnetized gaskets that hold your freezer doors shut may get frayed, which will make it impossible for the doors to close tight, allowing an unrelenting flow of hot air to enter your freezer.

Ice accumulation inside the refrigerator or freezer can be a major issue, because it may cause too much heat to remain inside the appliance, potentially making food spoil, or it may even cause an unpleasant, undesirable smell. Setting your freezer temperature too high or too low could result in excessive ice formation and accumulation rapidly. If your surroundings are too cold, the freezer might not receive enough running time to keep the temperature. Fortunately, taking some simple steps–such as keeping the chest freezer closed so it stays at its ideal freezing temperature, and packing food properly to keep the humidity and air out–can keep the ice from building up.

Frosting within the freezer box causes smells, lost storage, and an ineffective seal on your appliances doors. Your food can also run the risk of frosting, aka freezer burn. Frost also can affect your food, leading to a condition known as freezer burn, or freezing-bite foods.

When the coils inside your fridge become too cold, a defrost timer triggers a heater to kick in and melt away any extra ice. The defrost timer is a component of the compressor in your refrigerator, and tells the defrost heater to power on at a set frequency in order to keep the ice from building up. When a defrost cycle is working properly, your fridge/freezers cooling system stops for 20 minutes every 6 hours, so that heaters behind the rear walls can prevent the frost buildup on the freezers coils, and air is free to move around your appliance.

For freezer repairs in Oklahoma City contact Appliance Repair OKC Services by calling them at 405-378-4566 or you can visit our website at https://www.okcappliance.com or also our Google business page at https://cutt.ly/YEnc8qk. Call today!


The post My Freezer Is Frosting Up On The Inside? appeared first on Appliance Repair OKC Services | Best Appliance, Washing Machine Repair Company in Oklahoma.

Monday, July 18, 2022

My Refrigerator Is Not Cooling Only Freezing Foods?

Fridge Repair OKC

Man repairing fridge with customer


My Refrigerator Is Not Cooling Only Freezing Foods?

If your condenser fan motor is not working, you may be getting colder fridge, but not any cooling at all in freezer. If the condenser fan is not working correctly, your fridges temperature can go up, and your compressor can get too hot. Without a functioning fan, it is easy for your fridge to get too hot and stop cooling.

If the refrigerators fan is still working, but the fridge is not cooling, it is possible that either the compressor or the compressor startup relay is defective. That is why, even though your compressor is running, your fridge is unable to maintain freezing cold temperatures in order to keep food safe. If the compressor is not running, the freezer cannot freeze your perishable items.

If the fan motor for the evaporator fails, your freezer cannot freeze food, as the air that is being circulated will not get cold enough. The evaporator fan motor pulls air through evaporator coils (the cooling elements) and circulates the air through your freezer and fridge. In a refrigerator that has a single evaporator, the evaporator is located in the freezer compartment. The evaporator fan is the part of your fridge that blows out the cold air that you feel when you open the doors.

There are coils located underneath or behind the refrigerator which cool down and condense the refrigerators refrigerant. To clean your refrigerators coils, just take the cooler out from behind the wall and wipe down the area behind the cooler. If your fridges coils are too dusty or clogged, then the compressor has to work harder.

When your fridges coils are clogged, they cannot release heat effectively, so your compressor works harder to keep temperatures cool enough. The condenser coils must be exposed and cleaned in order for them to generate the type of cool that is necessary for the fridge to work. Every once in a while, you might want to open the lower or back panels of your refrigerator and clean out the condenser coils in order to ensure that they are able to generate maximum cold.

If condenser coils are noticeably dirty, the refrigerator is unable to keep proper temperatures. The fridge should be able to maintain an adequate temperature — provided that you keep the doors closed — until you are done cleaning your fridges coils.

The one exception is if your fridge has evaporator coils inside of the freezer. The heat exchanger and condenser coils are mounted outside of the cooler, as well as the evaporator coils within the unit.

The evaporator fan is responsible for pulling cold air from the other set of coils, which is then circulated through the whole unit – first in the freezer, and then into the cooler (or fresh produce section). The refrigerant runs through the other set of coils and turns to gas, making it cooler. It is standard to find most fridges using a fan to push the cold air from inside the freezer to an evaporator, which is then forced to an area inside the fridge to maintain the cold temperatures.
Some side-by-side fridges (especially older models) have a vented system to direct the cold air out of the freezer and into the cooler. The thermostats of side-by-side refrigerator/freezers are typically located at the rear, whereas bottom-of-the-counter units are more likely to have the thermostat below the refrigerator. Most refrigerators generate all of their cooling for the freezer, and then keep cooler parts cool by using venting between the refrigerator and freezer areas.

To make sure you get a good temperature, you will want to leave space to let air circulate properly between your freezer and fridge areas. We mentioned that air circulation is a big part of keeping the fridge and freezer temperature optimum. To maintain your whole refrigerator at its optimal cool temperature, airflow is necessary in the freezer compartment.

If boxes of food are blocking the air vents, the cold air may get blocked from moving throughout the refrigerator. When air vents cannot open, cold air cannot move from your freezer into your refrigerator compartment, making your cooler warmer. If an air damper is not working properly, your refrigerator may get too cold, which will result in food inside becoming frozen and unusable.

If An air damper is controlled incorrectly, it may lead to improper temperature settings, which may result in vegetables freezing inside of your cooler drawers, or other icing potentially occurring within your coolers interior.

This can also cause the freezer to get too cold, causing the cooled foods to freeze later. If this happens, the freezer compartment can still be cooled, but your fridge does not. If your freezer starts creating ice in the wrong places, like in vents or the coils of your evaporator, it could mean that you have the freezer set to the correct temperature, but your fridge is too hot. An ice maker that is running continuously may be making your freezer too cold, thereby making the fridge too hot.

If a thermostat is not working, it causes the compressor to run harder than it should, causing your fridge to over-freeze your food and waste. If you hear the compressor running, but the refrigerator is not cooling, it is most likely because of either frost-clogged evaporator coils or stuck or broken evaporator fans.

Normally, your fridges condenser fan and compressor, located near the floor in the back of most fridges, turn on when your thermostat calls for extra cooling. The condenser fan motor has a main job: moving air across the condenser coils, dumping heat, and thus decreasing the temperature. The temperature inside the fridge is maintained by a number of inward-flowing, outward-flowing air vents.

For freezer repairs in Oklahoma City contact Appliance Repair OKC Services by calling them at 405-378-4566 or you can visit our website at https://www.okcappliance.com or also our Google business page at https://cutt.ly/YEnc8qk. Call today!


The post My Refrigerator Is Not Cooling Only Freezing Foods? appeared first on Appliance Repair OKC Services | Best Appliance, Washing Machine Repair Company in Oklahoma.

Friday, July 15, 2022

My Washer Stopped Working Mid Cycle?

Washer Repair OKC

Repairman Repairing Washer In Front Of Young Woman In Kitchen At Home


My Washer Stopped Working Mid Cycle?

Some of the more common problems that cause a washing machine to stop halfway through a cycle include a malfunctioning thermostat, problems with water being filled up during the wash cycle, or even problems with the pump preventing the washing machine from being drained. General overheating is another likely reason your washing machine stops mid-cycle, and many washing machines have built-in sensors. If the washing machine was not draining correctly, then something blocking the pump may have caused your washing machine to stop mid-cycle.

If the washer does indeed stop mid cycle, then let it cool off for a couple of hours and try it again, if it stops again, a problem with the thermosistors seems much more likely. Similar to the timer, your washing machines control board may also become defective, and this will result in your washing machine stopping in mid-wash. If power goes out during the middle of a washing cycle, then obviously the washing machine is going to stop as well.

If your washing machines drainage pipe gets clogged, that could cause the washer to shut down in mid-cycle, since that triggers a pressure switch. The Drain Pump is a crucial component in your washing machine, since it allows the water to flow out of your tub in between cycles. When your drain pump is malfunctioning, your machine cannot drain and continues its cycle.

If the washing machine does not drain or cycle, it is possible that your water level controls are malfunctioning. You will also want to look at where water is coming into the washer. Check around where your washer attaches to your water valve, and where your faucet attaches to a wall hose.
Open so that water can get to your washing machines tub. Pulling stops the washing machine right there, though keep in mind it might not flush water out, and that water can leak if you open the door. Your washing machine will then flush out all the water in the wash tub before opening the door, which allows you to make necessary adjustments or add/remove items from the machine. Remove your washing machines access panel, which is usually located on the bottom of your machine.

Using a plastic probe, or even a cotton ball, gently push on the switch below the opening on the washer cover. The bottom of the lid will have a pin on it, which will trigger the lid switch when you shut the lid. As a safety feature, the lid switch will stop a washing cycle from continuing unless the lid is fully closed. When the lid switch fails, the contacts are not made, and the switch is not able to send a signal for the washer to proceed with its agitation and flushing cycles.

On Whirlpool clothes washers, a separate switch is provided that will not allow the washer to begin the spin cycle unless the lid is completely closed. Similar to the latch-on-door system noted above, older top-loading washing machines used the lid switch to operate the spin cycle safely. If the lid switch fails or breaks, the washing machine will think that the door is still open, and may fail to begin, or may halt before starting the spin cycle. The timer switch on the washing machine can wear down, causing it not to automatically enter rinse.

One of the common problems that may stop the washer cycle is heaters that are no longer working correctly. While this can be a rare issue, a malfunctioning control board could lead to problems from your washing machines timer not working, to your tub not stirring. This becomes particularly true if you are seeing many other, distinct problems before your washing machine starts stopping midway through your load. Control board problems with any appliance rarely present themselves in a single symptom.

If you have a more up-to-date washing machine, then chances are that instead, it is simply stopping the cycle, and the appliance might even show an error code. If you have found your washing machine regularly stops mid-rinse cycle, it could be caused by a bad water entry valve.

If a water inlet valve is faulty, then your washing machine will stop halfway through your cycle as it registers that the water level is too low. If The washer stops mid-cycle, The water inlet valve may be bad on the cold side. If the inlet valve fails to open, Whirlpools washer controls will wait until the water has entered before continuing with the next part of the cycle. If the drainage does not flow freely, or becomes fully blocked, a sensor will stop many Whirlpool washing machines.

If the water entry valve reading is low, this will stop the water advance into the tub, and the washer will not cycle. If the washing machine stops when the water is still in, you need to figure out how to remove the water without totally ruining the laundry room. To check, put your washer on the cycle and check it regularly, if the cycle stops in the first 30 minutes, the water is probably not getting hot enough. How to shut off your washing machine may differ from model and manufacturer, and your washing machine might need several minutes to unlock its doors after you have decided to stop a cycle.

If your appliance does not have this type of hose, then the gray drain pipe on the back of your machine can be dropped down to the ground-level bowl, where water is vented through the force of gravity. Washing Machine Not Rinsing — How to Fix Too Much Detergent Adds Too Much Detergent Adds Too Much Detergent Adds Too Much Washer Drain Pump Does not Work Or Clogs Drain hose May Bend Or Clog Drain Hose May Bend Or Clog Water supply line Not completely open Water supply valve Not completely open Switch or control board Failure. Reasons why washer gets stuck or stops before rinse cycle Washer timer switch.

To schedule washing machine repairs in Oklahoma City contact Appliance Repair OKC Services by calling 405-378-4566 or you can visit our website at https://www.okcappliance.com. Also our Google business website can be found at https://cutt.ly/YEnc8qk. Call now!


The post My Washer Stopped Working Mid Cycle? appeared first on Appliance Repair OKC Services | Best Appliance, Washing Machine Repair Company in Oklahoma.

Thursday, July 14, 2022

My Dishwasher Lights Are Just Flashing And Blinking?

dishwasher repair okc

Sad Woman Calling Technician On Cellphone To Fix Dishwasher With Foam Coming From It


My Dishwasher Lights Are Just Flashing And Blinking?

When you see your dishwasher lights flashing, but your control panel is unresponsive, make sure you check any error codes active. Most often, when an error occurs, all the lights on the dishwashers controls start to blink. When running into errors with your GE dishwasher, you may be faced with the situation of lights blinking, but not starting. As a result, your dishwasher flashes one or more lights on the control panel to alert you there is an issue.

If the machine detects an open door, it will flash the buttons to alert you. When a door is opened, control-panel lights are turned on or flash. Once you securely close the dishwasher door, the appliances lights will stop flashing, and the selected washing program will start. If your dishwasher is set to a delayed start, and you do not lock the door, the indicator light that says “Select Cycle” will continuously flash, and the delayed countdown timer will pause until you lock the door.

To prevent situations like this, the dishwasher will blink its Clean light seven times as a warning. A constant flash of Start, Wash, or Clean lights can be an indication your dishwasher has electrical, water flow, or door latch problems. A flashingWash light on your dishwasher could be a sign of problems with water volume or temperature. If your dishwasher has a disinfecting function, and its associated light keeps flashing, there could be something wrong with the water temperature.

When you have hit the start/reset button — after the dishwasher has already started the cycle — you will see the Start light flash. In addition to signaling that an open door is present, another time that a GE dishwashers start light will flash on and off is when a quick reset is performed in a GE dishwasher. The dishwashers door light is also the same light assigned to the start button. If the light next to your units Start button flashes slowly, the appliance is trying to let you know that the door is open.

If the light flashes whenever you try to press a button, someone might have accidentally locked your appliance. If the dishwashers cleaning light flashes quickly, but does not turn off, the dishwashers keypad may be shorted, or a few circuits might be damaged.

If you reset your machine, but your machine is still failing to run, then disconnect the dishwasher from the power for one minute. You can reset the control panel to repair lighting by first disabling or unplugging it from its power supply for approximately one minute.

If a heater element assembly, which heats water for your dishwasher, is burned, your control panels lights might flash or flash to warn you of the problem. When water fails to reach its required temperature level within a required time frame, the control panel may begin flashing certain lights.
As with the other possible dishwasher message codes, verify the water is no hotter than 176 degrees. Your dishwasher may show the information code using a combination of normal and Quick+ lights.

Normal, Delicate, and Smart Auto lights can also flash together to form the dishwashers information code. There are many combinations of dishwasher information codes which also include a Normal light.
Another type of information code that may appear on your dishwasher is a flashing Normal light, as well as the Delicate Light. An information code may occur on your dishwasher when your Normal, Heavy, and Express 60 lights flash. Another information code that may be displayed on your dishwasher is the combination of blinked Normal and Smart Auto lights.

If your dishwasher is blinking with the other lights, that could mean several things. The dishwashers blinking lights are just a machines way of communicating that it needs a bit more attention from you or a technician.

It can be quite confusing to figure out why your Frigidaire dishwasher lights are flashing. Let us say that your Frigidaire dishwasher is filled to capacity when you notice that your control panel is not responding, and that the lights are flashing.

These lights are not meant to blink repeatedly and completely, except if there is an issue with your appliance. Your Fridaire dishwashers lights are probably flashing because it is opened, or the door latch is not working. Whenever there is a flashing light alarm in your GE dishwasher, but no boot, the door is probably because the door is not closed completely.

Another time your dishwasher starts to sound a chime (along with lights flashing) is if there is been a power surge or an electrical malfunction with your system. Dishwashers equipped with electronic controls can begin to show flashing lights or beep sounds. Another cause for your KitchenAid dishwashers cleaning lights to flash seven times could be a defective heating element.

According to GE, if your dishwasher is blinking the “Start” or “Start/Reset” lights (for 75-90 seconds), this is just an indication that the appliance is restarting (and ready to shut down). The lights will blink for maybe a half-minute to one-and-a-half minutes depending on your model, and then they stop, allowing you to reset your appliance. If a door fails to lock in the first 3 seconds, a light/restarter flashes, and you will hear an audible sound. The Fridaire dishwasher typically flashes a “clean” keypad when it detects improper water temperatures (water temperatures must be at least 120 degrees F).

If you can’t find the cause of the dishwasher problems then call for dishwasher repair in Oklahoma City and be sure and contact Appliance Repair OKC Services by calling 405-378-4566 or visit our local website at https://www.okcappliance.com or also our Google business website at https://cli.re/Dyq1ME. Call now!


The post My Dishwasher Lights Are Just Flashing And Blinking? appeared first on Appliance Repair OKC Services | Best Appliance, Washing Machine Repair Company in Oklahoma.