Friday, March 31, 2023


How To Diagnose And Fix Dishwasher Error Codes

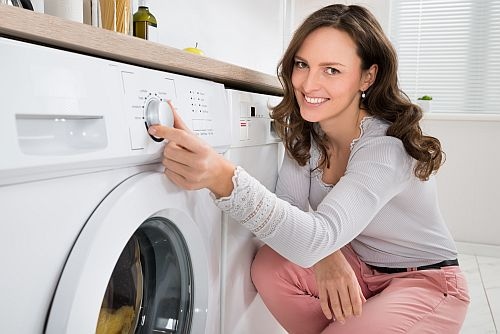
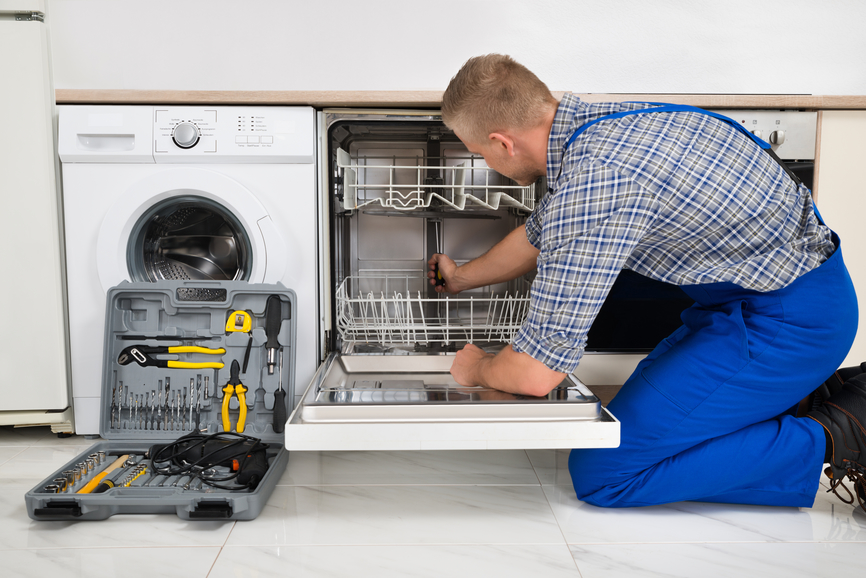
This article provides a brief overview of how to diagnose and fix dishwasher error codes. To begin, reset the dishwasher by disconnecting it from the power source. After disconnecting the dishwasher, press the cancel button for ten seconds and then turn the power back on. If the error code still appears on the display after five minutes, try pressing and holding down the cancel button for another ten seconds. This should clear most common error codes.

If your dishwasher is still displaying an error code, it could be caused by a faulty part. To diagnose and fix the issue, first make sure the drain hose is installed correctly. If the manual for your dishwasher isn't available, you'll need to disassemble the dishwasher to check the drain hose outlet and make sure it's properly connected to the base of the dishwasher. If this is not done properly, water can back up and cause premature draining. Next, check that all hoses are tightly secured and there are no kinks or cracks in them. You should also check the wiring for any loose or disconnected connections that could be causing a short circuit. Finally, make sure there is enough pressure from your water supply line - 120 psi should be adequate - and that all valves are turned on so water can flow into your dishwasher's tub. If none of these steps help, it's likely that you will need to replace either the water inlet valve or control board of your dishwasher.

Make sure to turn off all power before attempting any repairs yourself as this could cause further damage if done incorrectly. If you're unsure about how to complete any of these tasks safely then seek professional advice before proceeding with any repairs on your dishwasher.

To diagnose and fix dishwasher error codes on your LG Dishwasher, check the drain pan for any water leaking. If there is water present, this could indicate a flood sensor issue. If there is no leak, then find the source of the water which could be from the tub or lower water pressure and install additional devices to reduce this pressure. If there is no water present then it may be due to component failure or a high pressure issue.

To diagnose and fix dishwasher error codes, you first need to detect which dishwasher is opening. If it is an LG dishwasher, then the basin leak sensor should be checked and the drain pump should be turned on to pump out the water. The sensor detects a float switch in the base of the dishwasher and if it detects too much water or not enough water then it will trigger an error code. To find any leaks, check around the base of the dishwasher for signs of excess water. If there is too much water present then it could be due to a closing electrical circuit or a malfunctioning detects level sensor.

To diagnose the issue, it is important to inspect the dishwasher water inlet valve. If it is found to be faulty then replacing the water inlet valve may be needed. If there is no water present then it could indicate that the float switch needs to be tripped. Once this has been done, fill the dishwasher with enough water and check if the error code disappears. If not, then calling a Bosch technician might be necessary as they will have access to more advanced tools and equipment that can help solve the issue. In cases where there are issues with a cable harness or a main control board, a technician should be called for help.
To diagnose and fix Bosch dishwasher error codes, the dishwasher must first be displaying the error code. If the code is not displayed, the dishwasher may need to be serviced by a professional. If the error code is present, a troubleshoot of the electronic control system should be done. This can help identify any issues that may be occurring. In some cases, a technician may need to replace the temperature sensor in order to resolve an E02 error code. The sensor thermistor is typically located on or near the control board and can easily be replaced if necessary.

To diagnose and fix dishwasher error codes, first check the dishwasher to determine if it is properly operating. If it is not, run a dishwasher cycle and observe the results. For most modern frigidaire and miele dishwashers, check the sensors for resistance using a multimeter to detect your appliance’s fault. This will help you find leaks or other malfunctions which may be causing an error code. Additionally, pay attention to the door panel display which will tell you which specific part is malfunctioning. To further diagnose an issue with a temperature sensor, use a multimeter to measure its resistance while getting cold water from the tap.

If the resistance is off, the sensor needs to be replaced. To diagnose and fix dishwasher error codes, start by checking for any blockages in the drain dishwasher. Check the gasket on the drain hose for any signs of damage or defects and replace if necessary. Inspect the nozzles for any worn areas or defects, as well as check the door seals for damage or wear that could either cause a leakage sensor or allow water to flow out of your LG dishwasher. Make sure that all water sprinkler nozzles are working properly and ensure that there is no blockage in the error spray arm as this can cause a “AE” error code. If you have a garbage disposal plugged into your draining system, make sure to remove it and plug up the knockout hole before running a wash cycle again.

Dishwasher error codes can be difficult to diagnose and fix. With the right knowledge and tools, it is possible to troubleshoot the issue. If you are having trouble with your dishwasher, first check to make sure that you are using the correct type of dishwasher detergent and not using dish soap. Then look for any excess or not enough water in the drain pan or if there is a faulty leak sensor. If these conditions are met, then check if the stops heater is working properly or if the sensor type is wrong. The most common cause of an error code appearing on your dishwasher is usually due to a low pump speed or a high circulation pump, which can trigger an E01 error code.

To diagnose this, you will need to disconnect the machine from its power supply, and then test the overfill float switch. If the resistance reading is not within range when tested, then this could be the cause of the error code.

If you can't find the cause of the dishwasher problems then call for dishwasher repair in Oklahoma City and be sure and contact Appliance Repair OKC Services by calling 405-378-4566 or visit our local website at https://www.okcappliance.com or also our Google business website at https://cli.re/Dyq1ME. Call now!


Wednesday, March 29, 2023

Troubleshooting common washing machine issues


DIY Guide To Fixing A Washing Machine That Won’t Spin

If your washing machine fills and agitates without trouble, but does not spin properly, you may have issues mid-cycle. Top-load machines are typically driven by a washer drive motor and a drive belt, which connects to a wheel on the outside of the washing machine and drives the drum in a circular motion. If the drum motor is not working properly, it will not be able to spin properly. If you hear any noises during the spin cycle, it is possible that the washer drive belt is slipping, which can cause the machine to make noises or not spin at all. If your washer is not spinning properly, check to see if there are any loose parts in the lid and make sure everything looks as it should.

If you have a pedestal-mounted washing machine, make sure the washer is level. If it is not level, the washing process will not work properly, and the machine will not spin. You can check for signs of an unlevel machine by looking for excess noise, vibration or bouncing during the spinning process, or by putting a few items, such as a brick, in each individual leg of the machine. If a washing machine load is too heavy, the machine may not be level, so try washing smaller loads or re-leveling the machine if you suspect it is unlevel. Make sure the machine lid is closed and locked.

This is one of the first things to check if your top loading washer is not spinning. Many washing machines will not start a wash cycle if the lid is not closed. This is a safety precautionaso make sure that the lid switch, door locks, belt and motor control are all working properly. One of the most common causes of a top-loading washer not spinning is an impaired lid switch. The lid switch uses a magnet to detect when the door is closed, and if it does not detect this safety feature, the washer will not agitate or spin during the wash cycle, and it will also not start the spin cycle when you open the door, even if there is no water in the washer. If your washing machine is not filling with water, it will not be able to spin.

A blockage in the water valve, a broken belt, or a defective control board can all prevent the washer from filling. A faulty lid switch or faulty door switch can also cause the washer to not fill with water. A more complicated problem can be caused by a faulty component, such as a motor that is overheating. If the washer starts to spin, but it never picks up speed, it may be due to a problem with the valve, the hose or the door. If this is the case, you will need to troubleshoot the problem and replace the faulty part. It may take some time to figure out which part is causing the problem.

In theory, if the spin cycle does not start, it is because the water has not been drained from the appliance. Check to see if there is a loose water hose connection to the wall. If there is, tighten it and try again. If it still does not work, check the switch on the lid to make sure it is pushed in all the way. If not, push it in until it clicks and then try the cycle again. It is possible that the switch is faulty and needs to be replaced.

If the drain pump is not working, the washer will not be able to drain the excess water. If the pump is clogged, the drain cycle will not work and the machine will not spin. Faulty lid switch – If the machine stops mid-cycle, it could be due to a faulty lid switch. Check that the tab on the switch has been pressed in all of the way, and if it is not, press it in. If this does not fix the problem, you may need to take the machine apart for removal and cleaning of the drainage pump.

If the washing machine stops during the first half hour of the wash cycle, it is likely that the water is not hot enough. Check the error code on the machine to see if there is an error. If there is, you will need to adjust the water temperature. If you cannot adjust the temperature, the machine may be faulty and need to be replaced. If your machine stops spinning at the end of the cycle or mid-way through, it may be because the machine is faulty.

Newer machines, especially front-loading machines and high efficiency machines, have sensors that detect how much pressure is being applied to the drum. If the machine detects too much excess foam or too much laundry detergent, it will stop the spin cycle. This can result in no spinning or intermittent spinning during the wash cycles. Certain washer types, such as top-loaders, can also stop spinning if they detect an imbalance in the load. The machine may also fail to spin if it receives a signal that the lid is open.

If this is the case, you will need to replace the switch or one of the pulleys. If it is a broken drive belt, the washer will not spin because the motor will not be able to drive the belt, and the interlock will not allow the next cycle to start. This is an easy, DIY-friendly project depending on your machine brand and model and can usually be fixed by replacing the drive belt. If your machine is making noises that are not related to the wash cycle, it may be faulty and need to be replaced.

To schedule washing machine repairs in Oklahoma City contact Appliance Repair OKC Services by calling 405-378-4566 or you can visit our website at https://www.okcappliance.com. Also our Google business website can be found at https://cutt.ly/YEnc8qk. Call now!


The post Troubleshooting common washing machine issues appeared first on Appliance Repair OKC Services | Best Appliance, Washing Machine Repair Company in Oklahoma.

5 Common Oven Issues and How to Fix Them

oven repair OKC

appliance repair technician repairing oven


5 Common Oven Issues And How To Fix Them

If your oven is not cooking evenly, your food may be undercooked or overcooked. This can be caused by the oven not reaching the correct temperature, the position of the racks in the oven, or the cookware you are using. If you notice that your cooking times are off, you may need to adjust them.

The primary purpose of the bake element is to heat up the oven so that it can cook your food. If it is not working properly, your oven will not be able to reach the temperature it needs to cook properly. If the oven stops heating while you are baking cake or toast or roasting an entire chicken, you will need to remove the pieces of food from the oven and finish cooking them on the stovetop. If your red or green light is flashing, it means that the oven is overheating or underheating.

If your ovens temperature controls are not working correctly, you may need to make some sort of adjustment to the ovens calibration. You can check the accuracy of your oven by using a separate thermometer and comparing it to the temperature dial on your oven. If you notice that your oven is not heating to the correct temperature, you can adjust the calibration of the oven.

The internal temperature sensor in your oven heats up when the oven is turned on. If the sensor is in the wrong position, it will not be able to make contact with the oven wall. To check the sensors functionality, use an ohmmeter to measure the resistance between the sensor and the wall. If it is not in the right place or the resistance is too high, then you will need to move the sensor to a different position. Make sure that the oven has cooled down completely before moving the sensor. It may take a little while for the oven to heat up again, so be patient and give it some time.

If you have broken door springs, there is a chance that your oven door will not close properly. If this is the case, you may need to replace the springs. If you are not sure if your springs are broken or not, you can check them by opening the bottom drawer of your oven. Then, pull up on the door lock lever to see if the door opens and closes properly. You can also check the oven door sensor to make sure it is working properly.

If your oven will not start a self-cleaning cycle, it may be because the door switch is not working properly or the oven is not able to detect the duration of the cycle. To fix this trouble you will need to have a repairman come out and check your door lock switch and door lock motor. The thermostat is another component that can cause your oven to fail to start its own cleaning cycle. Make sure your oven is plugged in and that the control board is turned on. If it is not turned on, turn it on and then plug it back in.

A lot of people do not know that the oven control board can also cause issues with your oven. If you have an electric oven and it will not turn on, the issue may be with the temperature sensor or the heating elements. The next common problem is an oven that will not heat. This is one of the most common oven repair problems.

If your oven is not heating, it could be the result of a faulty heating element or a loose connection between the heating element and the matches. If your gas oven will not light, the reason is most likely the faulty gas igniter. If the igniter is faulty, you will need to replace it. If a gas burner is not working, it is likely that the gas line is clogged or faulty. If this is the case, you can replace the burner.

If the problem persists, you may need to call a professional repair technician. If you are not sure what is wrong with your oven, or if you do not know how to fix it, contact us for our services and we will help you. Here are some examples of common oven repair issues and things you can do to fix them. If an electric oven does not turn on, it may be due to a problem with the thermostat or heating elements. Problems with gas burners are usually caused by a malfunctioning igniter, a broken gas line, or an issue with the burners themselves.

Electric oven stoves that do not heat may have an electrical problem or a faulty ignitor. If a gas igniter is faulty, it can cause the element not to turn on or the burner socket not to heat. If the element does not heat, the oven will not heat and the food will not cook properly. An oven that stops heating is usually due to the element failing to heat up. If it is due to an element not heating up, it is usually a result of the element being faulty.

A possible issue is that the temperature control is not working properly. A faulty control board can also cause the oven to not heat properly. If your oven is not heating properly, you may need to replace the control board. When you open the door of your oven, it should be hot enough to cook your food. However, if your kitchen is equipped with all the bells and whistles and your oven does not seem to be getting hotter with time, it may be due to a possible issue with the thermostat.

The temperature should be around 350degF. If it is not, let the oven heat for about twenty minutes and then check the temperature with an oven thermometer. If the oven is still not hot enough, you will need to call a services for oven repair.

If you are having oven issues and need oven repair in Oklahoma City contact Appliance Repair OKC Services by calling 405-378-4566 or visit our website at https://www.okcappliance.com. Alternatively you can also visit our Google business website at https://cutt.ly/YEnc8qk.


The post 5 Common Oven Issues and How to Fix Them appeared first on Appliance Repair OKC Services | Best Appliance, Washing Machine Repair Company in Oklahoma.

Tuesday, March 28, 2023

How to Diagnose and Repair a Noisy Freezer

Serviceman Checking Temperature Of Freezer In Kitchen


How To Diagnose And Repair A Noisy Freezer

Calling a professional appliance repair technician is often the quickest way to diagnose and repair a noisy freezer. The technician will inspect the condenser fan and motor, as well as the refrigerator’s temperature, to determine the source of any excess noise. If it is determined that one or both of the fans need to be replaced, this can usually be done quickly and easily by an experienced technician. In some cases however, it may be necessary for them to replace or clean the condenser coils in order to reduce noise levels.

If you are having trouble diagnosing the problem, it may be best to call a professional refrigerator repair service. This is your best defense against potentially costly repairs. When calling for help, explain any unusual noises that the fridge is making as well as how long it has been making them. If a loud noise is coming from the refrigerator door, check to make sure that the defrost timer is working properly and that there are no loose parts near the door seal. If all else fails and you cannot figure out what’s wrong with your fridge, order an hour of repair services from an experienced technician.

Professional Maytag refrigerator repair is the best option for any kind of loud rattling or humming. A licensed technician will help identify the culprit, check if the appliance is not sitting level and make necessary adjustments to reduce or completely stop the loud noise coming from your fridge. Unfortunately, even if you can hear it in another room, it is likely that only a professional can diagnose and repair a noisy freezer.

The most common culprit of a fridge or freezer’s noise is the evaporator fan motor. This component is responsible for circulating air inside the refrigerator and freezer. If this component fails, it can cause a squeak or other noise to come from your appliance. Another symptom that may indicate the evaporator fan is not working properly is if you find frost building up on the inside walls of your freezer. If you suspect that your evaporator fan motor needs repair, it’s best to call in an appliance technician as quickly as possible to diagnose and repair the issue before further damage occurs.

To diagnose the problem, start by checking the bottom and back of the freezer section for any frost buildup around the evaporator coils. If there is frost, it could mean that air isn’t circulating from the evaporator fan to cool down the temperature in your freezer compartment. The technician will inspect both fans—the evaporator fan and condenser fan—to determine if either is malfunctioning or broken. If it’s determined that either of these fans needs replacing, they will also check inside to ensure that all connections are secure and functioning properly so as to ensure cold air circulates throughout your refrigerator efficiently.

To diagnose and repair a noisy freezer, first check for excessive refrigerator noise. If so, it could be the evaporator fan motor located in the freezer compartment or the fan motor in the refrigerator compartment. Open up both compartments to gain access to these parts. Check if they are blocked by dirt or debris, and use a vacuum cleaner to clean away any dust buildup on the blades of each fan motor and inside their respective compartments. Then remove any access panel covering them and check if either of these motors is worn out or damaged.

If the evaporator fan motor is damaged, you should replace it right away. After that, inspect the evaporator coils for any ice buildup. If there is an accumulation of ice on the coils, thaw them out and clean them thoroughly to ensure proper functioning of your freezer. Lastly, you must also check for any loose or worn-out components in your refrigerator unit as they can be a major source of loud noise. To keep your unit cool and running efficiently, it is essential that all its components are in good condition and working properly.

If your refrigerator freezer is making loud humming or other noise, it could be caused by a malfunctioning evaporator. The evaporator fan is an important component of the refrigeration process and should be checked if you suspect the fan motor is at fault. To diagnose and repair a noisy freezer, first unplug the unit from its power source to ensure safety before attempting any repairs. Next, check for any loose or broken parts on the fan motor, then inspect the evaporator for damage or debris buildup that could be causing it to run louder than normal.

Finally, look for any dirt or debris in the condenser that can cause rattling noises. If all of these checks come up clean, then it is likely that a faulty defrost timer or compressor is to blame. Start by replacing the defrost timer, and if this does not help then you may need to replace the compressor as well. If none of these solutions help, then it is possible that a loose drain pan or kitchen bench could be causing loud noises from the freezer. Check for any loose or missing parts on both the drain pan and kitchen bench and secure them properly if necessary.

Next, inspect the water dispenser and water inlet valve for any signs of damage or wear. If everything appears to be working properly, check the back of the Maytag refrigerator for any loud rattling. If a strange noise is present, it may be due to an issue with ice production or a blockage in the water inlet valve. Take note of how long it takes for the noise to stop and if it continues after a certain amount of time, contact a professional technician immediately.

Abnormal refrigerator noise is usually a sign of a normal freezer in need of repair. To diagnose and repair the noisy freezer, you must first call a qualified refrigeration repairman. Depending on the type and make of your freezer, they may need to perform any of the following tests: checking for ice maker malfunctions, water inlet issues, or faulty components such as an inlet valve or water supply. If your technician finds that there is loose drain inside your freezer which is causing the loud noise then unfortunately this is not good news.

The loose drain will have to be fixed by replacing it with a new one since it can’t be fixed from inside the freezer itself. Another possible problem could be due to an issue with your condenser fan motor which causes vibrations when running and can create very loud noises if not correctly secured or lubricated. If these are found to be the cause then again you will need to contact a professional technician who can help fix them for you quickly and efficiently before any further damage is caused.

To schedule freezer repairs in Oklahoma City contact Appliance Repair OKC Services by calling 405-378-4566 or visit our website at https://www.okcappliance.com to also our Google business page at https://cutt.ly/YEnc8qk. Call now!


The post How to Diagnose and Repair a Noisy Freezer appeared first on Appliance Repair OKC Services | Best Appliance, Washing Machine Repair Company in Oklahoma.

Sunday, March 26, 2023

How to Troubleshoot a Refrigerator that Keeps Running

Serviceman In Overall Working On Fridge With Screwdriver In Kitchen


How To Troubleshoot A Refrigerator That Keeps Running

This article discusses how to troubleshoot a refrigerator that keeps running. The most common reason for a refrigerator to keep running is a malfunctioning defrost termination thermostat. If the thermostat is not at the right temperature setting, ice particles will build upon the coils and build will cause the fridge to run constantly. To check that you are on the right track, first access the evaporator coils and check for excessive frost. If the coils are covered in frost, it’s likely a malfunctioning defrost termination thermostat causing this issue. If this is the case, then turning your refrigerator off and on should fix the problem. Otherwise, run your refrigerator at its highest setting for 24 hours and check the freezer temperature afterwards. The most common reason for a refrigerator not to keep its temperature is an incorrectly set thermostat.

If your refrigerator keeps running, the first thing you should do is check the thermostat. Make sure it is set to the right temperature setting; 12 degrees F is recommended as an appropriate temperature. If it’s not set to the right temperature, then your refrigerator won’t be able to do its job of cooling down and building ice particles. If you have checked that the thermostat is set correctly and your refrigerator still isn’t doing its job, you may need to check if there’s something wrong with the coils inside. It might be that they are running harder than usual, which could mean that they are too cold and need to be adjusted back up a few degrees.

If your evaporator fan is not running, the refrigerator section will not cool properly. To troubleshoot a refrigerator that keeps running, first check your evaporator fan and make sure it is in working order. If the fan is running, then check your condenser coils to ensure they are free of dust and debris. Keeping your condenser coils clean helps remove heat from the inside of your refrigerator and allows for circulating cold air to maintain a cool temperature.

If the evaporator coils become frosted over, it pulls the evaporator fan and stops your refrigerator from cooling properly. In order to troubleshoot a refrigerator that keeps running, you must first remove any frost from the evaporator coils. If this does not stop the refrigerator from running, your defrost heater will have to be activated to melt any ice on the coils. To do this, your refrigerator runs regular defrost cycles which detect a certain temperature and activate the heater. The fan then pulls air across the warm evaporator coil, melting away any frost that has built up and stopping it from forming again.
To troubleshoot a refrigerator that keeps running, first run your refrigerator and ensure the fridge is cold. If it is, then try to find out why it’s not maintaining temperature. If the fan is not running, this can inhibit the evaporator coil’s ability to absorb heat and will cause your fridge to keep running.

To troubleshoot the issue, you should first work your refrigerator to see if it is running for longer than normal. If the refrigerator has been running for longer than the usual refrigerator time of 8 to 10 hours, then you should shut off the compressor and allow it to remain off while the refrigerator cools down. Once it has cooled down, turn on the compressor and start defrost timer. The defrost timer will run the compressor intermittently to maintain a constant temperature in order to keep food cold in the cool compartment. If there is no fan running, then give the compressor 8 to 10 hours before restarting it again. This will allow enough time for heat from condenser coils to dissipate and cold air will be generated once again.

If your refrigerator still runs after doing these steps, it is likely due to a faulty evaporator fan motor. To troubleshoot this, you should first unplug the refrigerator and replace the evaporator fan motor with new parts. Once the replacement is complete, plug in your refrigerator again and check if the motor is running to ventilate the evaporator coils properly. If not, then you should try another test and monitor your refrigerator for the next few hours in short periods of time to see if it has solved the problem.

If the refrigerator is still running, you should check to see if the evaporator fan is broken or if the evaporator coils are clogged. If these two components are not working properly, then it can cause your fridge to run continuously. You should also check that your compressor and defrost heater are running correctly. Another possible reason could be a problem with the freezer door and door gaskets on your appliance. If these parts are not sealed properly, it can allow cold air to escape and warm air to enter, making your fridge run for longer periods of time in order to maintain its cooling temperature.

The first step to troubleshoot a refrigerator that keeps running is to make sure it is plugged in and getting power. If the plug is firmly in place, then you may have an issue with the condenser or broken motor inside your refrigerator. If that is the case, then you will need to call a repair technician. In some cases, the problem may be much simpler and just involve a dirty condenser. If this is the case, cleaning it should fix your problem. However, if cleaning does not solve your problem, then you will likely need to call in professional repair services. Most cases of refrigerator running can be fixed from home within a few hours with simple fixes like dirt removal or checking for power issues.

To troubleshoot a refrigerator that keeps running, you need to make sure your fridge is cool and set your freezer temperature between 0 and 10 degrees Fahrenheit. Next, keep the refrigerator unit clean by wiping down the surfaces and ensuring that all door gaskets are properly sealed. To keep your fridge running efficiently, check to make sure the condenser coils are clean. If they are dirty, use a vacuum cleaner to remove dirt and debris. Lastly, adjust the temperature setting inside the unit so that it stays around 12 degrees Celsius or 54 degrees Fahrenheit for optimal performance.

When a refrigerator keeps running, one of the first things you should do is check the evaporator coils. If there is excessive frost or a large buildup of ice, then this could be causing the problem. To access the evaporator coils, you will need to remove the back panel inside the unit and examine it carefully.

To schedule refrigerator repairs in Oklahoma City contact Appliance Repair OKC Services by calling 405-378-4566 or visit our website at https://www.okcappliance.com to also our Google business page at https://cutt.ly/YEnc8qk. Call now!


The post How to Troubleshoot a Refrigerator that Keeps Running appeared first on Appliance Repair OKC Services | Best Appliance, Washing Machine Repair Company in Oklahoma.

Friday, March 24, 2023

Common issues with dishwashers and how to fix and repair them

dishwasher repair OKC

appliance repair technician repairing dishwasher


Common Issues with Dishwashers and How to Fix And Repair Them

Dishwashers have become an indispensable part of modern households, saving time and water while ensuring our dishes are sparkling clean. However, like any appliance, they may encounter problems from time to time. This article aims to guide you through some common dishwasher issues and provide you with practical troubleshooting tips to help you identify and potentially fix these problems.

Dishwasher not starting:

One of the most common dishwasher issues is the machine not turning on. This can be due to various reasons, such as:

a. Power supply issues: Ensure the dishwasher is properly plugged in and that there are no blown fuses or tripped circuit breakers. If necessary, reset the breaker or replace the fuse.

b. Door latch problems: The dishwasher may not start if the door is not closed properly. Inspect the door latch and strike for any visible signs of damage, and replace them if needed.

c. Faulty control panel or timer: If the control panel or timer is malfunctioning, the dishwasher may not start. Consult your user manual for instructions on how to test and replace these components.

Dishwasher not draining:

A dishwasher that fails to drain water can cause unpleasant odors and potentially damage your kitchen flooring. Here are some potential causes and solutions:

a. Clogged drain or filter: Food particles and debris can accumulate in the dishwasher’s drain or filter, causing a blockage. Remove and clean the filter, and check the drain for any obstructions.

b. Faulty drain pump or motor: If the drain pump or motor is not functioning correctly, the dishwasher may not drain properly. Check the pump for any visible damage or debris and replace it if necessary.

c. Drain hose issues: The drain hose could be kinked or clogged, preventing water from draining out. Inspect the hose, straighten it if needed, and clear any blockages.

Dishes not getting clean:
Dirty dishes after a wash cycle can be frustrating. Here are some common reasons and solutions for this problem:

a. Insufficient water: If the dishwasher isn’t filling with enough water, the dishes may not get cleaned properly. Check the water inlet valve and float switch for any issues and replace them if necessary.

b. Spray arm problems: The spray arms may be clogged or damaged, preventing water from reaching the dishes effectively. Remove and clean the spray arms, and replace them if damaged.

c. Detergent dispenser issues: If the detergent dispenser is not functioning correctly, the dishes may not be cleaned effectively. Inspect the dispenser for any visible damage and replace it if needed.

d. Overloading: Overloading the dishwasher can prevent proper water circulation and cleaning. Make sure to load your dishes according to the manufacturer’s instructions.

Dishwasher leaking:

Leaks can cause water damage and should be addressed immediately. Here are some possible causes and solutions:

a. Door seal issues: A damaged or worn door seal can cause water to leak from the dishwasher. Inspect the door seal for any signs of wear or damage and replace it if necessary.

b. Loose or damaged hoses: Inspect the hoses connecting the dishwasher to the water supply and drain for any signs of damage or loose connections, and repair or replace them as needed.

c. Cracked or damaged tub: If the dishwasher tub is cracked or damaged, water may leak from the unit. In this case, you may need to replace the tub or consider purchasing a new dishwasher.

Dishwasher making strange noises:

Unusual noises can indicate a problem with your dishwasher. Here are some potential causes and solutions:

a. Spray arm issues: A loose or damaged spray arm may cause noise during operation. Check the spray arms for any signs of
damage and tighten or replace them as needed.

b. Foreign objects: Items such as utensils or small dishware can become lodged in the dishwasher, causing noise during operation. Check for any foreign objects and remove them.

c. Pump or motor problems: A noisy dishwasher could indicate issues with the pump or motor. Inspect these components for wear or damage and replace them if necessary.

d. Damaged bearings: Worn or damaged bearings can cause the dishwasher to produce loud noises. Consult your user manual to locate the bearings, inspect them for wear, and replace them if needed.

Dishwasher not drying dishes:

If your dishwasher isn’t drying dishes properly, there are a few potential reasons and solutions:

a. Rinse aid: Make sure you’re using rinse aid, as it helps to speed up the drying process. Check the rinse aid dispenser and refill it if empty.

b. Heating element issues: The dishwasher’s heating element may be malfunctioning, preventing dishes from drying. Consult your user manual for instructions on how to test and replace the heating element.

c. Faulty vent or fan: If the dishwasher’s vent or fan is not functioning properly, it can prevent proper drying. Check the vent for any obstructions, and inspect the fan for any signs of damage or wear. Replace these components if necessary.

d. Overloading: Overloading the dishwasher can restrict airflow, making it harder for dishes to dry. Load your dishes according to the manufacturer’s instructions to ensure proper drying.

By understanding these common dishwasher issues and their possible solutions, you can troubleshoot and potentially fix your appliance. However, if you’re unsure about any of the steps or the problem persists, it’s always best to consult a professional technician to avoid further damage or voiding your warranty. Proper maintenance and care will help ensure your dishwasher continues to serve you effectively and efficiently for years to come.

If you can’t find the cause of the dishwasher problems then call for dishwasher repair in Oklahoma City and be sure and contact Appliance Repair OKC Services by calling 405-378-4566 or visit our local website at https://www.okcappliance.com or also our Google business website at https://cli.re/Dyq1ME. Call now!


The post Common issues with dishwashers and how to fix and repair them appeared first on Appliance Repair OKC Services | Best Appliance, Washing Machine Repair Company in Oklahoma.

Thursday, March 23, 2023

Troubleshooting usual washing machine problems

washing machine repair service in okc

Repairman Repairing Washer In Front Of Young Woman In Kitchen At Home


Troubleshooting Usual Washing Machine Problems: A Comprehensive Guide

A washing machine is an essential appliance in every household, but like any other appliance, it can encounter various issues. This article aims to provide a comprehensive guide to troubleshooting common washing machine problems. By understanding these issues, you can diagnose and potentially fix them yourself, saving time and money on professional repair services.

Washer not turning on

If your washing machine is not turning on, there could be several reasons.

a. Check the power supply: Ensure that the washing machine is correctly plugged into a functioning power outlet. Try plugging in another device to confirm if the outlet is working.
b. Examine the power cord: Inspect the power cord for any visible damage, and replace it if necessary.
c. Test the door or lid switch: The washer may not turn on if the door or lid switch is malfunctioning. You can use a multimeter to check for continuity, and replace the switch if needed.

Washer not filling with water

When your washing machine is not filling with water, it could be due to the following reasons:

a. Check the water supply: Ensure that the water supply is turned on, and the hoses are connected correctly. Also, inspect the hoses for kinks or damage.
b. Examine the inlet valve: If the water supply is fine, the inlet valve might be defective or clogged. Use a multimeter to check for continuity, and replace the valve if necessary.
c. Inspect the water level switch: This switch ensures the right water level in the machine. A malfunctioning switch may not fill the washer correctly. Test it with a multimeter and replace it if needed.

Washer not spinning or agitating

If your washing machine is not spinning or agitating, it could be caused by:

a. Inspect the motor coupler: This component connects the motor to the transmission. If it’s worn or broken, the washer won’t spin or agitate. Replace the coupler if damaged.
b. Examine the drive belt: A worn or broken drive belt can prevent spinning or agitating. Replace the belt if necessary.
c. Test the lid switch: A faulty lid switch can stop the washer from spinning. Use a multimeter to check for continuity, and replace the switch if needed.

Washer not draining

If your washing machine is not draining properly, consider the following:

a. Inspect the drain hose: Check for kinks or obstructions in the drain hose that may prevent water from flowing out.
b. Examine the drain pump: A faulty or clogged drain pump can prevent the washer from draining. Remove any debris or replace the pump if defective.
c. Test the lid switch: As mentioned before, a malfunctioning lid switch can also cause draining issues. Check for continuity and replace if necessary.

Washer leaking water

Leaking water can be caused by several factors:

a. Check the hoses: Inspect the inlet and drain hoses for damage or loose connections, which may cause leaks.
b. Examine the door seal or gasket: A damaged door seal or gasket can allow water to leak out. Replace it if needed.
c. Inspect the tub seal: A faulty tub seal can cause water to leak from the washer. If it’s damaged, you may need to replace the seal or the entire outer tub.

Washer vibrating or shaking excessively

Excessive vibration or shaking can be caused by:

a. Check the leveling: Ensure that the washing machine is level and all four feet are touching the ground. Adjust the leveling feet if necessary.
b. Inspect the suspension components: Worn or damaged suspension components, like springs or dampening straps, can cause excessive vibration. Inspect these components and replace them if needed.
c. Examine the load balance: An unbalanced load can cause excessive shaking. Make sure to distribute clothes evenly inside the drum before starting a cycle. If the problem persists, try reducing the load size.

Washer making loud noises

Loud noises can be caused by several factors:

a. Check for foreign objects: Objects like coins, keys, or small items can get trapped in the drum or pump, causing noise. Inspect and remove any foreign objects.
b. Inspect the drive belt: A worn or damaged drive belt can cause noise during operation. Replace the belt if necessary.
c. Examine the motor or drum bearings: Noisy operation can also be caused by worn or damaged motor or drum bearings. If the bearings are the issue, you may need to replace them or the entire drum assembly.

Washer stops mid-cycle

If your washing machine stops mid-cycle, consider the following:

a. Test the timer: A faulty timer can cause the washer to stop mid-cycle. Use a multimeter to check for continuity and replace the timer if needed.
b. Examine the thermal fuse: If the thermal fuse is blown, the washer may stop mid-cycle. Test it with a multimeter and replace it if necessary.
c. Check the control board: A malfunctioning control board can cause the washer to stop unexpectedly. If other components are functioning correctly, consider replacing the control board.

Washer leaving clothes too wet

If your washing machine is leaving clothes too wet after the spin cycle, consider:

a. Inspect the drain system: Ensure that the drain hose and pump are clear of obstructions, allowing water to flow out properly.
b. Examine the drive belt: A loose or worn drive belt can cause the drum to spin inadequately. Replace the belt if necessary.
c. Test the motor control board: A faulty motor control board may not provide enough power for the spin cycle. If other components are working correctly, consider replacing the motor control board.

Washer displaying error codes

Modern washing machines may display error codes to help diagnose issues:

a. Consult the user manual: Refer to your washing machine’s user manual to understand the meaning of specific error codes.
b. Address the issue: Once you’ve identified the problem through the error code, follow the troubleshooting steps mentioned in the manual or in this article to resolve the issue.
c. Reset the washer: After resolving the problem, reset your washing machine by unplugging it for a few minutes before plugging it back in.

Conclusion

Troubleshooting usual washing machine problems can help you save time and money on professional repair services. By understanding and diagnosing these problems, you can maintain your washing machine’s performance and extend its lifespan. However, if you’re uncertain about any of the troubleshooting steps or if the issue persists after attempting to resolve it, consider consulting a professional appliance technician for further assistance.

To schedule washing machine repairs in Oklahoma City contact Appliance Repair OKC Services by calling 405-378-4566 or you can visit our website at https://www.okcappliance.com. Also our Google business website can be found at https://cutt.ly/YEnc8qk. Call now!


The post Troubleshooting usual washing machine problems appeared first on Appliance Repair OKC Services | Best Appliance, Washing Machine Repair Company in Oklahoma.

Wednesday, March 22, 2023

How to Diagnose and Fix Common Oven Problems

oven repair services Oklahoma City

Woman Trying To Use Her Oven


How to Diagnose and Fix Common Oven Problems

There are few things more frustrating than planning a delicious meal only to find that your oven is not functioning properly. Oven problems can occur for a variety of reasons, but with some basic troubleshooting, you can often diagnose and fix the issue yourself. This comprehensive guide will walk you through how to identify common oven problems and provide step-by-step instructions for fixing them.

Oven not heating

One of the most common oven problems is when the appliance fails to heat. Here are some possible causes and solutions:

a) Faulty heating element: Electric ovens have two heating elements – one for baking and one for broiling. If either element is not glowing red when the oven is turned on, it may need to be replaced.

Solution: Unplug the oven, remove the screws holding the faulty element in place, disconnect the wires, and replace it with a new one. Make sure to purchase the correct replacement element for your specific oven model.

b) Igniter issues: Gas ovens use igniters to light the gas and heat the oven. If the igniter is not glowing or only glows weakly, it may need to be replaced.

Solution: Turn off the gas supply, remove the oven racks and bottom panel, disconnect the igniter’s wires, and unscrew it from the oven. Install a new igniter, reconnect the wires, and reassemble the oven.

Uneven cooking or baking
Uneven cooking can be frustrating, especially when baking. Here are some common causes and solutions:

a) Malfunctioning thermostat: A faulty thermostat may cause uneven temperatures inside the oven.

Solution: Use an oven thermometer to check the accuracy of your thermostat. If it’s off by more than a few degrees, consider replacing it or having a professional recalibrate it.

b) Improper air circulation: Blocked air vents can lead to uneven cooking.

Solution: Ensure that oven racks are placed correctly and not blocking any vents. Do not overcrowd the oven with too many dishes at once, and avoid covering the oven racks with aluminum foil.

Oven door not closing properly

A poorly sealed oven door can lead to heat loss and longer cooking times. Here’s what you can do:

a) Inspect the door gasket: The gasket creates an airtight seal around the oven door. If it’s damaged or worn, it may need to be replaced.

Solution: Remove the old gasket by pulling it away from the door. Clean the area where the gasket was attached and install a new one by pressing it into the groove.

b) Check door hinges: Damaged or misaligned hinges can prevent the door from closing properly.

Solution: Inspect the hinges for damage and replace them if necessary. If the hinges are intact, try tightening the screws that hold them in place.

Oven self-cleaning function not working
The self-cleaning feature can be a lifesaver, but it can also malfunction. Here are some potential causes and solutions:

a) Door latch issues: The oven door must be securely latched for the self-cleaning cycle to begin.

Solution: Inspect the latch for damage and ensure it’s properly aligned. If it’s bent or broken, you may need to replace it.

b) Faulty control panel: A malfunctioning control panel can prevent the self-cleaning cycle from starting.

Solution: Reset the oven by unplugging it for a few minutes and plugging it back in. If the issue persists, you may need to replace the control panel or consult a professional.

Oven light not working

A non-functional oven light can make it difficult to monitor your food. Here’s how to fix it:

a) Replace the light bulb: Unscrew the old bulb and replace it with a new one specifically designed for ovens. Make sure the oven is unplugged before attempting this.

b) Check the light socket: If the light still doesn’t work after replacing the bulb, inspect the socket for damage or signs of corrosion.

Solution: Unplug the oven and use a multimeter to test the socket for continuity. If the socket is faulty, you may need to replace it.

c) Examine the door switch: The oven light is controlled by a door switch that activates when the door is opened.

Solution: Unplug the oven, locate the door switch, and use a multimeter to test it for continuity. If it’s faulty, replace the switch.

Oven produces excessive noise
A noisy oven can be distracting and may indicate a problem. Here are some potential causes and solutions:

a) Damaged fan motor: Convection ovens use a fan to circulate hot air, and a faulty fan motor can cause excessive noise.

Solution: Unplug the oven, remove the fan cover, and inspect the fan motor. If it appears damaged or worn, replace the motor.

b) Loose or broken parts: Over time, parts can loosen or break, leading to rattling or other noises.

Solution: Inspect the oven’s interior for loose or broken components, such as screws or heating elements. Tighten or replace any problematic parts as needed.

Oven temperature fluctuates
If your oven’s temperature is constantly fluctuating, it can result in undercooked or overcooked food. Here’s what to do:

a) Test the temperature sensor: A malfunctioning temperature sensor can cause temperature fluctuations.

Solution: Use a multimeter to test the sensor for continuity. If the sensor is faulty, replace it with a new one.

b) Inspect the control board: A defective control board can also lead to temperature fluctuations.

Solution: If the temperature sensor is functioning correctly, consider replacing the control board or consulting a professional.

Conclusion:

Dealing with oven problems can be frustrating, but with this guide, you now have the knowledge and tools necessary to diagnose and fix many common issues. Always remember to unplug your oven and take necessary safety precautions before attempting any repairs. If you are unsure about a repair or the problem persists, don’t hesitate to consult a professional appliance technician. Regular maintenance and prompt repairs can help extend the life of your oven and ensure consistently delicious meals for years to come.

If you are having oven issues and need oven repair in Oklahoma City contact Appliance Repair OKC Services by calling 405-378-4566 or visit our website at https://www.okcappliance.com. Alternatively you can also visit our Google business website at https://cutt.ly/YEnc8qk.


The post How to Diagnose and Fix Common Oven Problems appeared first on Appliance Repair OKC Services | Best Appliance, Washing Machine Repair Company in Oklahoma.

Tuesday, March 21, 2023

The Most Common Freezer Repairs and How to Avoid Them

freezer repair okc

refrigerator repair okc


The Most Common Freezer Repairs and How to Avoid Them: A Comprehensive Guide

A freezer is an essential household appliance, designed to store and preserve perishable food items for an extended period. However, like any other appliance, freezers may encounter problems and require repairs over time. This article will outline the most common freezer repairs and provide tips on how to avoid them, ensuring that your freezer remains in optimal working condition.

Freezer Not Cooling Properly
A freezer that isn’t cooling properly or has lost its cooling capacity can lead to spoiled food and waste. Here are some common causes and preventative measures:

a. Dirty Condenser Coils: The condenser coils are responsible for dissipating heat from the freezer. Over time, dust and dirt can accumulate on the coils, reducing their efficiency.

Prevention: Regularly clean the condenser coils using a vacuum cleaner or a coil brush to ensure optimal cooling performance.

b. Malfunctioning Evaporator Fan: The evaporator fan helps circulate cold air inside the freezer. If the fan malfunctions, the freezer’s cooling capacity may be compromised.

Prevention: Inspect the evaporator fan for any visible damage or debris and clean it as necessary. Replace the fan if it is not functioning correctly.

c. Inadequate Door Seal: A damaged or worn door seal can allow warm air to enter the freezer, compromising its cooling ability.

Prevention: Regularly inspect the door seal for damage and replace it if necessary. Make sure the freezer door is closed properly after each use.

Frost Build-Up
Excessive frost build-up in your freezer can reduce its efficiency and take up valuable storage space. Here are some common causes and preventative measures:

a. Frequent Door Opening: Opening the freezer door frequently or for extended periods can introduce warm air, leading to frost build-up.

Prevention: Minimize the frequency and duration of opening the freezer door. Organize your freezer to ensure easy access to items and reduce the need to keep the door open for long periods.

b. Damaged Door Seal: As mentioned earlier, a damaged door seal can allow warm air to enter the freezer, contributing to frost build-up.

Prevention: Regularly inspect and replace the door seal if necessary.

c. Incorrect Temperature Setting: Setting the freezer’s temperature too low can cause excessive frost build-up.

Prevention: Ensure that the freezer’s temperature is set according to the manufacturer’s recommendations, typically around 0°F (-18°C).

Freezer Overheating
An overheating freezer can lead to inefficient cooling and potential damage to the appliance. Here are some common causes and preventative measures:

a. Blocked Air Vents: Blocked air vents can restrict airflow and cause the freezer to overheat.

Prevention: Regularly inspect the air vents and ensure that they are free from any obstructions, such as food packaging or ice build-up.

b. Dirty Condenser Coils: As mentioned earlier, dirty condenser coils can affect the freezer’s cooling efficiency, leading to overheating.

Prevention: Clean the condenser coils regularly to ensure optimal cooling performance.

Noisy Freezer
A noisy freezer can be both annoying and indicative of a problem. Here are some common causes and preventative measures:

a. Vibrations: Ensure that the freezer is on a level surface and that there is adequate clearance around it to prevent vibrations.

Prevention: Adjust the freezer’s feet or use a leveling tool to ensure that it sits evenly on the floor.

b. Malfunctioning Evaporator or Condenser Fan: If the fans are malfunctioning, they can create noise.

Prevention: Inspect the fans for any debris or damage and clean or replace them as necessary.

Freezer Leaking Water
A leaking freezer can cause water damage to your home and may indicate a problem with the appliance. Here are some common causes and preventative measures:

a. Clogged Defrost Drain: The defrost drain is responsible for draining water from the defrost cycle. If it becomes clogged, water may accumulate and leak out.

Prevention: Regularly clean the defrost drain using a long, flexible brush or a pipe cleaner to remove any blockages and prevent water leaks.

b. Damaged or Cracked Drain Pan: The drain pan collects water during the defrost cycle. A damaged or cracked pan can cause water leaks.

Prevention: Inspect the drain pan periodically for damage and replace it if necessary.

Freezer Not Defrosting
A freezer that isn’t defrosting can lead to excessive frost build-up and reduced cooling efficiency. Here are some common causes and preventative measures:

a. Faulty Defrost Timer: The defrost timer is responsible for activating the defrost cycle. If it malfunctions, the freezer may not defrost properly.

Prevention: Inspect the defrost timer for damage and replace it if necessary. Regularly check that the defrost cycle is functioning as intended.

b. Malfunctioning Defrost Heater: The defrost heater is responsible for melting frost during the defrost cycle. A malfunctioning heater can prevent proper defrosting.

Prevention: Inspect the defrost heater for damage or wear and replace it if necessary.

Ice Build-Up in the Ice Maker
Excessive ice build-up in the ice maker can prevent it from functioning correctly and may cause damage to the appliance. Here are some common causes and preventative measures:

a. Incorrect Water Supply Pressure: If the water supply pressure is too high or too low, it can cause ice build-up in the ice maker.

Prevention: Check the water supply pressure and adjust it according to the manufacturer’s recommendations.

b. Faulty Water Inlet Valve: A malfunctioning water inlet valve can cause water to leak into the ice maker, leading to ice build-up.

Prevention: Inspect the water inlet valve for damage and replace it if necessary.

Freezer Door Not Closing Properly
A freezer door that doesn’t close properly can cause temperature fluctuations and energy loss. Here are some potential causes and preventative measures:

a. Misaligned Door Hinges: Over time, the door hinges may become loose or misaligned, causing the door to close improperly.

Prevention: Tighten the screws on the door hinges and adjust the alignment if necessary. Replace damaged or worn hinges.

b. Overfilled Freezer: An overfilled freezer can prevent the door from closing completely.

Prevention: Organize and declutter the freezer, ensuring that there is enough space for the door to close correctly. Avoid blocking the door shelves and ensure items are not pushing against the door.

c. Damaged or Worn Door Gaskets: As mentioned earlier, damaged or worn door gaskets can cause the freezer door to close poorly.

Prevention: Inspect the gaskets for damage and replace them if necessary.

Regular maintenance and prompt attention to common freezer problems can help you avoid costly repairs and ensure that your freezer remains in optimal condition. By following this guide, you can identify and address many of the most common freezer issues. However, if you are unsure or uncomfortable handling any of these problems, consider consulting a professional technician for expert advice and assistance. Proper care and maintenance will extend the life of your freezer and provide you with peace of mind.

To schedule freezer repairs in Oklahoma City contact Appliance Repair OKC Services by calling 405-378-4566 or visit our website at https://www.okcappliance.com to also our Google business page at https://cutt.ly/YEnc8qk. Call now!


The post The Most Common Freezer Repairs and How to Avoid Them appeared first on Appliance Repair OKC Services | Best Appliance, Washing Machine Repair Company in Oklahoma.

Monday, March 20, 2023

Troubleshooting common refrigerator problems

refrigerator repair okc

Tecnician repairing refrigerator


Troubleshooting common refrigerator problems

Refrigerators are an essential part of our daily lives, helping to preserve our food and keep it fresh for an extended period. However, like any other household appliance, refrigerators may encounter problems from time to time. This article will guide you through troubleshooting common refrigerator problems and provide you with potential solutions to help you save time and money on unnecessary repairs.

Refrigerator Not Cooling Properly
One of the most common problems is a refrigerator that doesn’t cool properly or has lost its cooling capacity. This can result from several factors, including:

a. Dirty Condenser Coils: Over time, dust and dirt can accumulate on the condenser coils, making them less efficient in dissipating heat. As a result, your refrigerator might struggle to maintain the correct temperature.

Solution: Unplug your refrigerator and use a vacuum cleaner or a coil brush to clean the condenser coils. This will help improve the cooling efficiency.

b. Faulty Door Gaskets: The door gaskets are responsible for sealing the refrigerator and preventing warm air from entering. Damaged or worn-out gaskets can cause the refrigerator to work harder to maintain the temperature.

Solution: Inspect the door gaskets for any cracks or damage. If necessary, replace them to maintain a proper seal.

c. Malfunctioning Thermostat: If your refrigerator’s thermostat is not functioning correctly, it may not send the correct signals to maintain the desired temperature.

Solution: Test the thermostat by adjusting the temperature settings. If the refrigerator does not respond accordingly, you may need to replace the thermostat.

2.Refrigerator Is Noisy
Noisy refrigerators can be annoying and may indicate a problem. Here are some possible causes and solutions:

a. Vibrations: Ensure that the refrigerator is on a level surface and that there is adequate clearance around it to prevent vibrations.

Solution: Adjust the refrigerator’s feet or use a leveling tool to make sure it sits evenly on the floor.

b. Faulty Evaporator or Condenser Fan: The fans help circulate cold air inside the refrigerator and dissipate heat outside. If they are malfunctioning, they can create noise.

Solution: Inspect the fans for any debris or damage. If necessary, replace the fans.

Water Leaking from the Refrigerator
Water leakage can be a messy and frustrating problem. Here are some common causes and solutions:

a. Clogged Defrost Drain: The defrost drain is responsible for draining water from the defrost cycle. If it becomes clogged, water may accumulate and leak out.

Solution: Use a long, flexible brush or a pipe cleaner to remove any blockages from the defrost drain.

b. Damaged Water Supply Line: If your refrigerator has an ice maker or a water dispenser, a damaged water supply line can cause leaks.

Solution: Inspect the water supply line for damage or loose connections. Replace the line if necessary.

Ice Maker Not Working

An ice maker that isn’t producing ice can be a significant inconvenience. Here are some common causes and solutions:

a. Frozen Water Supply Line: The water supply line may become frozen, preventing water from reaching the ice maker.

Solution: Turn off the water supply to the refrigerator and use a hairdryer to thaw the frozen line. Ensure that the refrigerator’s temperature is not set too low.

b. Faulty Ice Maker Assembly: The ice maker assembly includes several components that can malfunction, preventing ice production.

Solution: Inspect the ice maker assembly for any signs of damage or wear. If you cannot identify the issue, consider contacting a professional technician for a proper diagnosis.

Refrigerator Door Not Closing Properly
A refrigerator door that doesn’t close properly can cause temperature fluctuations and energy loss

Here are some potential causes and solutions:

a. Misaligned Door Hinges: Over time, the door hinges may become loose or misaligned, causing the door to close improperly.

Solution: Tighten the screws on the door hinges and adjust the alignment if necessary. If the hinges are damaged or worn out, consider replacing them.

b. Overfilled Refrigerator: An overfilled refrigerator can prevent the door from closing completely.

Solution: Organize and declutter the refrigerator, ensuring that there is enough space for the door to close correctly. Avoid blocking the door shelves and ensure items are not pushing against the door.

c. Damaged or Worn Door Gaskets: As mentioned earlier, damaged or worn door gaskets can cause the refrigerator door to close poorly.

Solution: Inspect the gaskets for damage and replace them if necessary.

Refrigerator Smells Unpleasant
Unpleasant odors in your refrigerator can be caused by various factors, including spoiled food, mold, or bacteria growth. Here are some solutions to tackle this problem:

a. Clean the Refrigerator: Remove all food items and shelves from the refrigerator. Thoroughly clean the interior with a mixture of warm water and mild detergent. Wipe down the shelves and drawers before placing them back in the refrigerator.

b. Check for Spoiled Food: Inspect all food items for spoilage and discard any expired or spoiled items. Regularly check and rotate food items to ensure they are still fresh and safe to consume.

c. Use Baking Soda: Place an open box of baking soda in your refrigerator to help neutralize odors. Replace the baking soda every three months for optimal effectiveness.

d. Regular Maintenance: Clean your refrigerator regularly and promptly address any spills or leaks to prevent unpleasant odors and bacteria growth.

Refrigerator Light Not Working
A non-functioning refrigerator light can make it challenging to locate items in your refrigerator. Here are some possible causes and solutions:

a. Burned-Out Light Bulb: The most common cause of a non-functioning light is a burned-out bulb.

Solution: Unplug the refrigerator and replace the light bulb with a compatible one. Ensure that the refrigerator is unplugged before attempting to change the light bulb to avoid electrical shock.

b. Faulty Door Switch: The door switch is responsible for turning the light on and off when the door is opened and closed. A malfunctioning door switch can prevent the light from functioning.

Solution: Inspect the door switch for any visible signs of damage. If necessary, replace the switch.

Refrigerator Constantly Running
A refrigerator that constantly runs can consume more energy and wear out its components faster. Here are some potential causes and solutions:

a. Dirty Condenser Coils: As mentioned earlier, dirty condenser coils can affect the refrigerator’s efficiency and cause it to work harder.

Solution: Clean the condenser coils regularly to ensure optimal performance and efficiency.

b. Frequent Door Opening: Opening the refrigerator door frequently or for extended periods can cause the refrigerator to run more often to maintain the temperature.

Solution: Minimize the frequency and duration of opening the refrigerator door. Organize items in your refrigerator to quickly locate them and avoid keeping the door open for extended periods.

c. Faulty Thermostat: A malfunctioning thermostat can cause the refrigerator to run constantly as it struggles to maintain the set temperature.

Solution: Test the thermostat and replace it if necessary.

Conclusion

Regular maintenance and prompt attention to common refrigerator problems can help you avoid costly repairs and ensure your refrigerator remains in optimal condition. By following this guide, you can troubleshoot and address many of the most common refrigerator issues. However, if you are unsure or uncomfortable handling any of these problems, consider consulting a professional technician for expert advice and assistance. Call Appliance Repair OKC Services at 405-378-4566 or www.okcappliance.com.

To schedule refrigerator repairs in Oklahoma City contact Appliance Repair OKC Services by calling 405-378-4566 or visit our website at https://www.okcappliance.com to also our Google business page at https://cutt.ly/YEnc8qk. Call now!


The post Troubleshooting common refrigerator problems appeared first on Appliance Repair OKC Services | Best Appliance, Washing Machine Repair Company in Oklahoma.

Friday, March 17, 2023

Common issues with dishwashers and how to troubleshoot them

dishwasher repair okc

appliance repair tech repairing domestic dishwasher in the kitchen


Common Issues With Dishwashers And How To Troubleshoot Them

This article discusses common issues with dishwashers and how to troubleshoot them. Problems can include dishes not getting dry, water not draining from the dishwasher, and a lack of power to the dishwasher. For most homeowners, the first thing they do when their dishwasher stops working is to try and repair it themselves. Unfortunately, repairing a dishwasher can be difficult and time consuming, and if the problem is more serious then it can cost a lot of money. What most people want is a quick solution that won’t cost them too much in time or money.

Dishwashers are a great invention, but they can be prone to common issues. Knowing how to load the dishwasher correctly and use rinse aid is key for avoiding types of dishwasher problems. When loading dishes, it is important to scrape away food residue from dishes before loading them in the dishwasher. This will help prevent food from clogging the drain hose or new disposal system. If your dishes are coming out with water spots or smells, then check if you have removed the drain plug at the bottom of your dishwasher before running a wash cycle.

If the plug is still in place, remove it and examine the drain hose. If you notice a kink or hole in the hose, then replace it with a new one. For a particularly pressing problem such as a flood dishwasher, check the hose drain valve to make sure it is open and not blocked. If these steps do not stay your dishwasher, consider consulting an appliance repair specialist or visiting The Family Handyman website for more detailed advice on how to resolve your water issue.

Common issues with dishwashers include your dishwasher drain pump becoming clogged, preventing it from draining water properly. If your dishwasher runs but does not drain, the pump screen or other components could be clogged, wreaking havoc in your kitchen space. In this case, draining your dishwasher and cleaning the pump screen will likely resolve the issue. If it does not, more significant problems could be occurring such as a faulty water supply system or a blocked pipe that pumps water out of the dishwasher.

Common issues with dishwashers include a door that won’t close, a dishwasher that floods, and a defective door switch. To troubleshoot these issues, first make sure the dishwasher door is closed properly. If it is not closed properly, open your dishwasher and check the door switch. If the switch appears defective or worn out, replace it with a new one. Additionally, make sure the timer selector switch is working properly and that there is no electrical shock when you run the dishwasher.
One of the common issues with dishwashers is a faulty float switch.

The float switch monitors how much water is in your dishwasher and may become faulty if it gets stuck. This can cause too much water to enter the dishwasher, which can damage internal components and cause leaks. If you suspect that your float or float switch has become faulty, it’s best to call a handy man for help. They will check the switch mechanism to make sure it is properly regulating the water level. They may also need to replace the float or float switch altogether.

Common issues with dishwashers include using wrong dishwashing material, filling your dishwasher incorrectly or overfilling it, and having a faulty float switch. If your dishwasher does not operate properly, the timer or water inlet valve may be the problem. Make sure you scrape off enough food from your dishes before loading them into the dishwasher. Also check to see if the switch timer is stuck, as this can prevent the machine from running correctly. Another possibility is a faulty water inlet valve which could cause poor washing performance or flooding.

Common issues with dishwashers can include prevent proper dishwasher drainage, overloading your dishwasher, using wrong detergent, and built up food sediment. To troubleshoot these problems make sure to follow your particular dishwasher’s manufacturers instructions. If you are overloading your machine, make sure to only load items like pots and pans in the bottom rack and plates and utensils in the top rack. It’s also important to follow the manufacturers advice when using detergent as too much can cause occasional leaking.

Impact dishwasher cleaning performance can also be improved by cleaning your dishwasher regularly. This includes draining your dishwasher once a month and running a cycle with a cup of vinegar. Cleaning the filter is also important as it prevents dishes from becoming clogged, which may cause draining problems. If you find that there is an odor in your dishwasher, try running it with baking soda and vinegar to solve the odor problem. If you have a garbage disposal unit connected to the same drain as your dishwasher, remain food particles could get caught in the filter and cause clogging or odors.

One way to avoid this is to empty the dishwasher filter and check for any blockages. If this does not help, you may need to give your dishwasher a good cleaning. Start by cleaning the spray arms, as these can become clogged with food particles and cause dirty water to remain in the dishwasher after draining. If you have recently installed a new garbage disposal unit, check that it is properly connected to your drainage system. Make sure that the drain plug on your dishwasher is securely connected and free of debris, which can prevent it from draining properly. If none of these steps help with draining your dishwasher, you may need to call a professional plumber who can access any clogs in the drainage system or provide additional advice on how to fix any smells emanating from your dishwasher.

Dishwashers are an important part of your kitchen and can save you time and effort when it comes to washing dishes. But sometimes they can become clogged with food particles, grease and other debris, leaving your dishes still needing to be washed by hand. To troubleshoot these common issues, try checking the strain screen in the bottom of the dishwasher, following manufacturers recommendations for cleaning the screen and sprayer arms on a daily basis. Make sure that no debris is blocking the door gasket or sprayer arms as well.

Common issues with dishwashers can include not cleaning dishes properly, leaving lingering stench, or not running altogether. If your appliance isn’t cleaning your dishes properly, try dishwasher cleaning solution. Otherwise, ensure that you are using the right type of detergent and putting your dishes in the right way. To clean the appliance itself, run a cycle with vinegar or special type of cleaner that is designed for dishwashers.

If you can’t find the cause of the dishwasher problems then call for dishwasher repair in Oklahoma City and be sure and contact Appliance Repair OKC Services by calling 405-378-4566 or visit our local website at https://www.okcappliance.com or also our Google business website at https://cli.re/Dyq1ME. Call now!


The post Common issues with dishwashers and how to troubleshoot them appeared first on Appliance Repair OKC Services | Best Appliance, Washing Machine Repair Company in Oklahoma.