Monday, March 20, 2023

Troubleshooting common refrigerator problems

refrigerator repair okc

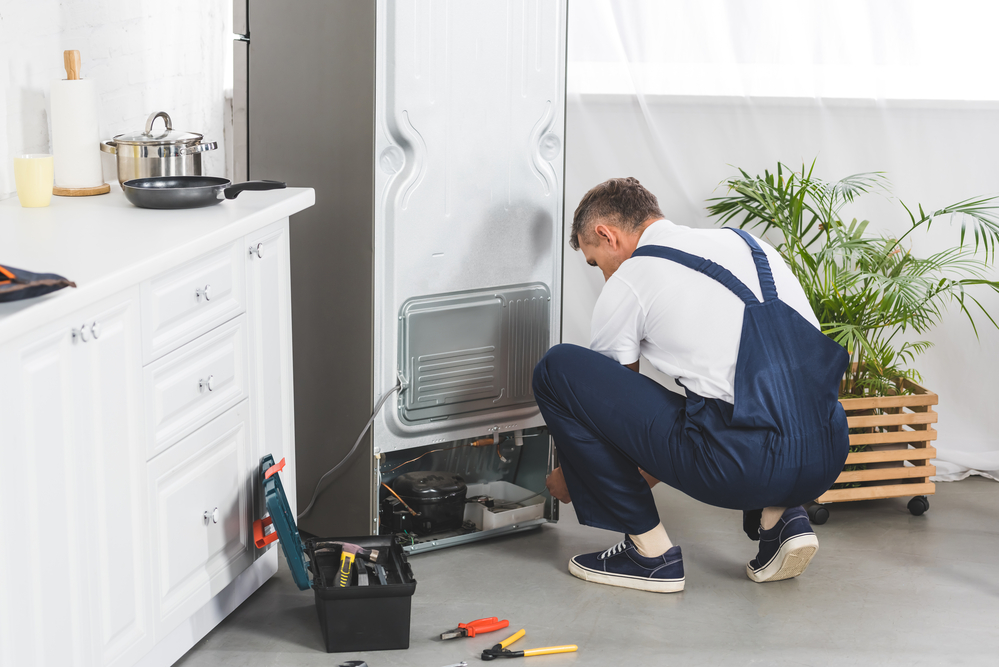
Tecnician repairing refrigerator


Troubleshooting common refrigerator problems

Refrigerators are an essential part of our daily lives, helping to preserve our food and keep it fresh for an extended period. However, like any other household appliance, refrigerators may encounter problems from time to time. This article will guide you through troubleshooting common refrigerator problems and provide you with potential solutions to help you save time and money on unnecessary repairs.

Refrigerator Not Cooling Properly
One of the most common problems is a refrigerator that doesn’t cool properly or has lost its cooling capacity. This can result from several factors, including:

a. Dirty Condenser Coils: Over time, dust and dirt can accumulate on the condenser coils, making them less efficient in dissipating heat. As a result, your refrigerator might struggle to maintain the correct temperature.

Solution: Unplug your refrigerator and use a vacuum cleaner or a coil brush to clean the condenser coils. This will help improve the cooling efficiency.

b. Faulty Door Gaskets: The door gaskets are responsible for sealing the refrigerator and preventing warm air from entering. Damaged or worn-out gaskets can cause the refrigerator to work harder to maintain the temperature.

Solution: Inspect the door gaskets for any cracks or damage. If necessary, replace them to maintain a proper seal.

c. Malfunctioning Thermostat: If your refrigerator’s thermostat is not functioning correctly, it may not send the correct signals to maintain the desired temperature.

Solution: Test the thermostat by adjusting the temperature settings. If the refrigerator does not respond accordingly, you may need to replace the thermostat.

2.Refrigerator Is Noisy
Noisy refrigerators can be annoying and may indicate a problem. Here are some possible causes and solutions:

a. Vibrations: Ensure that the refrigerator is on a level surface and that there is adequate clearance around it to prevent vibrations.

Solution: Adjust the refrigerator’s feet or use a leveling tool to make sure it sits evenly on the floor.

b. Faulty Evaporator or Condenser Fan: The fans help circulate cold air inside the refrigerator and dissipate heat outside. If they are malfunctioning, they can create noise.

Solution: Inspect the fans for any debris or damage. If necessary, replace the fans.

Water Leaking from the Refrigerator
Water leakage can be a messy and frustrating problem. Here are some common causes and solutions:

a. Clogged Defrost Drain: The defrost drain is responsible for draining water from the defrost cycle. If it becomes clogged, water may accumulate and leak out.

Solution: Use a long, flexible brush or a pipe cleaner to remove any blockages from the defrost drain.

b. Damaged Water Supply Line: If your refrigerator has an ice maker or a water dispenser, a damaged water supply line can cause leaks.

Solution: Inspect the water supply line for damage or loose connections. Replace the line if necessary.

Ice Maker Not Working

An ice maker that isn’t producing ice can be a significant inconvenience. Here are some common causes and solutions:

a. Frozen Water Supply Line: The water supply line may become frozen, preventing water from reaching the ice maker.

Solution: Turn off the water supply to the refrigerator and use a hairdryer to thaw the frozen line. Ensure that the refrigerator’s temperature is not set too low.

b. Faulty Ice Maker Assembly: The ice maker assembly includes several components that can malfunction, preventing ice production.

Solution: Inspect the ice maker assembly for any signs of damage or wear. If you cannot identify the issue, consider contacting a professional technician for a proper diagnosis.

Refrigerator Door Not Closing Properly
A refrigerator door that doesn’t close properly can cause temperature fluctuations and energy loss

Here are some potential causes and solutions:

a. Misaligned Door Hinges: Over time, the door hinges may become loose or misaligned, causing the door to close improperly.

Solution: Tighten the screws on the door hinges and adjust the alignment if necessary. If the hinges are damaged or worn out, consider replacing them.

b. Overfilled Refrigerator: An overfilled refrigerator can prevent the door from closing completely.

Solution: Organize and declutter the refrigerator, ensuring that there is enough space for the door to close correctly. Avoid blocking the door shelves and ensure items are not pushing against the door.

c. Damaged or Worn Door Gaskets: As mentioned earlier, damaged or worn door gaskets can cause the refrigerator door to close poorly.

Solution: Inspect the gaskets for damage and replace them if necessary.

Refrigerator Smells Unpleasant
Unpleasant odors in your refrigerator can be caused by various factors, including spoiled food, mold, or bacteria growth. Here are some solutions to tackle this problem:

a. Clean the Refrigerator: Remove all food items and shelves from the refrigerator. Thoroughly clean the interior with a mixture of warm water and mild detergent. Wipe down the shelves and drawers before placing them back in the refrigerator.

b. Check for Spoiled Food: Inspect all food items for spoilage and discard any expired or spoiled items. Regularly check and rotate food items to ensure they are still fresh and safe to consume.

c. Use Baking Soda: Place an open box of baking soda in your refrigerator to help neutralize odors. Replace the baking soda every three months for optimal effectiveness.

d. Regular Maintenance: Clean your refrigerator regularly and promptly address any spills or leaks to prevent unpleasant odors and bacteria growth.

Refrigerator Light Not Working
A non-functioning refrigerator light can make it challenging to locate items in your refrigerator. Here are some possible causes and solutions:

a. Burned-Out Light Bulb: The most common cause of a non-functioning light is a burned-out bulb.

Solution: Unplug the refrigerator and replace the light bulb with a compatible one. Ensure that the refrigerator is unplugged before attempting to change the light bulb to avoid electrical shock.

b. Faulty Door Switch: The door switch is responsible for turning the light on and off when the door is opened and closed. A malfunctioning door switch can prevent the light from functioning.

Solution: Inspect the door switch for any visible signs of damage. If necessary, replace the switch.

Refrigerator Constantly Running
A refrigerator that constantly runs can consume more energy and wear out its components faster. Here are some potential causes and solutions:

a. Dirty Condenser Coils: As mentioned earlier, dirty condenser coils can affect the refrigerator’s efficiency and cause it to work harder.

Solution: Clean the condenser coils regularly to ensure optimal performance and efficiency.

b. Frequent Door Opening: Opening the refrigerator door frequently or for extended periods can cause the refrigerator to run more often to maintain the temperature.

Solution: Minimize the frequency and duration of opening the refrigerator door. Organize items in your refrigerator to quickly locate them and avoid keeping the door open for extended periods.

c. Faulty Thermostat: A malfunctioning thermostat can cause the refrigerator to run constantly as it struggles to maintain the set temperature.

Solution: Test the thermostat and replace it if necessary.

Conclusion

Regular maintenance and prompt attention to common refrigerator problems can help you avoid costly repairs and ensure your refrigerator remains in optimal condition. By following this guide, you can troubleshoot and address many of the most common refrigerator issues. However, if you are unsure or uncomfortable handling any of these problems, consider consulting a professional technician for expert advice and assistance. Call Appliance Repair OKC Services at 405-378-4566 or www.okcappliance.com.

To schedule refrigerator repairs in Oklahoma City contact Appliance Repair OKC Services by calling 405-378-4566 or visit our website at https://www.okcappliance.com to also our Google business page at https://cutt.ly/YEnc8qk. Call now!


The post Troubleshooting common refrigerator problems appeared first on Appliance Repair OKC Services | Best Appliance, Washing Machine Repair Company in Oklahoma.

Friday, March 17, 2023

Common issues with dishwashers and how to troubleshoot them

dishwasher repair okc

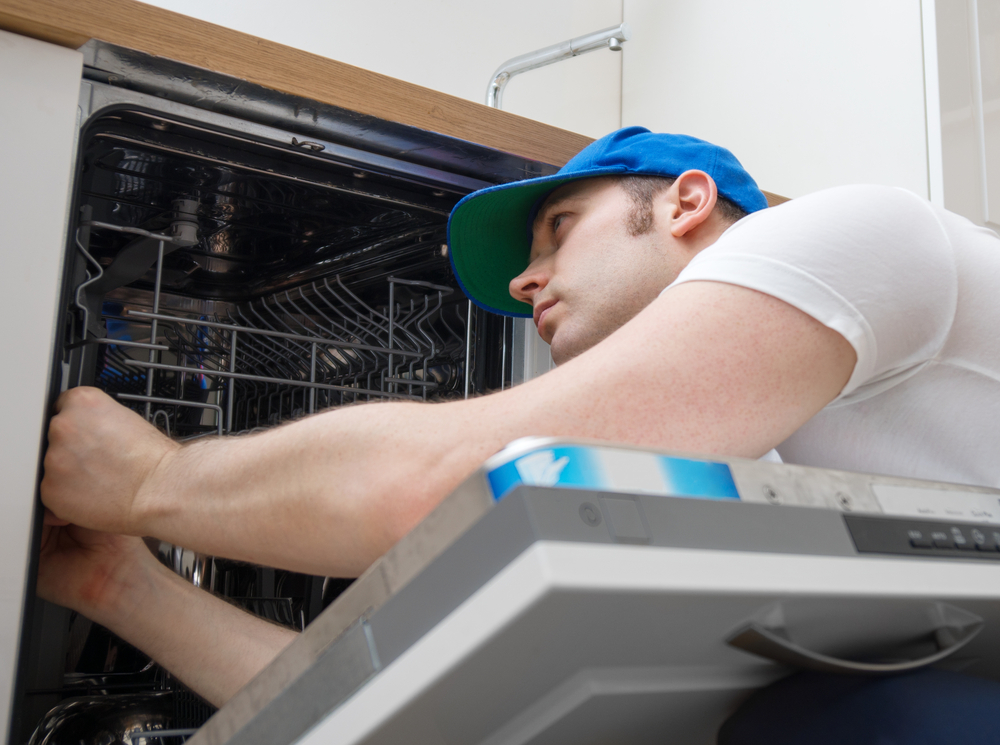
appliance repair tech repairing domestic dishwasher in the kitchen


Common Issues With Dishwashers And How To Troubleshoot Them

This article discusses common issues with dishwashers and how to troubleshoot them. Problems can include dishes not getting dry, water not draining from the dishwasher, and a lack of power to the dishwasher. For most homeowners, the first thing they do when their dishwasher stops working is to try and repair it themselves. Unfortunately, repairing a dishwasher can be difficult and time consuming, and if the problem is more serious then it can cost a lot of money. What most people want is a quick solution that won’t cost them too much in time or money.

Dishwashers are a great invention, but they can be prone to common issues. Knowing how to load the dishwasher correctly and use rinse aid is key for avoiding types of dishwasher problems. When loading dishes, it is important to scrape away food residue from dishes before loading them in the dishwasher. This will help prevent food from clogging the drain hose or new disposal system. If your dishes are coming out with water spots or smells, then check if you have removed the drain plug at the bottom of your dishwasher before running a wash cycle.

If the plug is still in place, remove it and examine the drain hose. If you notice a kink or hole in the hose, then replace it with a new one. For a particularly pressing problem such as a flood dishwasher, check the hose drain valve to make sure it is open and not blocked. If these steps do not stay your dishwasher, consider consulting an appliance repair specialist or visiting The Family Handyman website for more detailed advice on how to resolve your water issue.

Common issues with dishwashers include your dishwasher drain pump becoming clogged, preventing it from draining water properly. If your dishwasher runs but does not drain, the pump screen or other components could be clogged, wreaking havoc in your kitchen space. In this case, draining your dishwasher and cleaning the pump screen will likely resolve the issue. If it does not, more significant problems could be occurring such as a faulty water supply system or a blocked pipe that pumps water out of the dishwasher.

Common issues with dishwashers include a door that won’t close, a dishwasher that floods, and a defective door switch. To troubleshoot these issues, first make sure the dishwasher door is closed properly. If it is not closed properly, open your dishwasher and check the door switch. If the switch appears defective or worn out, replace it with a new one. Additionally, make sure the timer selector switch is working properly and that there is no electrical shock when you run the dishwasher.
One of the common issues with dishwashers is a faulty float switch.

The float switch monitors how much water is in your dishwasher and may become faulty if it gets stuck. This can cause too much water to enter the dishwasher, which can damage internal components and cause leaks. If you suspect that your float or float switch has become faulty, it’s best to call a handy man for help. They will check the switch mechanism to make sure it is properly regulating the water level. They may also need to replace the float or float switch altogether.

Common issues with dishwashers include using wrong dishwashing material, filling your dishwasher incorrectly or overfilling it, and having a faulty float switch. If your dishwasher does not operate properly, the timer or water inlet valve may be the problem. Make sure you scrape off enough food from your dishes before loading them into the dishwasher. Also check to see if the switch timer is stuck, as this can prevent the machine from running correctly. Another possibility is a faulty water inlet valve which could cause poor washing performance or flooding.

Common issues with dishwashers can include prevent proper dishwasher drainage, overloading your dishwasher, using wrong detergent, and built up food sediment. To troubleshoot these problems make sure to follow your particular dishwasher’s manufacturers instructions. If you are overloading your machine, make sure to only load items like pots and pans in the bottom rack and plates and utensils in the top rack. It’s also important to follow the manufacturers advice when using detergent as too much can cause occasional leaking.

Impact dishwasher cleaning performance can also be improved by cleaning your dishwasher regularly. This includes draining your dishwasher once a month and running a cycle with a cup of vinegar. Cleaning the filter is also important as it prevents dishes from becoming clogged, which may cause draining problems. If you find that there is an odor in your dishwasher, try running it with baking soda and vinegar to solve the odor problem. If you have a garbage disposal unit connected to the same drain as your dishwasher, remain food particles could get caught in the filter and cause clogging or odors.

One way to avoid this is to empty the dishwasher filter and check for any blockages. If this does not help, you may need to give your dishwasher a good cleaning. Start by cleaning the spray arms, as these can become clogged with food particles and cause dirty water to remain in the dishwasher after draining. If you have recently installed a new garbage disposal unit, check that it is properly connected to your drainage system. Make sure that the drain plug on your dishwasher is securely connected and free of debris, which can prevent it from draining properly. If none of these steps help with draining your dishwasher, you may need to call a professional plumber who can access any clogs in the drainage system or provide additional advice on how to fix any smells emanating from your dishwasher.

Dishwashers are an important part of your kitchen and can save you time and effort when it comes to washing dishes. But sometimes they can become clogged with food particles, grease and other debris, leaving your dishes still needing to be washed by hand. To troubleshoot these common issues, try checking the strain screen in the bottom of the dishwasher, following manufacturers recommendations for cleaning the screen and sprayer arms on a daily basis. Make sure that no debris is blocking the door gasket or sprayer arms as well.

Common issues with dishwashers can include not cleaning dishes properly, leaving lingering stench, or not running altogether. If your appliance isn’t cleaning your dishes properly, try dishwasher cleaning solution. Otherwise, ensure that you are using the right type of detergent and putting your dishes in the right way. To clean the appliance itself, run a cycle with vinegar or special type of cleaner that is designed for dishwashers.

If you can’t find the cause of the dishwasher problems then call for dishwasher repair in Oklahoma City and be sure and contact Appliance Repair OKC Services by calling 405-378-4566 or visit our local website at https://www.okcappliance.com or also our Google business website at https://cli.re/Dyq1ME. Call now!


The post Common issues with dishwashers and how to troubleshoot them appeared first on Appliance Repair OKC Services | Best Appliance, Washing Machine Repair Company in Oklahoma.
Thursday, March 16, 2023

Troubleshooting common washing machine issues

washer repair okc

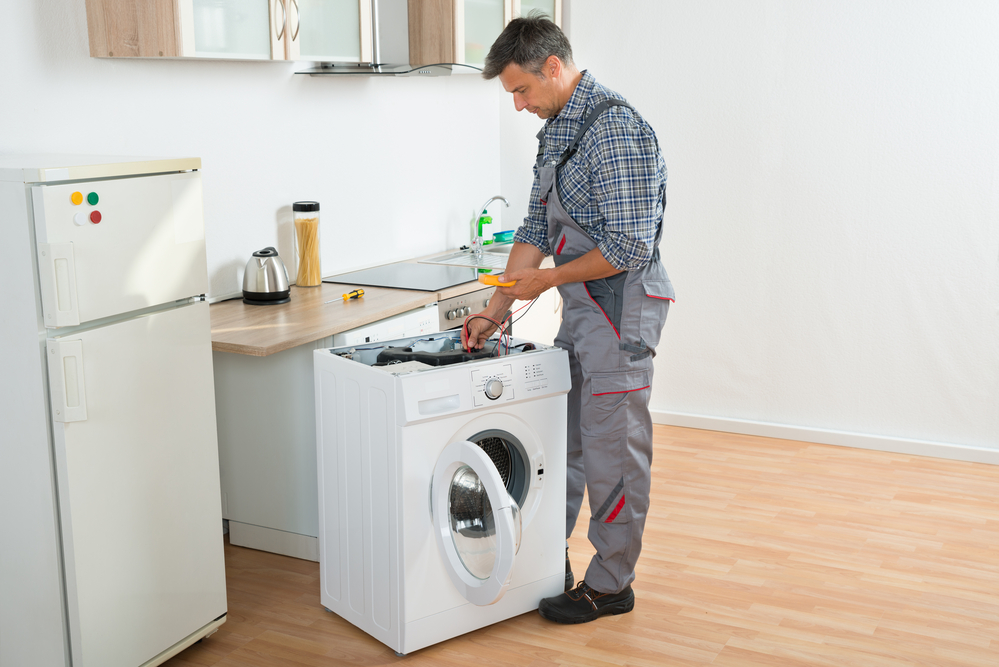
Technician checking washing machine with digital multimeter in kitchen


Troubleshooting Common Washing Machine Issues

This article discusses common washing machine issues and how to fix them. Blocked drains, broken pumps, and washers not spinning can all be solved by following the instructions outlined. If the washer is making strange noises or is leaking water, it may be necessary to take it into a professional for repair. However, there are some common washing machine issues that can be troubleshot by the homeowner. If your washing machine is not draining properly, you can check the pump drain and drain hose to make sure they are clear of any obstructions. Additionally, you should check the filter to see if it is blocked.

If so, you can remove and clean the filter before continuing with your wash cycle. Another issue is an overflowing hose pump, if this occurs, a shallow tray should be placed underneath it to catch any water that may be discharged. In some cases, the pump may be blocked and stopping water from being drained properly; if this is the case you will need to unscrew the pump filter cover and use towels to soak up any excess water.

You may need to use a snake or other drain fixture to clear the pump of any debris. Additionally, if your drainage pipe is blocked or disconnected, you may need to pull your washing machine out and remove the water from the outlet pipe. After that, you can use a snake to clear the hose of any blockages and pour water down it until it stops flowing. If none of these steps alert your washer that it is draining properly, it could be caused by a common problem – a blocked drain pipe. If this is the case you will need to call an experienced technician who can snake out your drain hose and ensure there are no clogs causing the issue. Your washing machine should now be able to continue its cycle without any further issues!

Troubleshooting common washing machine issues can be a challenge. Leaking washers, damaged drain hoses, and a filled washer are all symptoms that the hose or drain pump may not be working properly. If the washer is supposed to be draining but suddenly stops, then it’s likely there are too many clothes in the drum. Strange noises during the spin cycle could also indicate a problem.

If you are washing too many clothes, your go washer might not be able to handle it. Make sure you fill your washer correctly; if the load is too large, it may cause clothes and linens to become caught in the center pole. If you have placed your clothes in the machine properly, but the machine is still off balance, it may exceed maximum load weight.

Be sure to check and adjust the load weight if necessary. You should also check the washer basket, suspension system and alignment of your machine to help prevent degradation. Make sure you do not overload your machine, as this can cause problems with drainage. If you’re having trouble with your washing machine, try running a cycle without clothes first.

This helps reset the machine and might solve your problem. If it still isn’t working, check to see if the plug is properly plugged into the wall, or if it’s tripping your circuit breaker. If that doesn’t work, you may need to unlock your washer. To do this, turn off the power source and unplug it from the wall. Check your manual for instructions on how to unlock it, as some models require a special tool for unlocking. If all else fails, you may need to call an electrician to check if there’s something wrong with the power outlet or power source that isn’t allowing your washer to recognize it. If they can’t find anything wrong with either of those things, they may suggest running a new cycle in case there’s something blocking the machine from starting up again. In any case, a certified electrician will be able to tell you what is causing your washing machine issues so you can get them solved as quickly as possible.

One of the most common washing machine issues is when the washer door does not close properly or when the washers door is stuck in one position. If this happens, it’s a good idea to unplug your washer and investigate your washers door switch. This can be done by placing your washer in its spin cycle and then attempting to move the door of the washer to different positions until you find a position that works.

If this fails, you may need to troubleshoot common washing machine issues. If the washer is clogged or not draining properly, you’ll need to check the hoses. First, disconnect your washer machine from its power source. Next, pull the machine away from the wall and open the cabinet underneath it to locate the hose entrance. Unscrew any access panel and use your hand to feel for where the hose connects to the drain pump at the bottom of your washer in addition to checking for any other obstructions.

If any items like coins, pens, or even socks are blocking the draining of the wash cycle, you will need to remove them from the drum before continuing. If items like coins and debris have blocked the drain pump in your washer’s inner tub, then you’ll need to take a look at the outer tub for any foreign objects that may be blocking it. On many machines, there is a heater in the bottom of the tub that can heat up and cause a blockage. If this is the case for your machine, you will need to unplug it and use caution when removing anything that may be clogging up its workings.

If you’re having trouble with hot washes, it may be time to call a professional washer repair service. Running an occasional maintenance wash can help keep your machine in good shape and prevent any serious problems from occurring. Washer vibration is another common issue that can occur and it can defeat the purpose of having a smelly-free washing machine. Cleaning your clothes properly requires the machine to remain balanced and if the washer feet are locked, it could create an unbalance. Problems like corrosion or dirt build up can be addressed by carefully inspecting the parts involved in the process of cleaning your clothes.

To schedule washing machine repairs in Oklahoma City contact Appliance Repair OKC Services by calling 405-378-4566 or you can visit our website at https://www.okcappliance.com. Also our Google business website can be found at https://cutt.ly/YEnc8qk. Call now!


The post Troubleshooting common washing machine issues appeared first on Appliance Repair OKC Services | Best Appliance, Washing Machine Repair Company in Oklahoma.
Wednesday, March 15, 2023

How To Troubleshoot Oven Temperature Problems

oven repair OKC

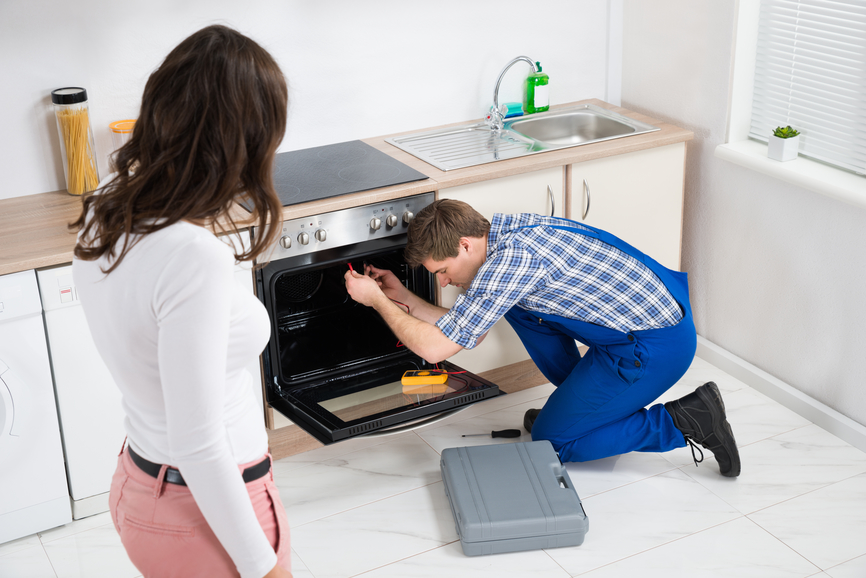
appliance repair technician repairing oven


How To Troubleshoot Oven Temperature Problems

Oven temperature problems can be a real pain, especially if you have a gas oven. There are several possible causes for wrong oven temperature readings, and sometimes it can be difficult to identify the exact issue. The first step in troubleshooting is to read an article or reference guide that outlines the common reasons why an oven may display the wrong temperature. These reasons could include calibration issues, faulty thermostat, faulty gas valve, or even a clogged burner tube.

To troubleshoot oven temperature problems, first inspect the heating elements. If they are damaged or need to be replaced, you may need to call in a professional for assistance. Additionally, check the lower level of the oven to ensure it is not blocked or obstructed in any way. If a thermometer is available, use it to test the oven’s accuracy and compare it with other units in your kitchen area.

If the oven appears to be running too cool or too hot, it is likely that you may have a faulty igniter or stoves burners. It is not uncommon for electric ovens to fail to reach the correct temperature over time. Food may become undercooked, overcooked, and burned when these problems occur. Dirty and clogged igniters are usually the cause of this problem as they cannot generate enough heat for the oven to reach its desired temperature.

To troubleshoot this issue, you should start by checking the gas safety valve, gas connection and gas valve. If these are working correctly, then check the ignitor and ignition electrode for any dirt or debris. If these are clean and functioning properly, then inspect the electrical connection to make sure it is secure. If all of these components appear to be in good condition but the oven still isn’t heating up properly, it may be time to call a professional for an inspection as this could be indicative of a more serious issue. Safety should always come first when dealing with bad gas so make sure to take all necessary precautions before attempting any repairs yourself.

If your oven is not reaching the desired temperature, it’s likely due to a faulty oven control board or interior fuse. Check the gas burners, wiring connections and relay switch for any signs of damage. If you don’t feel comfortable with these repairs then it’s time to seek professional help. A qualified technician can inspect the gas line and supply line for any leaks or other issues that may be causing the problem. Additionally, they can replace any faulty relays in order to get your oven up and running again quickly. For complex problems like this one, seeking expert assistance is always recommended as it will ensure that your appliance is fixed properly and safely without further complications down the road.

But if you’re an experienced baker or a novice cook looking to save time and money, troubleshooting oven temperature problems yourself may be the best option. With a little bit of elbow grease and a reliable guide, you can often find simple fixes that don’t require an expensive service call. Start by identifying the problem as accurately as possible – is the oven not heating up at all? Is it too hot or too cold? Once you have determined what’s wrong, refer to your guide for troubleshooting tips. In some cases, it can be something as simple as checking that your appliance is plugged in correctly or replacing some parts like the thermostat knob.

However, when it comes to more complex oven temperature problems, you need the help of an appliance repair dedicated team such as Prime Appliance Repair. To troubleshoot your oven’s temperature issues, there are several easy steps you can follow. First and foremost, check to make sure that the set temperature is accurate. If it is not what you have set it at, then the issue might be with either the oven control board or bake element. It could also be due to a faulty temperature sensor. By working with an expert repair team like Prime Appliance Repair, they can assist in determining which part needs replacing and how to fix your oven so that it will reach the right temperature for baking again without taking longer than necessary.

First, check the temperature dial setting to ensure it is set to 300 degrees Fahrenheit. Next, place an oven thermometer in the center of your oven and set a timer for 90 minutes. After the two hours have passed, check the thermometer to see if it has reached 300 degrees Fahrenheit. If not, adjust the dial by 15 minutes and retest in another 20 minutes until you reach 300 degrees Fahrenheit.

Oven temperature problems can be caused by a faulty oven temperature sensor, an oven thermostat that isn’t set correctly, or a difference between the temperature setting and the actual temp of the oven. To troubleshoot this issue, first check if your oven has manual or electric control. If it is manual, adjust the thermostat dial to 10 degrees Celsius higher than your desired temperature and then wait 20 minutes before testing it with an oven thermometer. If you have a modern electronic control model, test both the thermostat and temp sensor to see if they are providing accurate readings. If either one reads more than 10 degrees Celsius off from proper temperature then they need to be replaced.

If the oven temperature is not reaching the desired reading, then it may be time to check and replace the thermostat. First, you should preheat your oven to 350 degrees Fahrenheit and let it run for two hours. After two hours, check the thermostat by using an oven thermometer and see what temperature it reads. If the difference between what you set and what it reads is more than 35 degrees Fahrenheit then you will need to replace your thermostat. To do this, turn off power to your oven before replacing with a new one. Once replaced wait at least 20 minutes before turning back on power so that any residual charge has been released from the system.

If your oven is producing unreliable temperatures, or food is taking longer to cook than it should, you can troubleshoot the problem. Check that the desired temperature has been correctly set on the oven’s control panel and that there are no differences between this setting and the actual heat inside. If there is a difference, check for any obstructions in the vents that could be blocking airflow or look to see if any of the heating elements are damaged or worn out.

If you are having oven issues and need oven repair in Oklahoma City contact Appliance Repair OKC Services by calling 405-378-4566 or visit our website at https://www.okcappliance.com. Alternatively you can also visit our Google business website at https://cutt.ly/YEnc8qk.


The post How To Troubleshoot Oven Temperature Problems appeared first on Appliance Repair OKC Services | Best Appliance, Washing Machine Repair Company in Oklahoma.
Tuesday, March 14, 2023

Understanding the Different Parts of a Freezer and How They Work

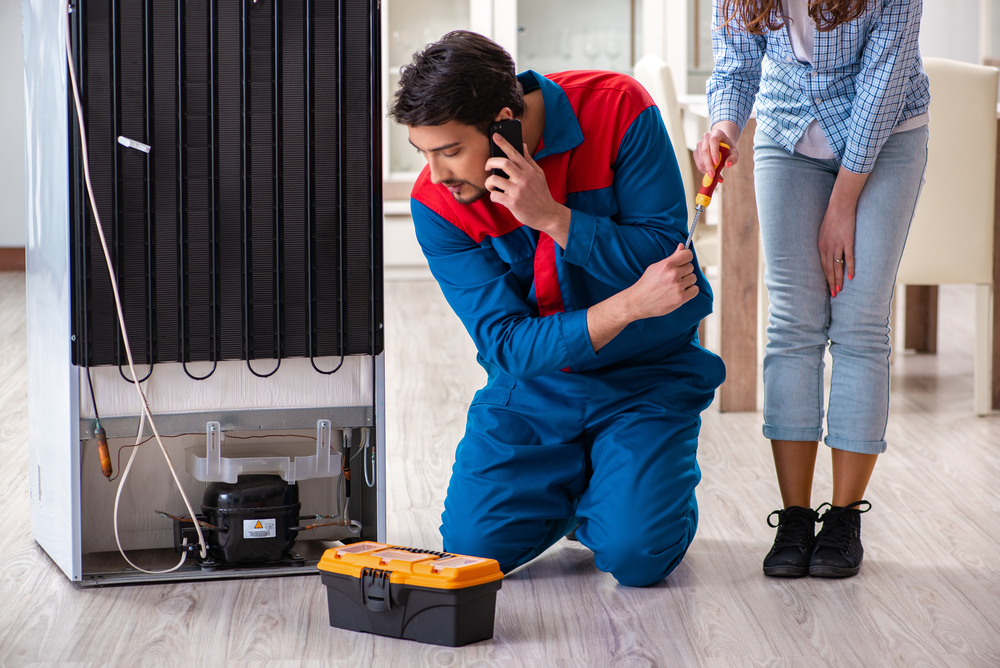
repair tech repairing freezer with customer


Understanding The Different Parts Of A Freezer And How They Work

This article explains the different parts of a freezer and how they work. A refrigerant circulates through the appliance parts to keep food freezing cold for long-term storage. The refrigerant is pumped by the compressor through a tube into the next component called a condenser. Last, the refrigerant vapor evaporates to a gas, then flows back to the compressor. The compressor pumps the refrigerant back into the condenser, where it begins its cycle again. That is how a freezer works. All the appliance parts work together to create the freezing cold temperatures conducive to long term food storage. Refrigerant cycles through a tube, absorbing heat and circulating cold air, lowering the temperature within the freezer until it is freezing cold. By understanding these components and how they work together, you can better understand why your freezer is so important for keeping food safe from spoilage for long term storage.

The process of manipulating refrigerant pressure starts with a compressor that compresses the now liquid refrigerants into heads. This increases the pressure of the liquid refrigerants, which rises as it is sent to receive by the evaporator coils. A larger evaporator contains a gas and a small metering tube, which operates as an expansion valve. The low pressure vapor then passes through this tube which changes its state from liquid to gas. This is achieved by changing the low pressure vapor into a high-pressure vapor.

This process takes place when refrigerant drops in pressure as it enters a large evaporator. The vapor condenses and turns into liquid. The pressure is subcooled, and the liquid is then passed through a condenser. From there, the high-pressure liquid runs through a capillary metering tube and enters an additional cooling coil where its pressure drops and its temperature rises.

This is the evaporator chiller. As the liquid moves through this coil, it absorbs heat from the atmosphere via the condenser coils and converts back into a gas. The vapor then enters the condenser coils, where it boils again and re-enters the compressor in a highly pressurized state. In this way, a heat transfer process is taking place to cool air that enters the evaporator coils. The cold refrigerant absorbs hot gas from inside of the freezer while at the same time releasing its own heat to outside of it. Finally, this refrigerant enters another set of condenser coils and its pressure drops yet again as it absorbs vapour from within them.

The condenser coils cool the refrigerant as it passes through them, and as the gas condenses, it generates a cooling effect on the contents of the refrigerator. The switching compressor is then triggered to increase its speed, which further reduces the temperature and pressure of the gas. This cooled gas is then passed into an evaporator, which helps to regulate the temperature within the fridge. The evaporator is also responsible for monitoring the temperature of ambient air that enters from outside and ensuring that it does not become too hot or cold inside.

The compressor is the motorized device that begins the refrigerant cycle. The refrigerant in its gaseous form passes through thin radiator pipes and then enters the compressor. Here, the treated vapor particles are compressed, increasing their pressure and temperature, giving off heat in the process. The coolant flows through thicker tubes to a condenser where it is cooled down to liquid form. It then passes into thinner pipes which it flows through until it reaches an evaporator where it converts back into a gas under high pressure.

This gas then evaporates and cools the inside of the freezer. The gas is then passed through a device called a compressor which compresses it back into a hot refrigerant vapor again. The hot refrigerant vapor is then supplied to a condenser where it removes heat from the air, lowering its temperature and converting it back into a saturated liquid state. The liquid refrigerant is then passed through an expansion valve which lowers the pressure and temperature of the liquid.

It then enters the evaporator where it absorbs heat from the cooling air and is converted into gas. This gas is then compressed by a compressor, raising its temperature and pressure. The hot gas is then passed through a capillary tube which lowers its pressure and temperature, converting it to a low-temperature liquid. This liquid refrigerant passes through coils or fins with a fan forcing air over them. Heat from the air is absorbed by the coils, cooling it down; creating cool temperatures within the refrigerator/freezer. The low pressure liquid refrigerant then exits the outlet of the evaporator to begin another cycle of compression and expansion which helps determine low pressure and low temperature levels in order for cooling to occur.

This is an important part of how a freezer works. The pumping cooling fluid releases cooling fluid heat in order to turn refrigerators on and off. The compressor then compresses the refrigerant gas, which drives the refrigerant through the condenser, where it is cooled down and released into their cooling cabinet. This acts as a chiller cabinet, as it regulates thermodynamic state. The fluid then passes through the expansion valve, which causes it to expand and cool down further before entering the evaporator. The evaporator acts as a working fluid for the refrigerator by absorbing heat from its surrounding environment, this is where you find your frozen food! From here it returns to the compressor via a pump liquid cycle and begins another round of compression and expansion within its circuit, thus producing cold air for your freezer. This same process is repeated until your required temperature within your refrigerator is reached.

Understanding the different parts of a freezer and how they work is an important part of proper maintenance. The basic refrigeration loop for a refrigerator cooling system consists of a compressor, condenser coils, expansion valve, evaporator coils and a fluid coolant. The compressor pumps the coolant throughout the circuit, which starts at the condenser coils. Heat from the refrigerators interior is removed by the refrigerant vapour at the evaporator coils and then passes through to the compressor. The heat exchangers of these condenser coils are used to transfer heat from one medium to another in order to remove it from inside your fridge and dissipate it into your surrounding environment. This cooled vapor then flows through the expansion valve where it converts back into liquid form and enters into evaporator coils.

To schedule freezer repairs in Oklahoma City contact Appliance Repair OKC Services by calling 405-378-4566 or visit our website at https://www.okcappliance.com to also our Google business page at https://cutt.ly/YEnc8qk. Call now!


The post Understanding the Different Parts of a Freezer and How They Work appeared first on Appliance Repair OKC Services | Best Appliance, Washing Machine Repair Company in Oklahoma.
Sunday, March 12, 2023

The Most Common Refrigerator Repairs and How to Avoid Them

refrigerator repair Oklahoma City

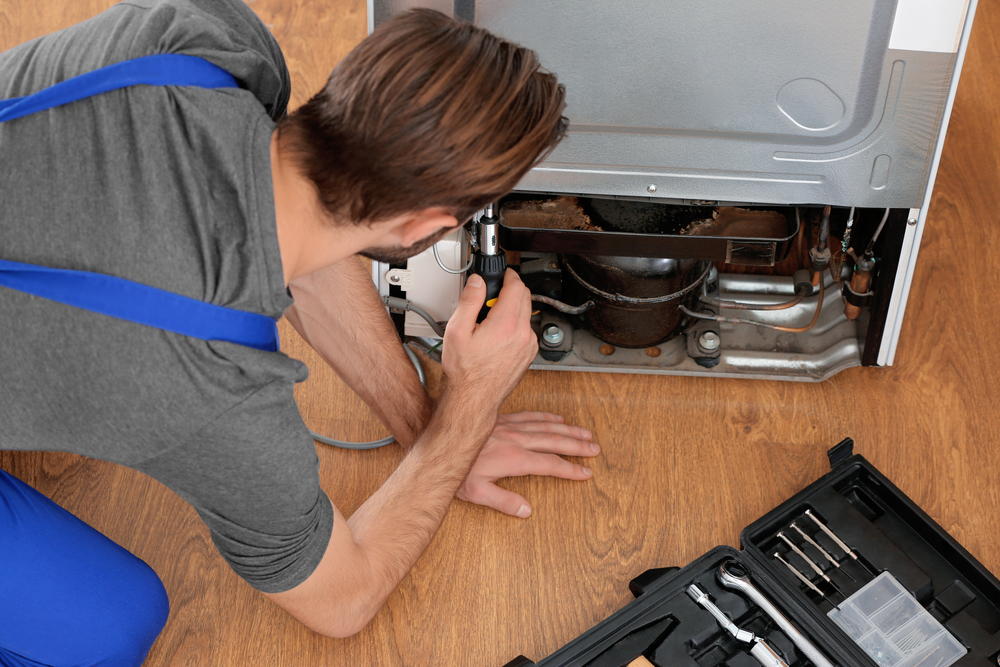
Male technician repairing refrigerator indoors


The Most Common Refrigerator Repairs And How To Avoid Them

Noisy fridges are one of the most common refrigerator problems people face. The refrigerator motor is usually to blame, as it runs more frequently when temperatures outside the fridge spike and less energy is being conserved. To avoid this issue, ensure your fridge maintains adequate temperatures by regularly checking it and adjusting its settings as needed in order to keep food fresh and cool.

A faulty thermostat is the most likely culprit for a refrigerator not reaching optimum temperatures. If your refrigerator is too warm or too icy cold, check the temperature settings on your fridge and make sure they are set correctly. Additionally, check for any ice buildup or condensation spots in and around the fridge as these can be signs of a failing thermostat or compressor.

The evaporator fan, refrigerant system, and condenser coils are all key components in the temperature control of a refrigerator. To avoid costly repairs, it is important to regularly check these parts for any signs of dust or dirt buildup. If you notice dust, use a vacuum cleaner to remove the debris. Additionally, you should test the thermistor and temperature controls on a regular basis to ensure they are working properly. In some cases, you may need to replace these components if they become defective.

The most common refrigerator repairs involve the condenser coils, condenser fan and fan motor. If your refrigerator isn’t cooling properly, it could be because the coil cool is clogged with dust or not functioning correctly. Similarly, if the condenser fan or fan motor stops working, your fridge won’t be able to maintain adequate temperature. To help prevent such problems from arising in the first place, make sure to clean the coils at least once a year and check that they are receiving sufficient power from the bottom of your fridge.

One of the most common refrigerator repairs is related to kitchen debris, dust and dirt particles getting into the condenser coils and compressor coils. If these are not kept clean, they can become clogged with dust and dirt which will prevent them from functioning properly. Additionally, if the coils become too dusty or dirty it can cause them to overheat and fail. To avoid this problem, use a vacuum cleaner or brush to keep your fridge’s coils clean by removing any built-up dirt particles. Furthermore, keep your refrigerator at a specific temperature that keeps all the food items stored inside in good condition while also ensuring your fridge stays operational at its peak efficiency. The same goes for freezers; make sure you set the right temperatures for both refrigerator and freezer compartments so that none of them freezes over due to excessive coldness.

Refrigerators should be set at a temperature between 37 and 40 degrees Fahrenheit. Freezers should be set between 0 and 5 degrees Fahrenheit. If the internal temperatures of your fridge or freezer are higher than they should be, it could mean that cooling pipes are blocked or that lubricant escapes have occurred, leading to a decrease in efficiency. You can also avoid refrigerator repairs by regularly cleaning the door seal to make sure it is in good condition and isn’t allowing cold air to escape the fridge.

This will help keep your refrigerator working at its optimal level and prevent you from having to pay higher energy bills due to low temperatures inside your fridge. Additionally, make sure you don’t overfill the shelves inside your refrigerator as this can hinder air circulation which can lead to a lower temperature than desired. To ensure maximum efficiency from your refrigerator, keep it in good condition by following these tips above!

Ice buildup and frost buildup are two of the most common refrigerator repairs. If your ice maker or condenser coils start to freeze up, check the door seal for cracks, loose parts, and other signs of wear. You may need to replace the door seal if it is cracked or worn. Damper doors can also cause ice buildup if they do not close properly. Free refrigerators can often develop moist air if their crisper drawers are not kept clean and sealed tightly. A small cap on the freezer floor might need replacing if it is loose or missing.

This is a common problem that can cause the evaporator coils to freeze up and the refrigerator section to become too warm. Replacing it will help ensure that the evaporator plate remains free of frost buildup. Another repair is in regards to an ice maker or water dispenser. The heater and/or defrost control may need replacing if they are not functioning properly, as this can stop the cycle defrost from running and cause frost buildup on the evaporator coils.

To prevent this, the user should make sure to clean out the drain hose and defrost drain regularly to avoid clogged debris. The drain trough should also be cleaned out periodically. Another common repair is replacing a sensor fuse or defrost sensor, which can break down due to wear and tear. To avoid this, keep an eye on the freezer temperature and check for any unusual behavior from the system. Lastly, if your refrigerator isn’t cooling properly then it may be due to a faulty defrost system. Make sure that you are using warm water instead of hot water when cleaning off ice buildup in order to prevent damage to the coils or other components. With all these tips in mind, you can help keep your refrigerator running smoothly and avoid costly repairs in the future!

Common refrigerator problems include water leaks, blocked defrost drains, and food particles clogging up the fridge or freezer. Water leaks can cause serious damage to your floors if not addressed quickly. To prevent water leaks, check the hose regularly and make sure it is tightly connected at both ends. Blocked defrost drains can also lead to water damage, as well as injury if you accidentally step on them while they are iced over. To prevent blockages, make sure to regularly clean out any food particles that have accumulated in your fridge or freezer. Additionally, keep an eye on your defrost drain and make sure it is clear of debris so that water can easily flow through it when needed.

The most common refrigerator repairs are related to the water supply, water dispenser, and ice maker. If you have a frozen water supply line or excess water pooling on the floor near your fridge, it is likely due to a faulty valve or clogged filter. In addition, if your ice maker is producing too much ice or not working at all, it may be due to worn parts inside of the freezer. Regularly checking for any signs of wear and tear can help you avoid these issues before they become expensive repairs.

To schedule refrigerator repairs in Oklahoma City contact Appliance Repair OKC Services by calling 405-378-4566 or visit our website at https://www.okcappliance.com to also our Google business page at https://cutt.ly/YEnc8qk. Call now!


The post The Most Common Refrigerator Repairs and How to Avoid Them appeared first on Appliance Repair OKC Services | Best Appliance, Washing Machine Repair Company in Oklahoma.
Friday, March 10, 2023

How to diagnose and fix dishwasher error codes

dishwasher repair Oklahoma City

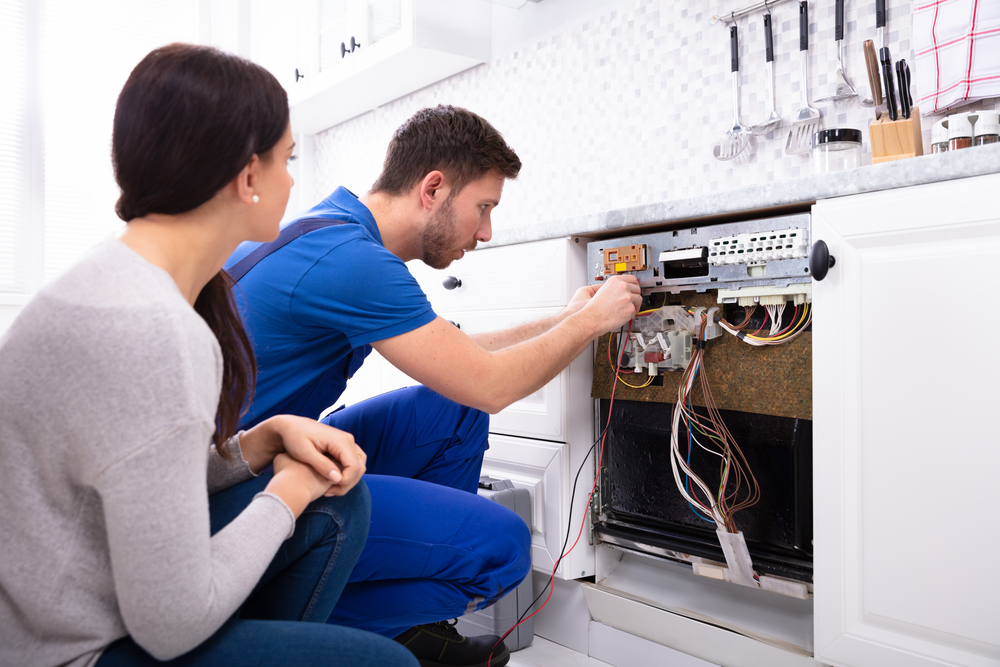
Woman Looking At Male Technician Checking Dishwasher With Digital Multimeter In Kitchen


How To Diagnose And Fix Dishwasher Error Codes

This article discusses how to diagnose and fix dishwasher error codes. Codes indicate a problem with the temperature sensor or thermistor in your Bosch dishwasher, which may require specialist attention. If there is no water in the dishwasher pan or any leaking, the flood sensor may be defective. If the error persists, you will need to troubleshoot the water heating system or call a professional to fix the issue. A dishwasher error code can be due to a power module failure, indicating a water temperature issue.

For example, if your Bosch dishwasher has an error code of E01, this indicates that the temperature is not reaching 194 degrees Fahrenheit. This could be due to either a temperature issue or a temperature sensor issue. The sensor thermistor may need to be replaced in order to indicate the correct water temperature and avoid further error codes.

If the dishwasher tub is not filling, it could be due to a water inlet valve issue. The first step would be to check if there is any soapsuds or debris blocking the water inlet valve, as this could cause low water level and the dishwasher will not start. If this does not solve the issue, then replacing the water inlet valve may be necessary. In some cases, it may also be necessary to replace the main control board of your Bosch dishwasher model as it can indicate an E03 error code if it is malfunctioning.

To diagnose and fix dishwasher error codes, you first need to turn off the water supply tap and disconnect the machine from the mains socket. Check if the water supply hose is connected properly and that its tip is placed correctly in the turned faucet. If it is too short or has a restricted water supply, then you may need to replace it with a longer one. In case of any clogging in the filter mash, check and clean it out if necessary.

To diagnose and fix dishwasher error codes, firstly, make sure that you have turned on the water supply valve. If it has been detected that your dishwasher is not filling up with water, check the drain hose end to confirm that it is tightly connected to the hose outlet. Make sure that the drain pump has been turned on and secure. An incorrectly installed unit may cause premature draining of the tub due to too much water entering the system. Be sure to check whether there is any kinked water line which may be preventing the flow of water into your dishwasher.

If this is not the case, then the most likely cause of a dishwasher error code may be due to a faulty water flow sensor. The water flow sensor monitors the amount of water entering the dishwasher and will indicate an error code if too much or no water is detected. In particular, an E04 error code indicates that there is a component failure in the water flow sensor. Therefore, it is important to check and clean any clogged spray arms as well as inspect the fill valve and float sensor which monitors the amount of water in your LG dishwasher.

If the drain hose is clogged or kinked, it can prevent water from draining properly, leading to a build-up of water and a possible error code. To diagnose and fix dishwasher error codes, first make sure the drain hose is installed correctly and that there is no problem with the water pressure. If your dishwasher does not give an error code, you may need to do some required troubleshooting. Check for food debris in the filter, ensure that the air gap is free from blockage and check the seals on all components are in good condition.

If the dishwasher is not powering on, disconnect it from the power source and reset it. When using a dishwasher, if it stops heating or produces an E01 error code when pressing the cancel button, this triggers a thermal overload and should be cleared by pressing the reset button. If the error clears after pressing this button, but recurs when turning on the dishwasher again, then there may be an issue with either the water supply or electrical power. Try using an extension cord to ensure that there is sufficient power and check for any signs of damage in electrical components such as switches or wires.

If the E5 error code persists, it is likely that you need to call a professional for assistance. For other dishwasher error codes such as E15 and H24, start by turning your dishwasher off and disconnecting it from the power outlet. Next, pull your dishwasher out from its place in order to access the side panels. Check for any occurring leaks and if necessary replace the drain or water supply hose. It is possible that the issue may be with the float switch which can become stuck due to too much water in the dishwasher’s tub. If this stands error code H24, you may need to call a professional as this could be more complex than a DIY fix.

But for other error codes, the best way to diagnose and fix the issue is to troubleshoot your dishwasher’s water heating system. Firstly, make sure the dishwasher is connected to your hot water supply and check if the heating element and thermostat are working properly. If they are not, then you may need to replace them. Once you have checked all connections and replaced any faulty parts, try running a cycle from the control panel again.

If the error code still occurs, it is time to remove the access panels on your dishwasher. If you have an LG dishwasher, remember to unplug it before attempting to remove these panels. Once exposed, check for any signs of leaks or damage to the heater and any other parts. If you find a leak, replace the part immediately and try running a cycle again. If a heater error occurs, be careful as electrocution is possible and consult an experienced technician if necessary.

To diagnose and fix dishwasher error codes, start by troubleshooting the drain. If your Bosch dishwasher is not draining correctly, check the drain pan for a leak. If there is a leak, find and plug it. Next, check the drain wash motor and make sure it is working properly. If the motor is not functioning correctly, it may be necessary to replace it. Additionally, if you have a garbage disposal plugged into your dishwasher’s drain hose, unplug it and check for a flood sensor near the removed garbage disposal.

If you can’t find the cause of the dishwasher problems then call for dishwasher repair in Oklahoma City and be sure and contact Appliance Repair OKC Services by calling 405-378-4566 or visit our local website at https://www.okcappliance.com or also our Google business website at https://cli.re/Dyq1ME. Call now!


The post How to diagnose and fix dishwasher error codes appeared first on Appliance Repair OKC Services | Best Appliance, Washing Machine Repair Company in Oklahoma.